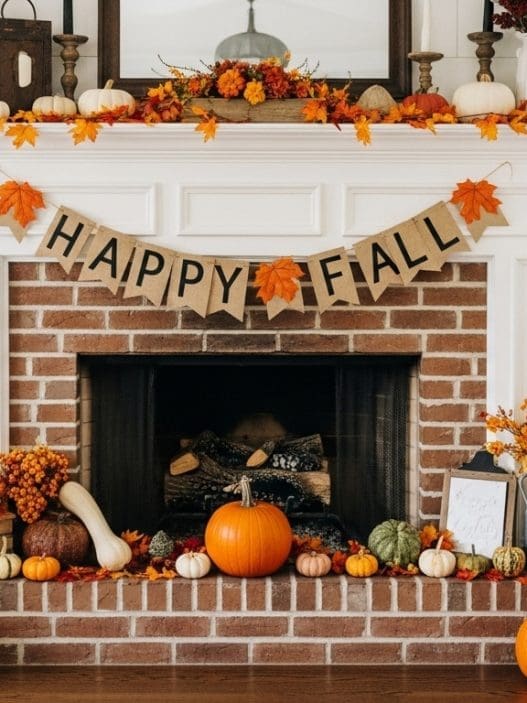









If you love simple fall decorations that feel warm, rustic and a little bit vintage, this recycled paper and cardboard leaf garland is such a lovely idea to recreate.
Made from old cardboard and pages from unwanted books, the individual leaves have that perfectly imperfect handmade appearance that works beautifully with cozy autumn decor.
Hang your finished garland across a mantel, drape it around a window or use it to add a little fall color and texture to an otherwise plain shelf.
And because most of the materials can be recycled from things you already have at home, this is also a wonderfully inexpensive fall craft.
What You’ll Need
You can make your autumn leaf garland as long or as full as you like.
For a similar look, gather:
- Thin recycled cardboard
- Old book pages, sheet music or other unwanted paper
- Leaf templates or real leaves to trace
- Pencil
- Scissors
- Craft glue or glue stick
- Natural jute twine or string
- Hole punch
- Brown, rust, mustard or muted orange craft paint, optional
- Small paintbrush or sponge
- Brown ink or an ink pad, optional
Cereal boxes, packaging boxes and other lightweight cardboard are particularly useful because they are easy to cut but still give the leaves enough structure to hold their shape.
Step 1: Collect Your Recycled Cardboard
Start by looking through your recycling before buying any craft supplies.
Thin cardboard packaging is ideal for this project.
Cereal boxes, cracker boxes, delivery packaging and lightweight cardboard inserts can all be turned into autumn leaves.
Flatten the boxes and cut away any heavily creased or damaged sections.
Do not worry about printed designs because you can either use the plain reverse side or cover the cardboard with paper.
For a rustic fall garland, slight variations in the cardboard actually add to the handmade appearance.
Step 2: Find Some Old Paper
Old book pages give this garland its beautiful vintage character.
If you have an unwanted or damaged book that cannot reasonably be reused, save some of the pages for crafting.
You could also use:
- Old sheet music
- Newspaper
- Brown packing paper
- Kraft paper
- Scrapbook paper leftovers
- Old maps
- Printed pages from your recycling pile
Avoid cutting apart books you still want to keep.
A mixture of different papers can make the finished garland even more interesting.
Step 3: Make Your Leaf Templates
You do not need perfectly shaped leaves for this project.
In fact, using several slightly different shapes will make the garland look much more natural.
You can draw simple leaves freehand or collect a few fallen leaves and trace around them.
Try making three or four different shapes.
Maple-inspired leaves look especially autumnal, but simple oval, oak and pointed leaves are much easier to cut from cardboard.
Vary the sizes too.
A mixture of small and large leaves will give your finished garland more movement than repeating one identical shape.
Step 4: Trace the Leaves Onto Cardboard
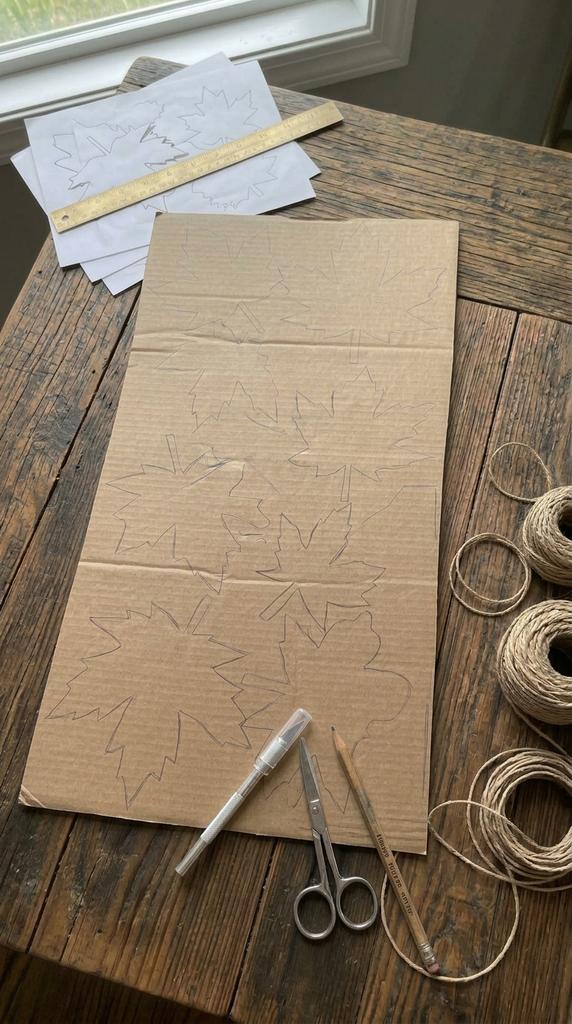
Place your templates over the cardboard and trace around them with a pencil.
Try fitting the shapes close together so you waste as little cardboard as possible.
For a medium-length mantel garland, start with around 20 to 30 leaves.
You can always make more later if the garland looks too sparse.
Do not worry about making every leaf identical.
Tiny differences between them are exactly what make handmade cardboard fall decor DIY projects so charming.
Step 5: Cut Out Your Cardboard Leaves
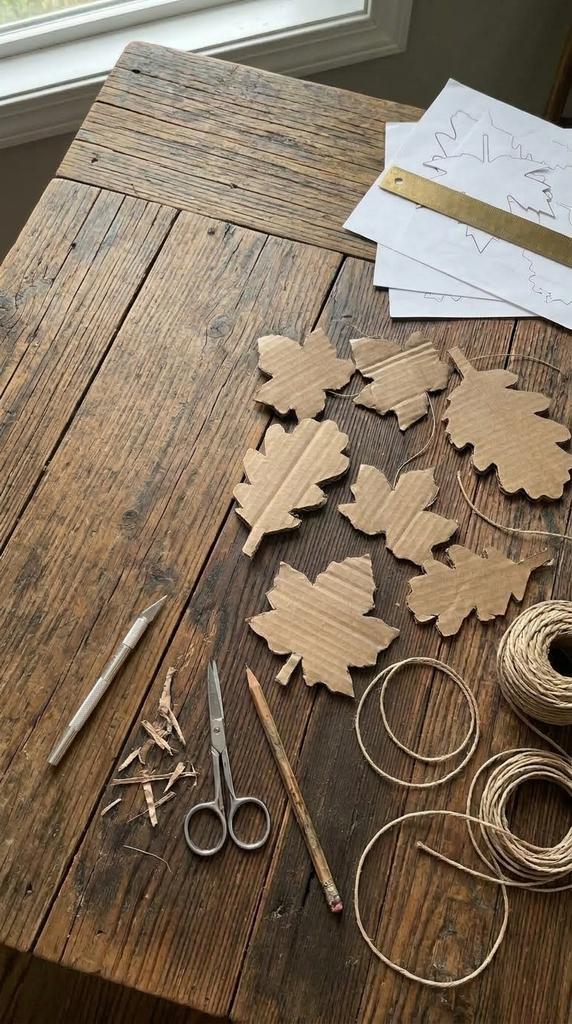
Carefully cut around each pencil outline.
Simple leaf shapes are much quicker to cut than intricate ones, particularly if you are making a large garland.
Once you have a pile of cardboard leaves, lay them out together.
If some look too similar, trim a few into slightly different shapes.
You can also gently bend each leaf lengthways down the center.
This creates a subtle crease that makes flat cardboard look much more like a real leaf.
Step 6: Cover Some Leaves With Old Book Pages
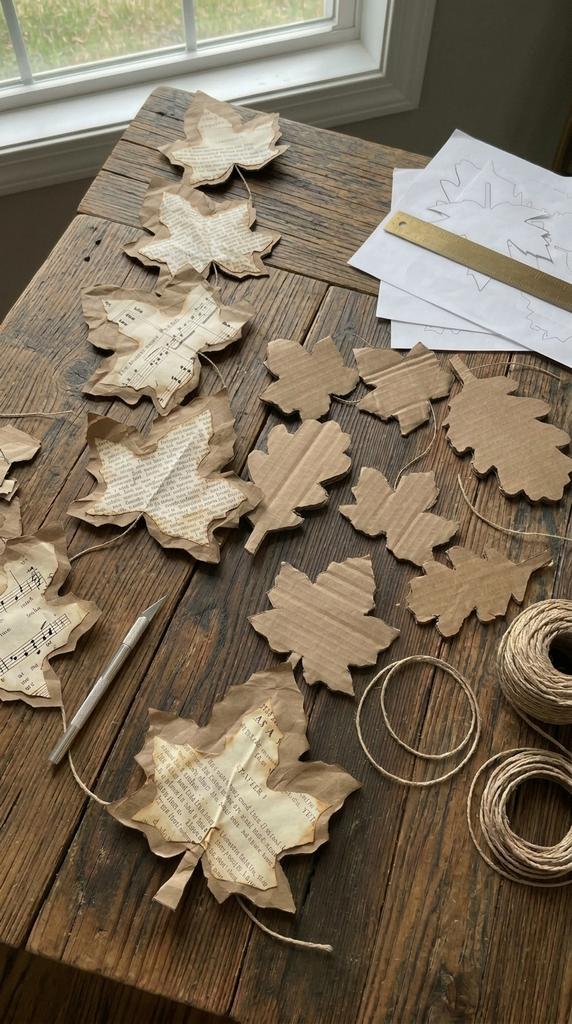
You can leave some of the cardboard exposed, but covering several leaves with old paper adds another layer of texture.
Spread a thin, even layer of craft glue across one side of a cardboard leaf.
Press a piece of book page over the top and smooth it down gently.
Once the glue has dried, trim around the cardboard so the paper follows the leaf shape.
Repeat with as many leaves as you like.
You could cover every leaf with paper, but I love the look of alternating printed leaves with plain cardboard ones.
The contrast makes the garland feel more rustic and collected.
Step 7: Add Autumn Color
This step is completely optional.
If you prefer neutral fall decor, leave the cardboard and book pages exactly as they are.
For a little more autumn color, lightly brush or sponge paint onto some of your leaves.
Try muted shades such as:
- Burnt orange
- Rust
- Mustard yellow
- Warm brown
- Deep red
- Olive green
You do not need solid blocks of color.
A thin wash of paint that still allows the cardboard or printed words underneath to show through can look especially beautiful.
This is also an easy way to turn recycled materials into autumn leaves DIY decor without losing their lovely handmade character.
Step 8: Give the Leaves an Aged Appearance
If you want the book-page leaves to feel a little more vintage, darken their edges.
Gently brush brown ink around the outside of each leaf.
You can also use a tiny amount of watered-down brown paint.
Keep the center relatively light and concentrate the darker color around the edges and creases.
The idea is not to make every leaf perfectly brown.
Uneven shading makes them look much more interesting.
You could even add a few tiny painted veins using a fine brush.
Step 9: Make a Hole in Each Leaf
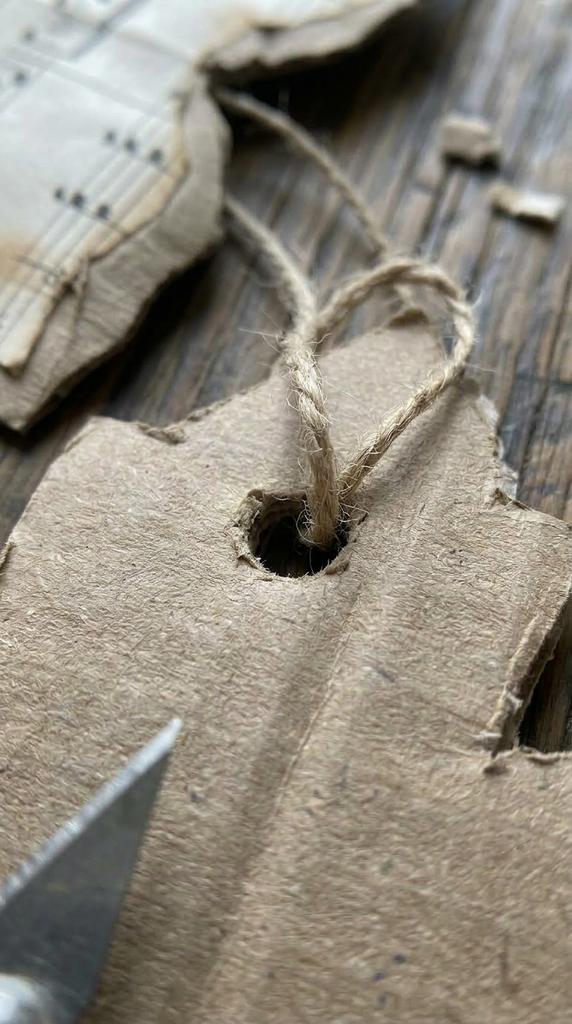
Once everything is completely dry, use a small hole punch to make a hole near the top of each leaf.
Do not place the hole too close to the edge or the cardboard could tear.
If you do not have a hole punch, carefully make a small opening with an appropriate craft tool on a protected work surface.
Another option is to glue the leaves directly onto your twine.
Punching holes, however, makes it much easier to move the leaves around until you are happy with their spacing.
Step 10: Thread the Leaves Onto Twine
Cut a length of natural jute twine slightly longer than you want your finished garland to be.
Leave extra twine at both ends for hanging.
Thread your leaves onto the string one at a time.
Alternate between:
- Large and small leaves
- Cardboard and book-page leaves
- Plain and painted leaves
- Different leaf shapes
Do not worry about keeping the spacing perfectly even.
A little irregularity suits this style of rustic fall decoration.
Step 11: Arrange Your Fall Leaf Garland
Before hanging it permanently, spread the garland across a table or floor.
Move the leaves around until the colors and sizes feel nicely balanced.
If one area looks too empty, add another leaf.
If it feels overcrowded, increase the spacing.
You can also rotate some leaves so they point in slightly different directions.
Real autumn leaves never fall in a perfectly organized line, so your garland does not need to either.
Step 12: Hang Your Garland
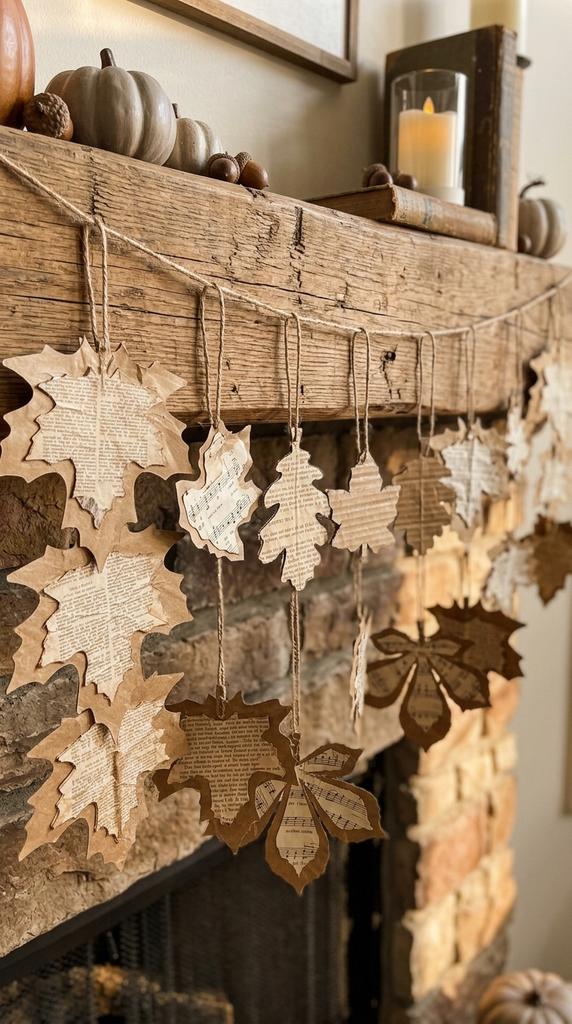
Now find the perfect place to display it.
This recycled leaf garland would look beautiful:
- Draped across a fall mantel
- Hung along a window
- Decorating an open shelf
- Across a mirror
- Around a doorway
- Along a staircase
- Above a console table
- Across the front of a sideboard
For an especially cozy fall display, combine it with small pumpkins, warm-toned candles or a vase filled with dried branches.
How Many Leaves Do You Need?
The number of leaves depends on how long and full you want your garland to look.
For a small window garland, around 15 to 20 leaves may be plenty.
For a mantel, start with approximately 20 to 30.
If you are decorating a long shelf, staircase or doorway, you might need 40 or more.
Rather than making them all at once, create your first batch and temporarily arrange them along the twine.
You will quickly see whether you need more.
How to Make Cardboard Leaves Look More Realistic
The easiest trick is adding shape.
Instead of leaving every cardboard leaf completely flat, gently fold or bend it down the center.
Then slightly curl the outer edges in different directions.
Some can curl upward while others bend downward.
You can also score subtle veins into the cardboard or draw them with a fine brown pencil.
These little details are especially effective when making fall leaves crafts because they prevent the finished project from looking like a row of identical paper cutouts.
Easy Ways to Customize Your Fall Leaf Garland
One of the best things about this project is how easily you can change the finished look simply by choosing different recycled papers and colors.
Make It More Vintage
Use old book pages, sheet music and brown cardboard.
Darken the edges with brown ink and use natural jute twine.
Pair the finished garland with old books, brass candlesticks and amber glass.
Make It More Colorful
Paint individual leaves in traditional autumn colors.
Mix rust, orange, mustard, burgundy and olive green while allowing some plain cardboard leaves to remain visible.
Keeping the colors slightly muted will help maintain the recycled handmade look.
Keep It Neutral
Skip the paint completely.
Use only brown cardboard, cream book pages and natural twine.
This version works particularly well if you prefer simple or Scandinavian-inspired fall decor.
Make It More Rustic
Leave rough cardboard edges visible and mix in brown packing paper or kraft paper.
You could also tie tiny scraps of fabric, raffia or ribbon