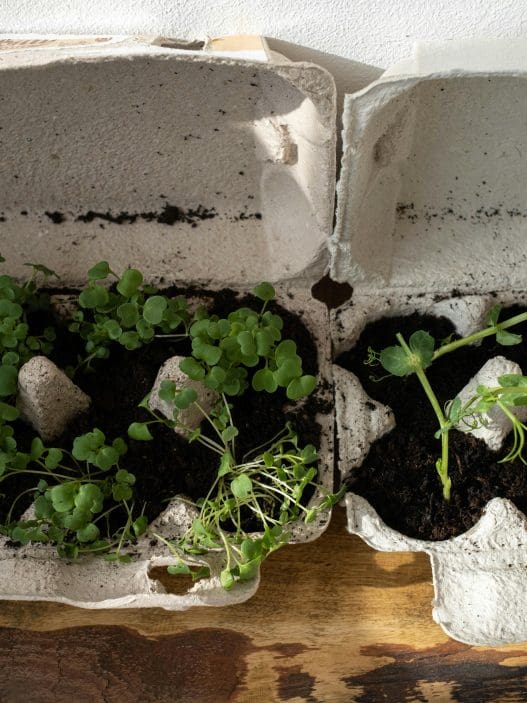


Orchids are admired for their beauty and resilience, but like any plant, they can experience stress that causes their leaves to wilt, roots to rot, or blooms to fade prematurely. Fortunately, many orchids can be revived with the right approach. By understanding what your orchid needs and addressing problems early, you can restore its health and encourage future flowering.
This guide covers 20 practical methods on how to revive an orchid. We’ll explain why each method works, list the materials you will need, and give step-by-step instructions so you can revive your favorite orchid!.
1. Assess Root Health Before Taking Action
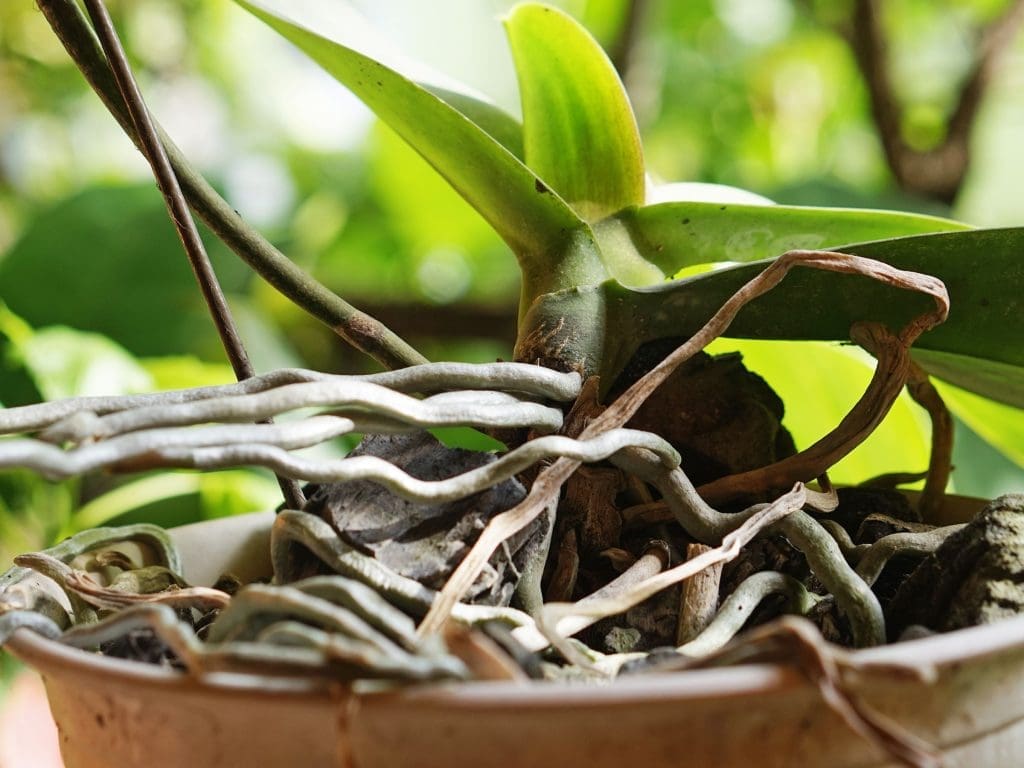
Photo Credit: gardeningknowhow
Why This Works:
Checking root health first ensures you treat the real cause of decline. Healthy roots are green and firm, while unhealthy ones are mushy, brown, or brittle. Without this check, you risk misdiagnosing the problem and giving the wrong care. By identifying rot, dehydration, or both, you can target the right solution and avoid stressing the orchid further.
Materials:
- Clean scissors or pruning shears
- Disposable gloves
- Paper towels
Instructions:
- Remove the orchid from its pot carefully.
- Shake off old potting medium to expose roots.
- Examine for rot, dryness, or breakage.
- Separate healthy roots from damaged ones visually.
- Plan your care steps based on what you find.
- Keep the plant out of the pot until root work is done.
2. Trim Off Dead or Damaged Roots
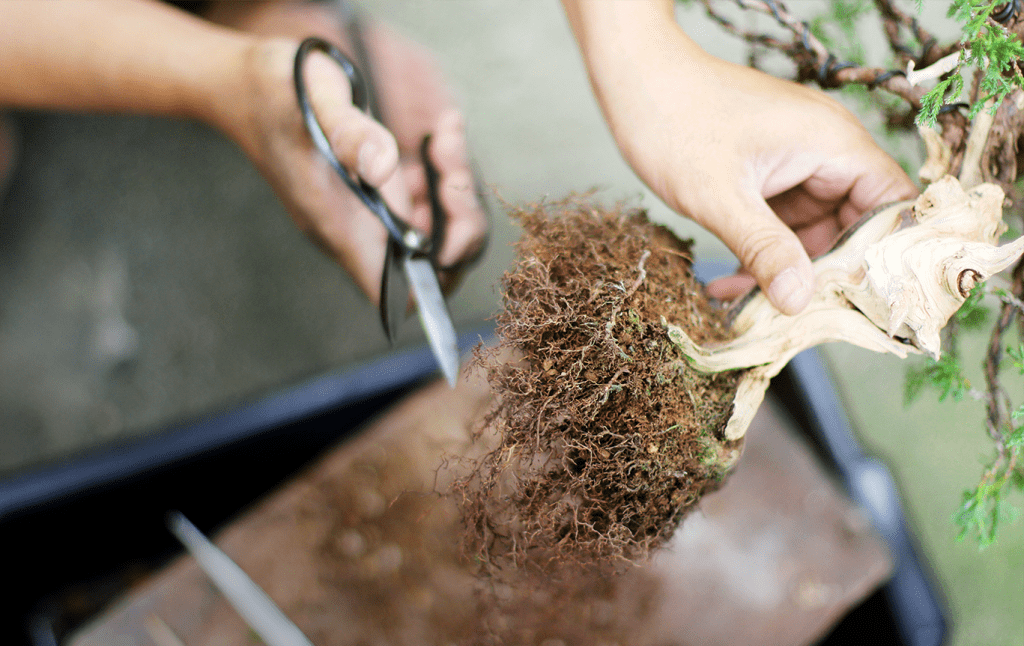
Photo Credit: Oakridge Garden Centre
Why This Works:
Cutting away dead or rotting roots prevents infection spread and helps the plant redirect resources to healthy root growth. Damaged roots cannot take up water or nutrients, and leaving them in place can invite harmful bacteria and fungi that further weaken the orchid.
Materials:
- Sterilized pruning shears
- Hydrogen peroxide (3%)
- Paper towels
Instructions:
- Identify roots that are brown, soft, or hollow.
- Sterilize shears before making cuts.
- Trim away damaged roots completely.
- Dab hydrogen peroxide on cut ends.
- Allow roots to air dry for 1–2 hours.
- Prepare fresh orchid potting mix for replanting.
3. Refresh the Potting Medium

Why This Works:
Old potting medium breaks down over time, retaining excess moisture and suffocating roots. Orchids need a loose, well-draining mix to thrive. By replacing the medium, you improve air circulation around the roots, reduce the risk of rot, and provide a fresh environment that encourages new root development.
Materials:
- Fresh orchid bark or sphagnum moss
- New or cleaned orchid pot
- Gloves
Instructions:
- Remove all old potting material from roots.
- Rinse roots lightly with room-temperature water.
- Place a layer of fresh medium in the pot.
- Position orchid roots in the pot center.
- Fill gaps gently with new medium.
- Water lightly after repotting.
4. Re-pot in a Transparent Orchid Pot

Why This Works:
Transparent pots allow light to reach the roots, which helps with photosynthesis. Many orchids, especially Phalaenopsis, have photosynthetic roots that benefit from light exposure. The clear pot also makes it easier to monitor root health and moisture levels, reducing the risk of overwatering.
Materials:
- Clear plastic orchid pot
- Fresh orchid potting mix
- Gloves
Instructions:
- Choose a pot slightly larger than the root mass.
- Place a small layer of medium at the base.
- Position the orchid so roots spread naturally.
- Add medium around roots without packing tightly.
- Leave the crown above the medium surface.
- Water gently and place in indirect light.
5. Adjust Watering Frequency

Why This Works:
Both overwatering and underwatering can damage orchids. Overwatering leads to root rot, while underwatering causes dehydration. Adjusting your schedule based on the orchid’s needs and potting medium helps maintain optimal root moisture without excess. A good practice is to water when roots turn silvery rather than green.
Materials:
- Watering can with narrow spout
- Room-temperature water
- Moisture meter (optional)
Instructions:
- Check root color before watering.
- Water when roots look silver or gray.
- Pour water slowly until it drains fully.
- Avoid letting water pool in the crown.
- Let the pot drain completely before placing back.
- Adjust frequency seasonally based on growth stage.
6. Provide Bright, Indirect Light
Why This Works:
Orchids thrive in bright, indirect light. Too little light delays blooming and slows recovery, while too much direct sun can scorch leaves. Correct light exposure fuels photosynthesis, which helps the orchid produce energy for new growth and flower production.
Materials:
- Sheer curtain or shade cloth
- South or east-facing window
- Plant light meter (optional)
Instructions:
- Place the orchid in a bright location with filtered light.
- Use sheer curtains to diffuse intense sunlight.
- Rotate the pot weekly for even light exposure.
- In winter, move closer to the light source.
- If indoors lacks brightness, use a grow light.
- Avoid placing in direct midday sun.
7. Increase Humidity Levels
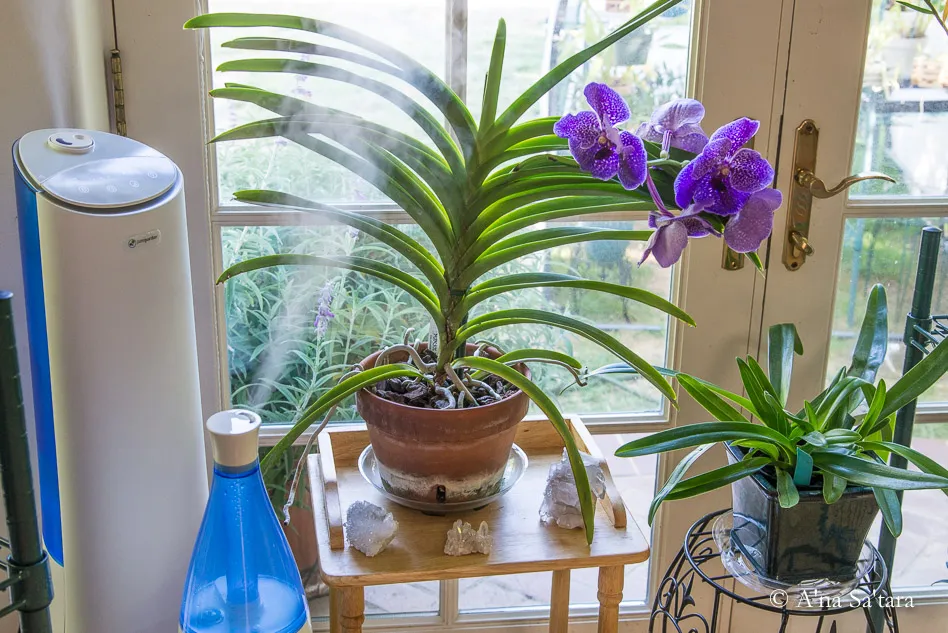
Photo Credit: Essence of Orchids
Why This Works:
Orchids are tropical plants that prefer higher humidity, usually between 50 and 70 percent. Low humidity can cause leaves to wrinkle and roots to dry out quickly. Increased humidity replicates their natural environment, helping them recover from stress and stimulating healthy growth.
Materials:
- Humidity tray or pebble tray
- Room humidifier
- Spray bottle
Instructions:
- Place a pebble tray with water beneath the orchid pot.
- Group plants together to create a microclimate.
- Mist leaves lightly in the morning.
- Use a humidifier during dry months.
- Monitor humidity with a hygrometer.
- Avoid misting blooms directly to prevent spotting.
8. Fertilize with Balanced Orchid Food
Why This Works:
Nutrients are vital for orchids to repair tissues and produce blooms. A balanced orchid fertilizer (like 20-20-20) delivers nitrogen, phosphorus, and potassium in the right proportions. Feeding regularly but lightly prevents nutrient deficiency and supports a steady recovery.
Materials:
- Orchid-specific liquid fertilizer
- Measuring spoon
- Watering can
Instructions:
- Dilute fertilizer to half the recommended strength.
- Apply every 2 weeks during active growth.
- Pour fertilizer directly onto the potting medium.
- Flush the pot with plain water once a month to prevent salt buildup.
- Pause feeding during dormancy.
- Resume when new growth appears.
9. Remove Spent Flower Spikes
Why This Works:
Once an orchid’s blooms fade, the flower spike continues to draw energy from the plant, which slows root and leaf recovery. Removing the spike allows the orchid to redirect its energy into strengthening its foliage and roots. This rest period is essential before it can produce a fresh flower stem.
Materials:
- Sterilized pruning shears
- Rubbing alcohol or hydrogen peroxide
- Paper towels
Instructions:
- Identify whether the spike is green or brown.
- If completely brown, cut it off at the base.
- If still green, cut just above a visible node for possible reblooming.
- Sterilize shears before and after cutting.
- Dab the cut area with hydrogen peroxide to prevent infection.
- Discard the removed spike.
10. Soak Roots in a Rehydration Bath
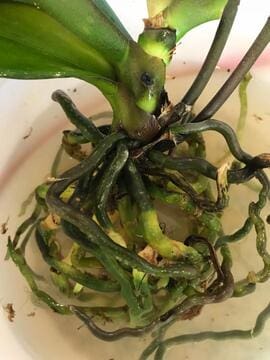
Photo Credit: https://www.better-gro.com/
Why This Works:
When orchid roots are severely dehydrated, a short soak can help reintroduce moisture without drowning them. Soaking softens the potting medium and allows roots to take in enough water to regain elasticity, improving their ability to absorb nutrients.
Materials:
- Bowl or bucket
- Room-temperature water
- Timer
Instructions:
- Remove the orchid from its pot.
- Place roots in a bowl of water.
- Soak for 10–15 minutes, no longer.
- Drain completely to avoid standing water.
- Re-pot in fresh medium immediately after soaking.
- Resume normal watering schedule.
11. Use a Root Growth Supplement

Why This Works:
Root growth stimulants, such as kelp extract or vitamin B1, promote faster root development. These supplements help stressed orchids recover by encouraging new root tips, which are critical for water and nutrient absorption.
Materials:
- Orchid-safe root growth solution
- Measuring spoon
- Watering can
Instructions:
- Dilute the supplement according to product instructions.
- Apply directly to the potting medium.
- Repeat every 2–4 weeks during recovery.
- Combine with proper watering and light conditions.
- Avoid over-application to prevent root burn.
- Discontinue once strong new roots have formed.
12. Maintain Stable Temperatures
Why This Works:
Orchids dislike sudden temperature changes. Keeping them in a stable environment reduces stress and prevents leaf drop. Most orchids thrive in daytime temperatures of 65–75°F and nighttime temperatures of 60–65°F.
Materials:
- Room thermometer
- Fan or space heater (if needed)
Instructions:
- Monitor indoor temperatures regularly.
- Avoid placing orchids near heating vents or drafty windows.
- Provide consistent warmth during colder months.
- In summer, use fans for air circulation without direct drafts.
- Adjust placement seasonally to maintain stability.
- Keep away from extreme temperature swings.
13. Improve Air Circulation
Why This Works:
Good airflow prevents fungal and bacterial growth around the orchid’s roots and leaves. Stagnant air can trap excess moisture, leading to rot. Gentle circulation keeps the plant’s environment fresh and healthy.
Materials:
- Small oscillating fan
- Hygrometer
Instructions:
- Position a fan to create gentle air movement near the plant.
- Avoid aiming airflow directly at the orchid.
- Use in combination with proper humidity levels.
- Run for several hours daily, especially in humid weather.
- Monitor to ensure the potting medium doesn’t dry too quickly.
- Turn off at night if temperatures drop too much.
14. Clean and Disinfect Leaves
Why This Works:
Dust and residue on orchid leaves block light absorption and can harbor pests. Regular cleaning improves photosynthesis and reduces the risk of spider mites, mealybugs, and scale insects.
Materials:
- Soft cloth or sponge
- Diluted mild dish soap or neem oil spray
- Spray bottle
Instructions:
- Mix a mild soap solution (1 drop per cup of water).
- Dampen a cloth or sponge with the solution.
- Wipe leaves gently, top and underside.
- Rinse with plain water if soap was used.
- Inspect for pests during cleaning.
- Repeat monthly or as needed.
15. Treat for Pests Promptly

Why This Works:
Pests such as aphids, scale, and spider mites can weaken orchids by feeding on sap. Treating infestations early prevents irreversible damage and supports faster recovery.
Materials:
- Insecticidal soap or neem oil
- Spray bottle
- Gloves
Instructions:
- Isolate the affected orchid from other plants.
- Spray with insecticidal soap or neem oil, covering all plant surfaces.
- Repeat treatment every 7–10 days until pests are gone.
- Monitor closely for signs of re-infestation.
- Avoid over-spraying blooms to prevent damage.
- Resume normal care after pests are eradicated.
16. Use Ice Cube Watering (For Controlled Hydration)
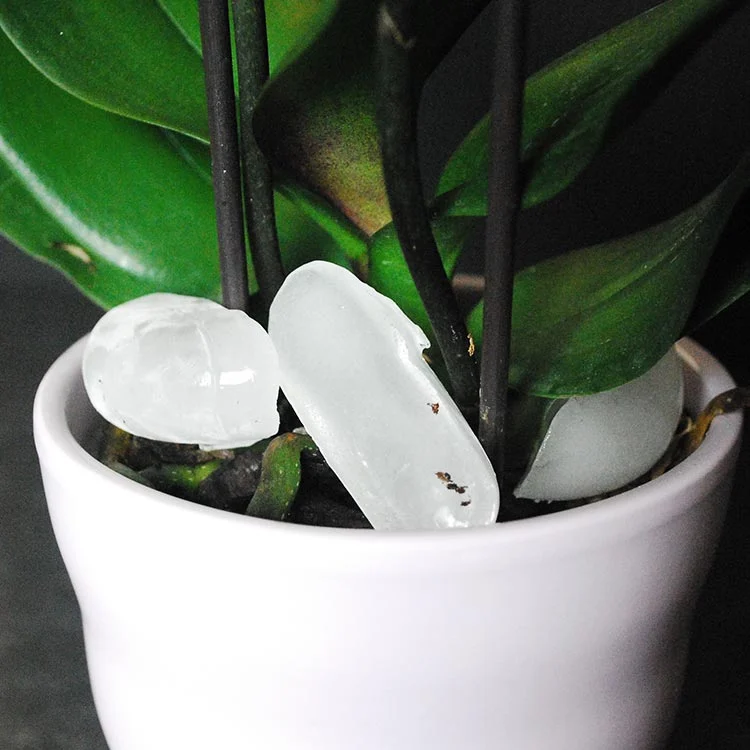
Photo Credit: justaddiceorchid
Why This Works:
Using ice cubes provides a slow-release water source, reducing the risk of overwatering. As the ice melts, it gently hydrates the orchid’s roots without flooding the medium. This method works best for orchids in well-draining pots.
Materials:
- Ice cubes
- Measuring cup
Instructions:
- Place 2–3 ice cubes on the potting medium, away from the crown.
- Allow them to melt completely.
- Repeat once a week, adjusting for climate and humidity.
- Monitor root color for hydration cues.
- Avoid using ice if roots are already waterlogged.
- Switch to normal watering if ice method is ineffective.
17. Remove Damaged Leaves
Why This Works:
Dead or yellowing leaves can attract pests and waste the plant’s resources. Removing them improves airflow and directs nutrients to healthy growth areas.
Materials:
- Sterilized scissors
- Hydrogen peroxide (3%)
- Gloves
Instructions:
- Identify leaves that are completely yellow or spotted.
- Cut them at the base with sterilized scissors.
- Treat the cut area with hydrogen peroxide.
- Dispose of removed leaves in the trash.
- Avoid removing more than 1–2 leaves at a time.
- Monitor for new leaf growth.
18. Give the Orchid a Rest Period
Why This Works:
After blooming, orchids often enter a resting phase where they conserve energy. Reducing watering and fertilizing during this time mimics their natural cycle, helping them store energy for the next bloom season.
Materials:
- Watering can
- Calendar for tracking care schedule
Instructions:
- Reduce watering frequency after blooms drop.
- Stop fertilizing until new growth appears.
- Maintain bright, indirect light.
- Keep temperatures stable.
- Resume regular care when a new spike emerges.
- Be patient, as rest periods can last several months.
19. Check for Crown Rot
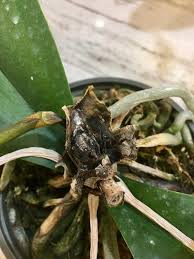
Photo Credit: orchidboard.com
Why This Works:
Crown rot occurs when water sits in the plant’s center, leading to decay. Catching it early and treating it prevents the infection from spreading to healthy tissues.
Materials:
- Cotton swabs
- Hydrogen peroxide (3%)
Instructions:
- Inspect the plant’s crown for mushy or dark areas.
- Use a cotton swab dipped in hydrogen peroxide to clean the area.
- Tilt the plant slightly to prevent water pooling.
- Water carefully around the edges of the pot.
- Remove any severely damaged tissue.
- Monitor for signs of recovery.
20. Re-bloom with a Temperature Drop
Why This Works:
Some orchids, especially Phalaenopsis, need a slight nighttime temperature drop to trigger blooming. This simulates seasonal changes in nature and signals the plant to produce a flower spike.
Materials:
- Thermometer
- Window with cooler nighttime air
Instructions:
- Place the orchid in a cooler spot at night (around 55–60°F).
- Maintain normal daytime temperatures.
- Keep the plant in bright, indirect light.
- Continue regular watering and feeding.
- Watch for a new spike within 4–6 weeks.
- Return to normal care once blooming begins.
Disclaimer: Always consult a professional or doctor before handling new plant care products, especially if you have allergies or sensitivities to ingredients like fertilizers or pest control solutions.