


Having a herb planter looks so pretty on Pinterest, but most of us don’t have the marble countertops or the giant window ledges they show. I’ve killed more basil than I’d like to admit, but over the years, I’ve found a few realistic ways to grow herbs in planters that actually fit apartment or small kitchen.
The Best Way to Grow Herb Planters if You Do Not Get a Lot of Natural Sunlight
Not everyone has a sunny kitchen window, and that’s okay. Low-light herbs can still thrive if you make a few simple adjustments. The key is mimicking natural sunlight and keeping your plants warm and well-drained. If your home feels more like a cozy cave than a sun-soaked cottage, here’s how to make your herb planter ideas still work.
Tips for Low-Light Herb Growing:
- Choose partial-shade herbs like parsley, mint, chives, or lemon balm. These can handle less light and cooler spots.
- Use full-spectrum grow lights above your herb planters. Clip-on styles or strip lights work perfectly under cabinets.
- Rotate plants weekly so each side gets even exposure to light sources.
- Keep soil slightly drier since lower light means slower evaporation (overwatering is the usual killer).
- Reflect light by placing planters near white walls, mirrors, or shiny kitchen tiles.
- Try hydroponic herb planters if you want foolproof growth year-round. They use built-in LED lights that mimic daylight and regulate moisture automatically.
If you’re not sure your herbs are getting enough light, look at their leaves—pale or leggy stems are the first signs they’re craving more brightness.
How Often Should You Water Herbs
Watering herbs can feel like guesswork, but it’s actually all about balance. Too much water leads to root rot; too little makes them wilt and lose flavor. Below is a quick reference table you can save for your kitchen or gardening board.
| Herb Type | Ideal Watering Frequency | Tip for Success |
|---|---|---|
| Basil | Every 2–3 days | Keep soil evenly moist but not soggy. Loves humidity. |
| Mint | Every 3–4 days | Thrives with consistent moisture and indirect light. |
| Rosemary | Once a week | Let soil dry out completely between waterings. |
| Thyme | Once every 7–10 days | Prefers dry soil; too much water causes root issues. |
| Parsley | Every 2–3 days | Water when the top inch of soil feels dry. |
| Oregano | Every 4–5 days | Needs good drainage and moderate watering. |
| Chives | Every 3 days | Keep soil damp; grows quickly with regular trimming. |
| Cilantro | Every 2–3 days | Likes moist soil but not standing water. |
| Sage | Once a week | Let it dry between waterings; hates wet feet. |
| Dill | Every 3–4 days | Enjoys slightly moist soil and gentle airflow. |
Pro Tip: Always touch the soil before watering. If the top inch feels dry, it’s time. If it’s damp, wait another day. Herbs are surprisingly forgiving once you get into a rhythm.
The Easiest Herbs to Grow if You Are a Beginner
If you’re new to indoor gardening, some herbs practically grow themselves. These forgiving plants don’t need much attention, sunlight, or fancy equipment, which makes them perfect for small-space kitchens or starter herb planters.
Beginner-Friendly Herbs:
- Basil – Grows fast, smells amazing, and keeps producing when trimmed regularly. Loves warmth and moisture.
- Mint – Almost impossible to kill. Spreads easily, so keep it in its own container. Great for teas or desserts.
- Chives – Regrows after cutting, adds a mild onion flavor to everything, and thrives even in small pots.
- Parsley – Easy to germinate and stays green all year with regular watering.
- Oregano – A classic Mediterranean herb that’s drought-tolerant and ideal for forgetful waterers.
- Thyme – Hardy and fragrant. Great for those who forget to water.
- Rosemary – Prefers sunlight but tolerates partial shade. Trim regularly to prevent woody stems.
If you want instant gratification, start with small starter plants instead of seeds. It’s a great confidence boost to see green leaves right away, and you can begin snipping for meals within a few weeks.
Quick Recap for Beginners
If you’re setting up your first herb planter, remember:
- Pick herbs that match your light conditions.
- Drainage matters more than fancy pots.
- Water only when the soil feels dry.
- Keep trimming—this helps herbs grow bushier.
- Don’t overthink it. Even the “ugly” planters still make your kitchen smell amazing.
Herb gardening doesn’t have to be perfect; it just has to be green, fragrant, and a little bit yours.
16 Clever Herb Planter Ideas
These 16 herb planter ideas are all practical, small-space-friendly, and just quirky enough to make you want to start snipping sprigs for your next dinner.
1 | Mason Jar Window Herb Planter
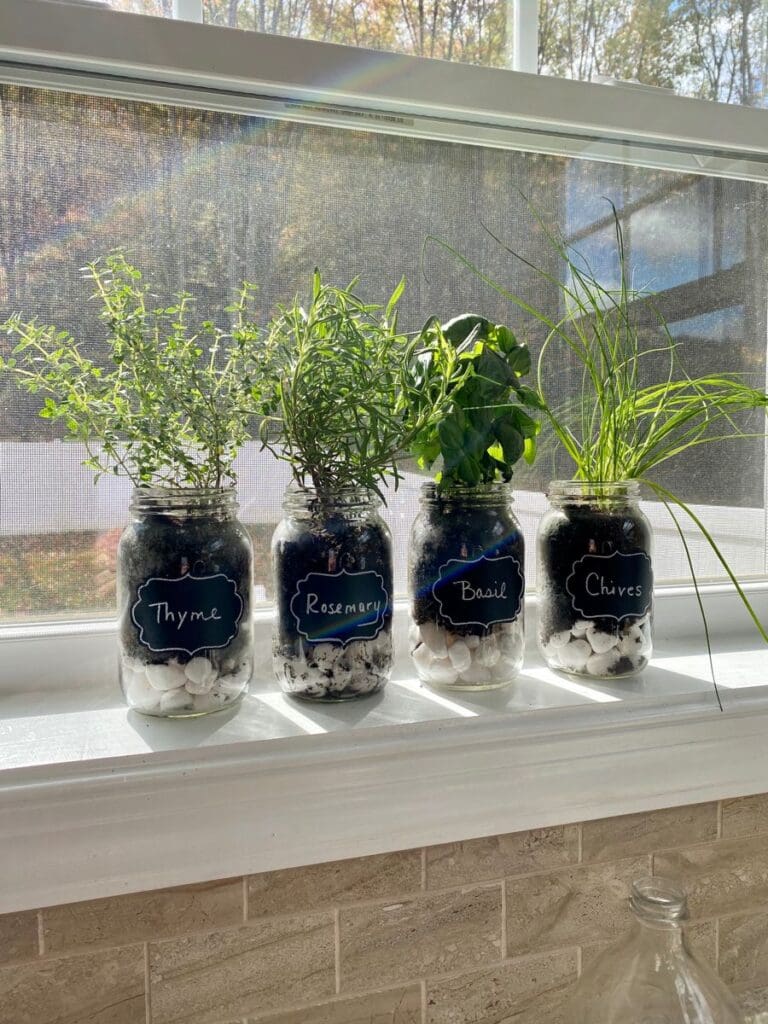
I once tried this with old pasta sauce jars I saved (you’d think I was being eco-conscious, but really I just forgot to recycle them). It turns out they’re perfect for herbs if you layer pebbles at the bottom for drainage.
The trick is to avoid overwatering – trust me, soggy roots equal sad basil.
Stick them on a sunny sill and they look effortlessly rustic.
DIY Steps:
- Wash and dry glass jars thoroughly.
- Add a 1-inch layer of small pebbles or gravel for drainage.
- Fill jars three-quarters full with potting mix.
- Plant herb seeds or small starter plants.
- Label each jar with twine and paper tags.
- Place jars on a bright windowsill and mist lightly every few days.
2 | Hanging Tin Buckets on a Rail
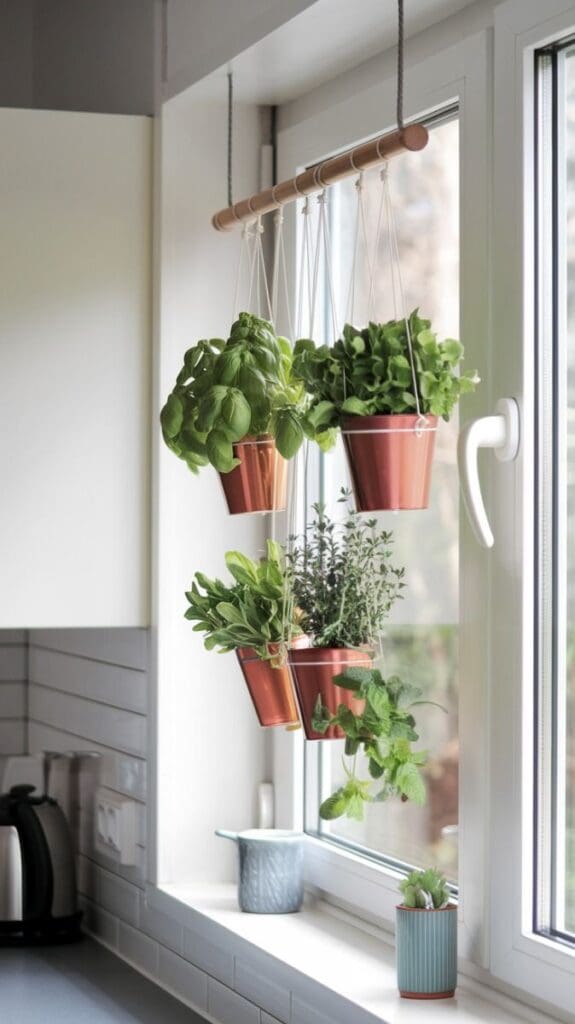
My friend Jenna has these above her kitchen sink, and it’s the cutest thing.
She drilled a few holes in the bottom, added mint, parsley, and thyme, and suddenly her tiny flat smells like a garden.
The nice part is swapping herbs each season – she switches to lavender in summer.
You can find similar tin buckets with hooks (she grabbed hers in a 3-piece set), and it’s one of the smartest vertical herb planter ideas I’ve seen.
DIY Steps:
- Get a sturdy kitchen rail with hanging hooks.
- Drill small drainage holes in the bottom of each tin bucket.
- Fill each bucket halfway with soil.
- Add your favorite herbs and gently pat down the soil.
- Hang the buckets evenly spaced along the rail.
- Water sparingly to avoid leaks and place over a sink or tray.
3 | Wooden Crate Herb Planter Box
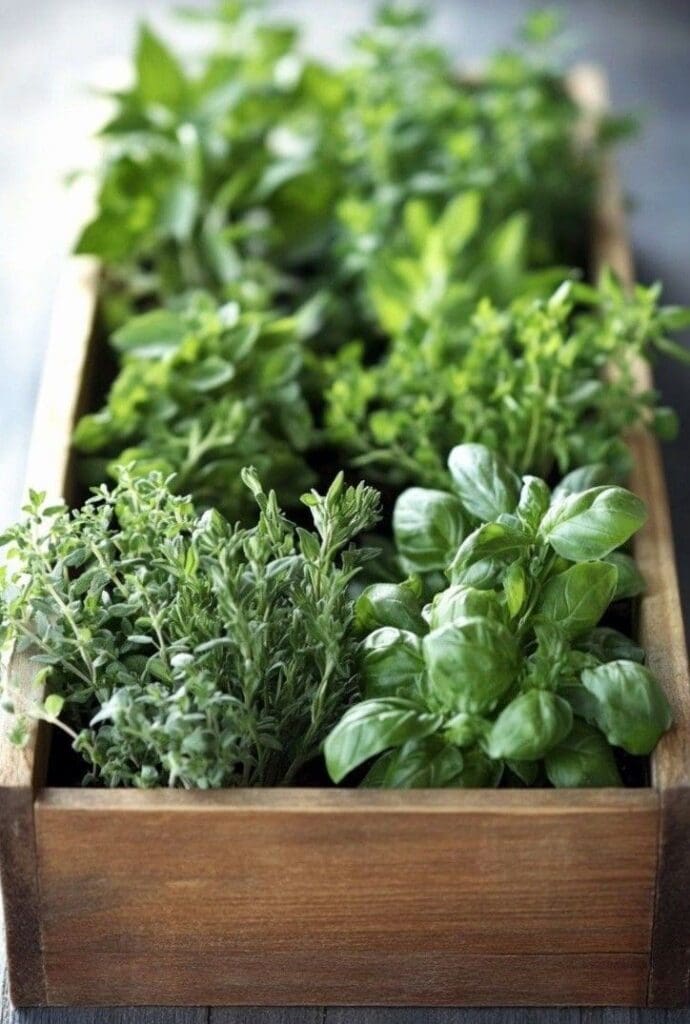
This one’s from my mom, who can make anything look like it came straight from a magazine spread.
She reused an old wooden wine crate, lined it with landscape fabric, and filled it with soil and rosemary.
The crate sits on her back porch and somehow looks both vintage and intentional. She told me the key was not to overpack the herbs – let them breathe and sprawl a bit.
Every time I visit, the air smells like roasted chicken.
DIY Steps:
- Find an old wooden crate or wine box.
- Line the bottom with landscape fabric or burlap.
- Fill with a mix of potting soil and compost.
- Plant rosemary, thyme, and sage evenly spaced.
- Water thoroughly once after planting.
- Set the crate in partial sun and trim regularly.
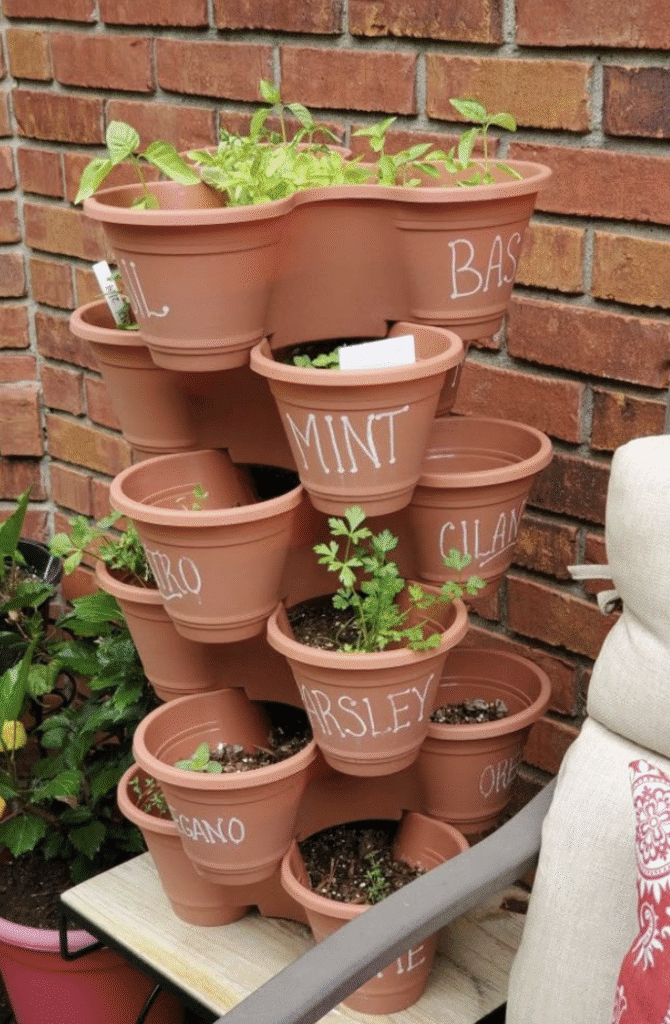
4 | Stackable Planter Tower
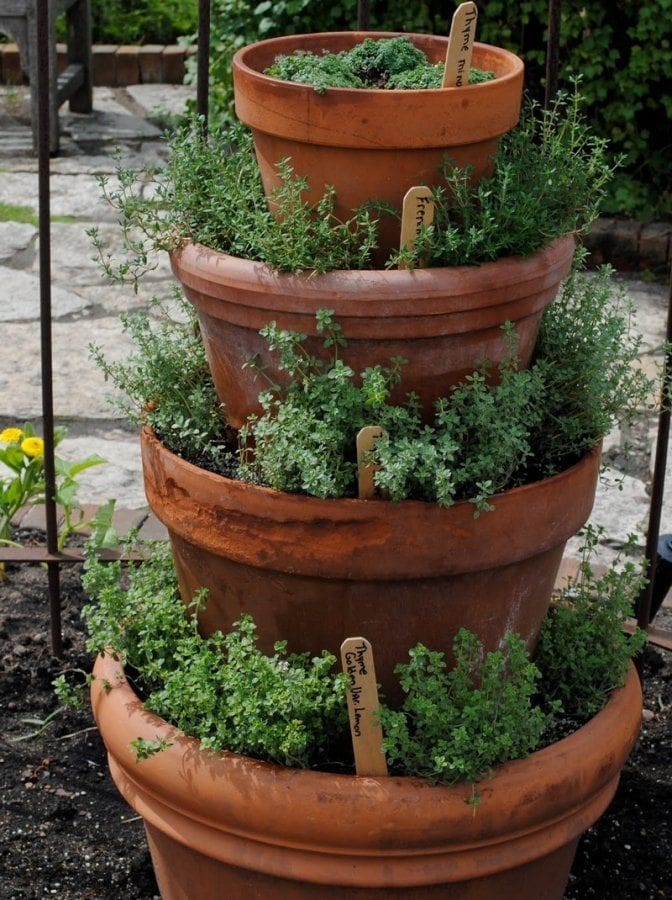
Image Source: azurefarmlife.com
I saw this setup on the roadside outside a farm shop – a literal tower of herbs spiraling up like a green sculpture. It was just a plastic stackable planter, but the effect was stunning.
Great for small patios or balconies since it uses height instead of floor space.
You can start with basil on top and trailing herbs like oregano near the bottom. It’s surprisingly stable too (I gave it a gentle wobble to check).
DIY Steps:
- Purchase or assemble stackable tiered planters.
- Fill each level with potting soil.
- Plant herbs with similar water needs on each tier.
- Stack tiers securely, pressing gently to stabilize.
- Water from the top and let it drain through layers.
- Rotate occasionally so each side gets sunlight.
5 | Wall-Mounted Wooden Shelf Planter
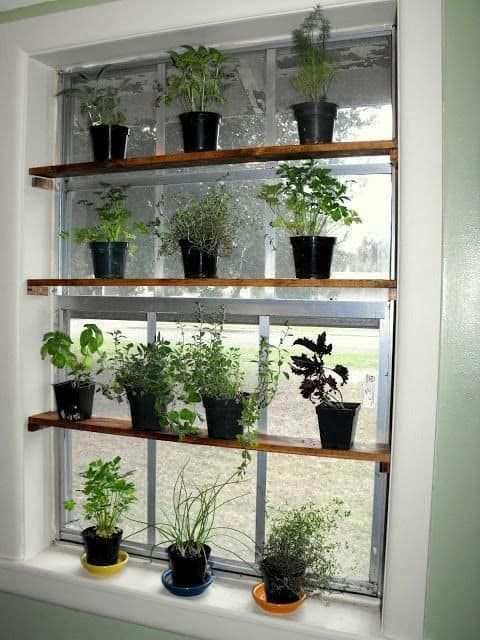
Credit: Handmade Factory
I once turned an old bathroom shelf into a herb display after realizing I had zero counter space left.
A coat of sage-green paint and a few terracotta pots later, it became my favorite part of the kitchen.
The shelf sits near a window, so the herbs get plenty of light. If you try this, secure the pots so they don’t tip when you water.
It’s a small DIY with big “I live in a magazine” energy.
DIY Steps:
- Repaint or refinish an old wall shelf in your chosen color.
- Install the shelf near a window or bright spot.
- Add terracotta pots with drainage trays.
- Fill pots with soil and plant herbs like basil or chives.
- Use removable adhesive or small rings to secure pots.
- Wipe the shelf occasionally to prevent water marks.
6 | Galvanized Trough Planter
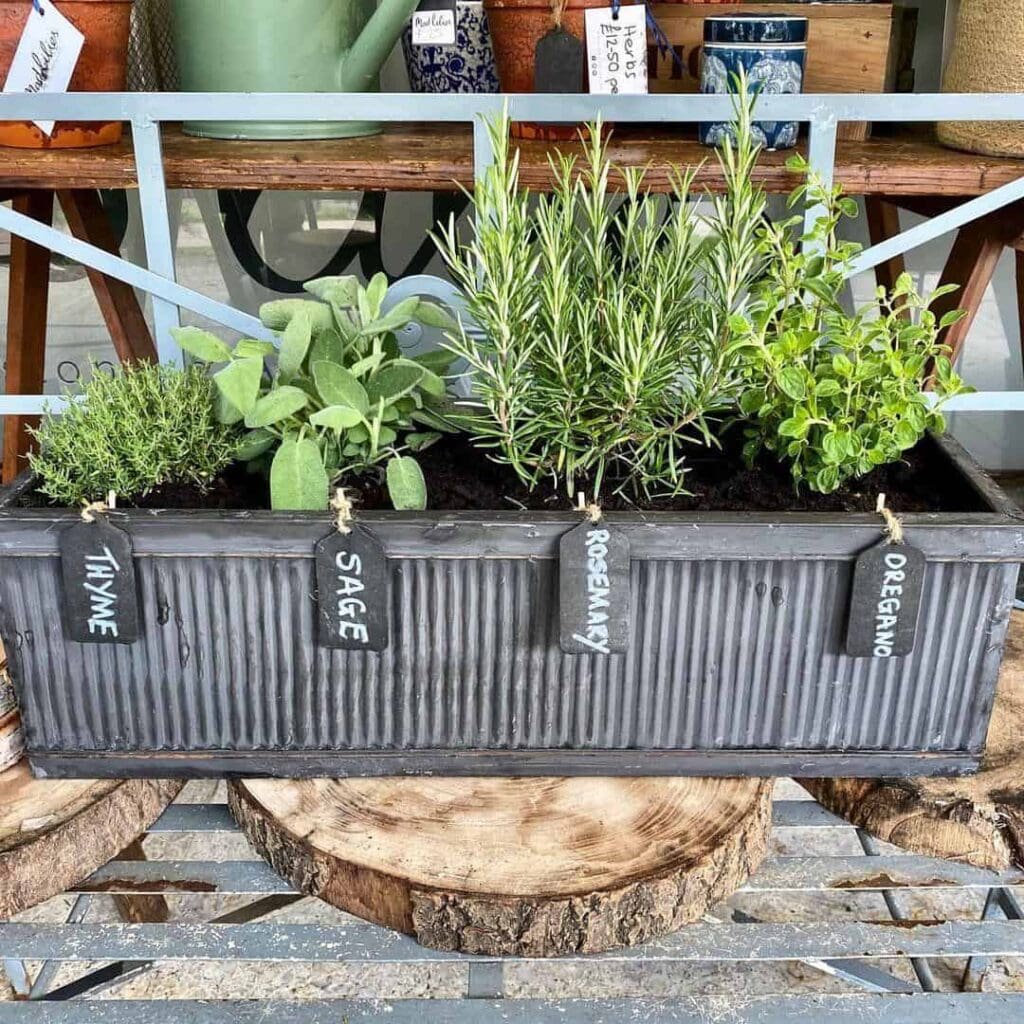
Credit: @mad_lilies
I saw this in front of a roadside café once – just a long galvanized trough filled with herbs and little chalkboard labels.
It looked so charming I stopped to take a photo (and awkwardly pretended to be checking my messages).
These troughs are great because they fit lots of herbs together and don’t dry out as fast as smaller pots. They also have that farmhouse look without trying too hard. Perfect for balconies or patio edges.
DIY Steps:
- Buy a galvanized trough with drainage holes (or drill your own).
- Add a thin layer of stones at the bottom.
- Fill with rich potting soil mixed with compost.
- Plant herbs like basil, parsley, and mint side by side.
- Insert small chalkboard labels for a rustic touch.
- Water deeply once a week or as soil dries out.
7 | Ceramic Mixing Bowl Planter
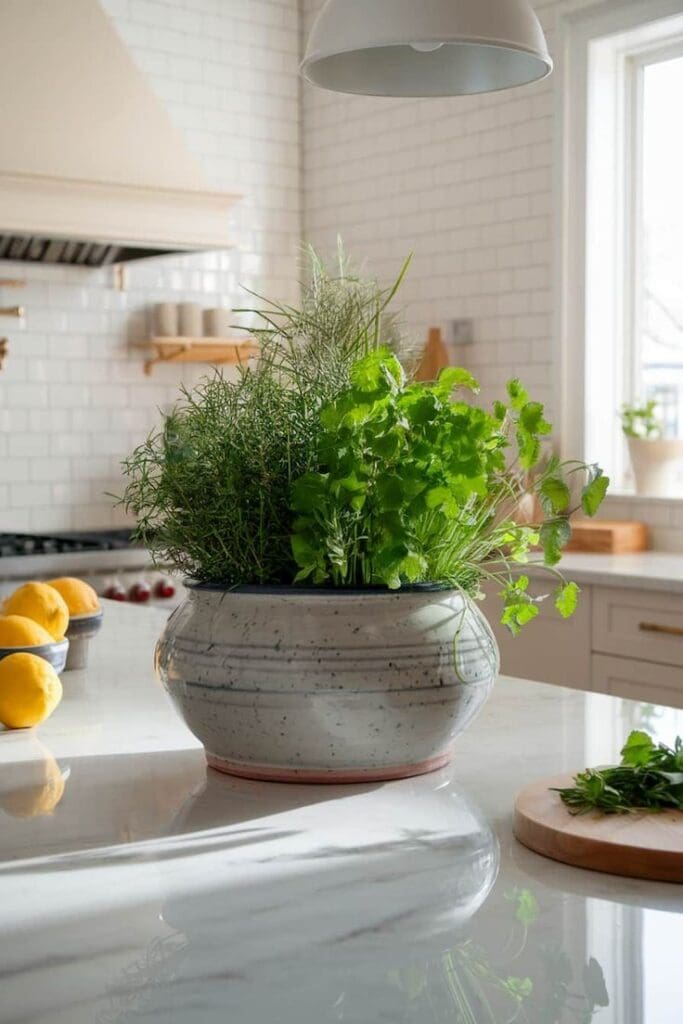
My friend Lexi did this after breaking the handle on her favorite ceramic mixing bowl.
Instead of tossing it, she turned it into a planter. The shape actually helps herbs root evenly, and it looks cute on the countertop.
She planted cilantro and dill in hers, which now lives next to her toaster.
Just goes to show
: kitchen “accidents” can become instant decor upgrades.
DIY Steps:
- Take an old ceramic bowl and drill a few small drainage holes.
- Add gravel or small pebbles to the base.
- Fill halfway with indoor potting mix.
- Plant herbs that don’t mind shallow roots.
- Place near indirect sunlight.
- Water lightly, checking soil moisture with your finger.
8 | Old Teacup Herb Garden
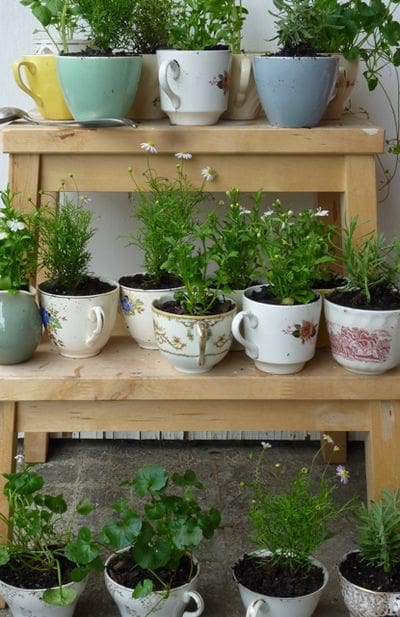
I saw this idea at a thrift store display – rows of mismatched teacups with tiny herbs sprouting out. It looked whimsical, like something from a fairy garden.
Perfect for people who only need small amounts of fresh herbs for cooking.
The trick is to avoid overwatering since teacups are tiny. Bonus points if you find floral cups that make your kitchen shelf look like an old English tearoom.
DIY Steps:
- Collect mismatched teacups and saucers.
- Add a thin layer of pebbles for drainage.
- Spoon in potting mix until nearly full.
- Add small herb cuttings (like thyme or chives).
- Place on a sunny shelf or kitchen ledge.
- Mist with water every few days instead of pouring.
9 | Repurposed Candle Jars
This one’s a personal favorite.
I had three old candle jars with the wax nearly gone, so I froze them overnight and popped the leftover wax out.
Once cleaned, they became perfect planters for mini herbs. They look sleek and modern, especially with a bit of jute wrapped around the rim. Also, it’s oddly satisfying to give something “dead” a new life.
DIY Steps:
- Freeze old candle jars to remove leftover wax easily.
- Wash thoroughly with warm soapy water.
- Add small pebbles for drainage.
- Fill with potting soil and plant tiny herb starters.
- Wrap jute or ribbon around the jar rim for decoration.
- Keep near a sunny spot and trim herbs regularly.
10 | Vertical Pallet Herb Wall
My mom made this one summer using an old pallet she found behind the garden center.
She sanded it, stained it, and added little planting pockets. It now stands against her kitchen wall and holds everything from mint to basil.
She swears it’s the easiest way to grow multiple herbs in small spaces, and it doubles as decor. It smells incredible when you brush past it.
DIY Steps:
- Find a clean wooden pallet and sand it smooth.
- Stain or paint the wood for a finished look.
- Staple landscape fabric on the back to form pockets.
- Fill each pocket with potting mix.
- Add herbs, spacing them evenly.
- Mount vertically and water from the top down.
11 | Clay Pot Tower
I saw this at a roadside farmer’s stand, and it was genius.
They stacked clay pots of different sizes, tilting them slightly to make a spiral tower.
Each layer had a different herb, and it looked so sculptural. The top had basil, middle had thyme, and the bottom had trailing oregano.
It’s a quick project that looks like you spent hours.
DIY Steps:
- Gather three to five clay pots in descending sizes.
- Thread a metal rod through the center holes for stability.
- Fill the largest pot with soil and slide it to the base.
- Angle the next pot slightly off-center, then fill.
- Continue stacking and planting as you go up.
- Water from the top and let it trickle down.
12 | Colander Hanging Herb Planter
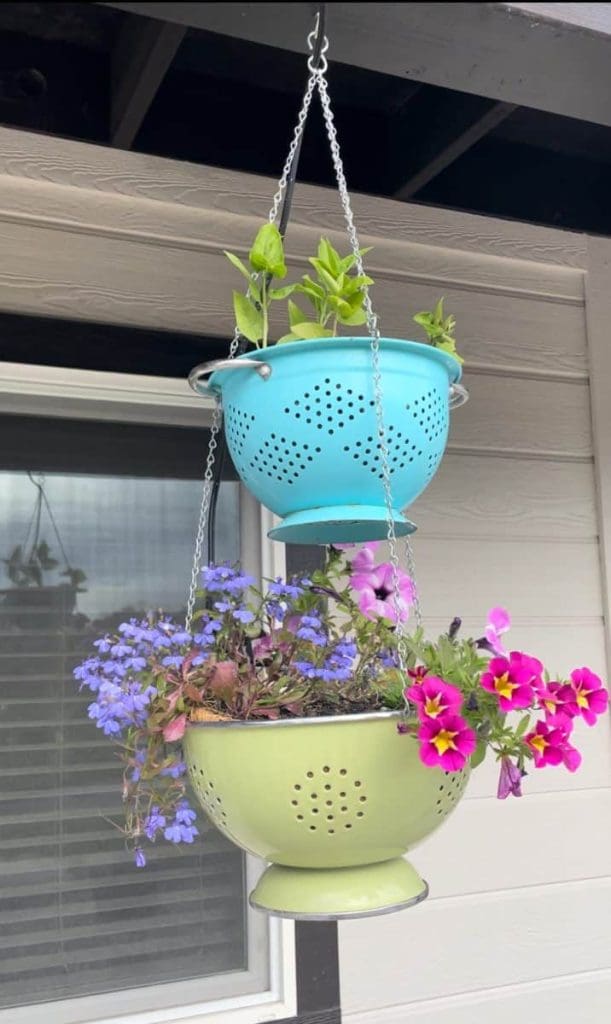
My friend Sara once turned an old colander into a hanging herb planter after she melted part of it on the stove (we’ve all been there).
She spray-painted it turquoise, added chain hooks, and now it’s this quirky hanging garden by her back door.
The drainage holes are already built in, so it’s perfect for herbs.
DIY Steps:
- Find an old or thrifted metal colander.
- Spray-paint it in your favorite color (optional).
- Attach hanging chains or sturdy rope to the handles.
- Line the inside with landscape fabric.
- Add soil and plant herbs like basil or dill.
- Hang in a bright, sunny area and water lightly.
13 | Window Box Herb Planter
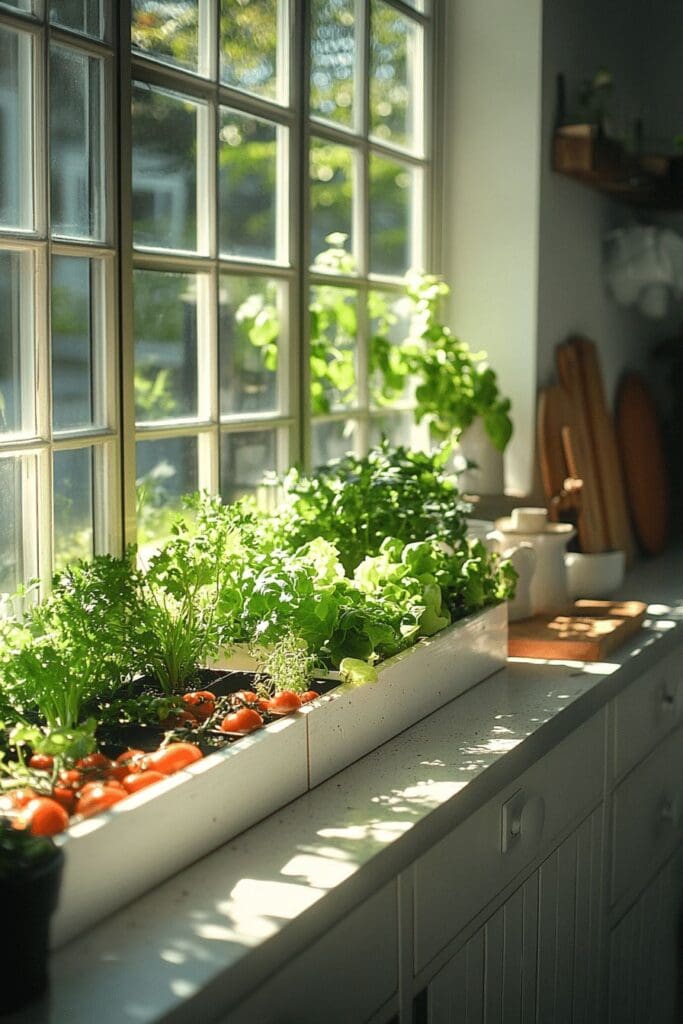
Credit: https://jennaliving.com/
My mom has had one of these outside her kitchen window for years, and it’s her pride and joy.
She grows chives, parsley, and oregano- mostly for her Sunday roasts.
I used to watch her snip herbs through the open window like some gardening queen. If you have even a small ledge, it’s worth trying.
DIY Steps:
- Measure your window ledge and buy a fitting planter box.
- Drill drainage holes if it doesn’t have them.
- Fill with soil mixed with organic compost.
- Plant 3-4 herb varieties.
- Secure the box with strong brackets or hooks.
- Water once every few days and harvest often.
14 | Hanging Macramé Herb Planter

I saw this herb planter hanging in a local café and immediately wanted to copy it.
They used three macramé holders with small ceramic pots inside, all filled with herbs.
The combination of greenery and knotted rope adds such cozy texture to a space.
It’s perfect for renters since you can hang them anywhere with ceiling hooks.
DIY Steps:
- Buy or make macramé plant hangers.
- Choose lightweight pots that fit snugly inside.
- Fill each pot with potting mix.
- Add herbs like mint, sage, or thyme.
- Hang at different heights for a cascading effect.
- Water gently so you don’t drench the rope.
15 | Over-the-Sink Rail Herb Planter
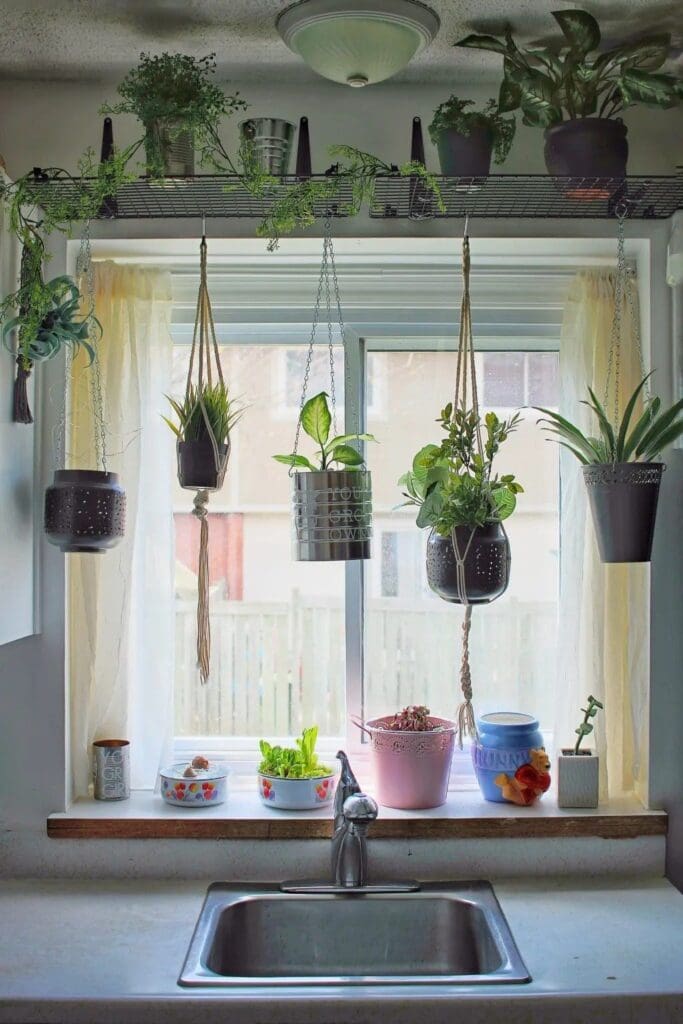
My friend Jess swears by this herb planter for apartment kitchens.
She has a metal bar above her sink with small planters that slide or hang onto it. It’s the most convenient setup – you can rinse herbs and dishes in one spot.
It’s low-maintenance too since the water splashes help keep the soil moist.
DIY Steps:
- Install a strong tension or wall-mounted rail above the sink.
- Buy small hanging planters or containers with hooks.
- Fill with lightweight potting soil.
- Plant herbs like basil and cilantro.
- Hang them evenly spaced.
- Rotate occasionally to get even sunlight.
16 | Recycled Tin Can Planters
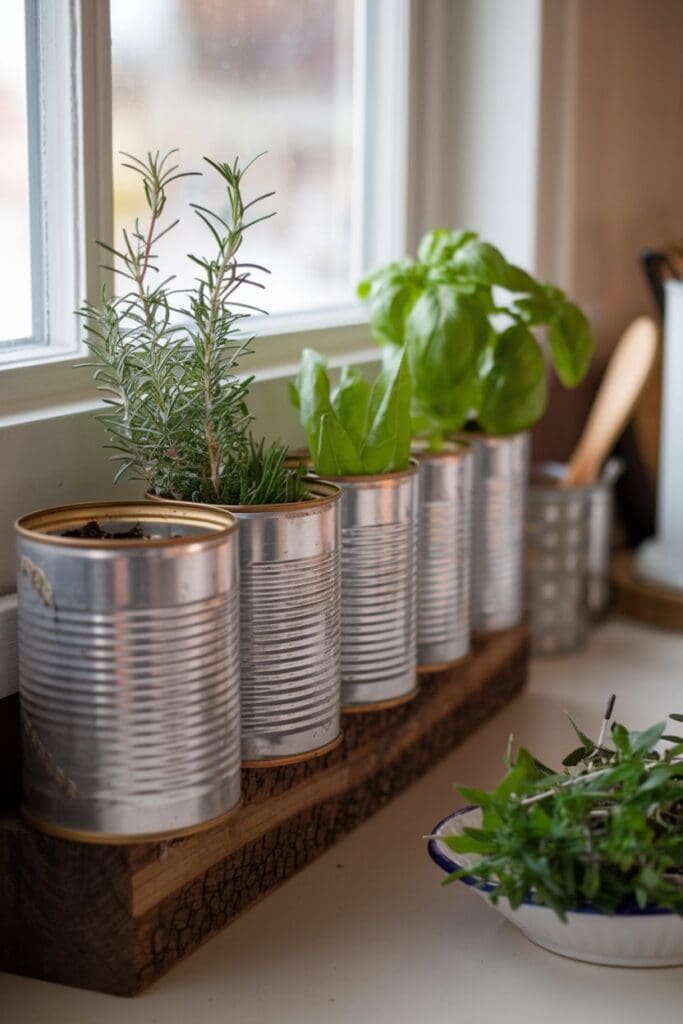
Image Source: houseplantauthority.com
I saw this idea for a herb planter outside a roadside flower stall, and it was simple and cute.
They’d cleaned up old soup cans, painted them pastel colors, and filled them with herbs. However, they also look great unpainted, like the one above!
The rough texture of tin actually helps moisture balance. I’ve since made a few myself, and they’ve held up for years.
DIY Steps:
- Clean empty tin cans thoroughly.
- Drill or hammer small holes in the bottom.
- Paint the outside with waterproof paint.
- Fill with soil and add herb seedlings.
- Arrange on a shelf or hang with twine.
- Water lightly once a week.