


Let’s talk about one of the easiest ways to give your home instant Halloween charm: Halloween window painting! If you’ve ever struggled with making your windows spooky without going overboard, you’re not alone. The key is to balance creativity, fun, and a little seasonal flair so your windows look inviting and festive both from inside and outside.
Here’s how to make your windows pop this Halloween. I’ve put together 22 ideas you can mix and match depending on your space, skill level, and style. Some are dramatic, some are playful, and a few are downright quirky. Each idea comes with practical tips and numbered steps so even beginners can tackle them with confidence.
This post contains affiliate links which help to support our blog. You will not be charged anything extra for using the link. We earn a small commission from each sale.
Here are some helpful tools you may need for Halloween window painting:
Washable Window Paint
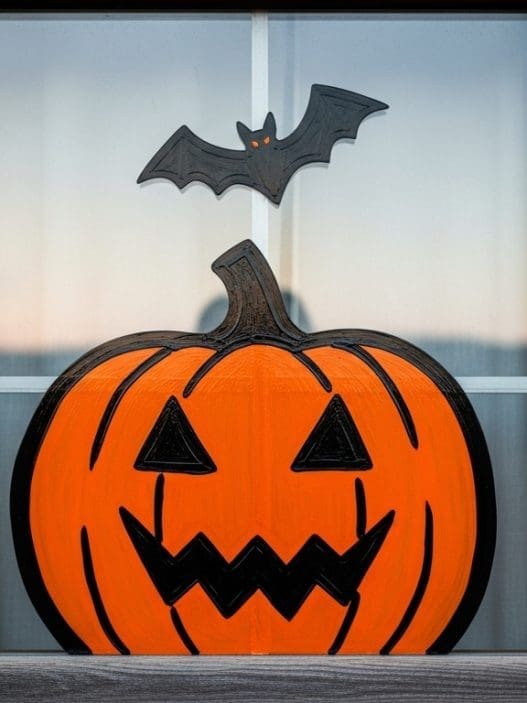
1. Classic Jack-O’-Lantern Faces
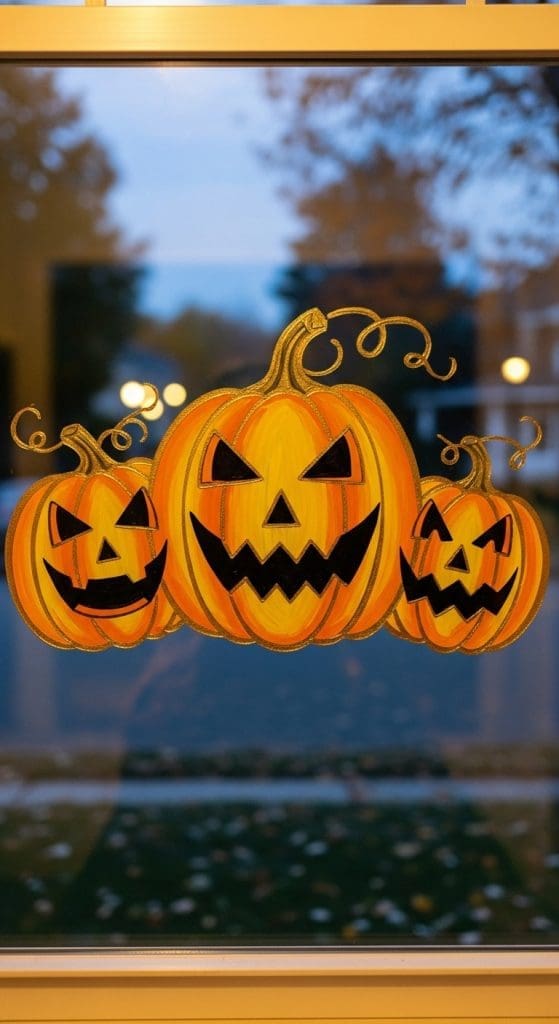
Nothing says Halloween like glowing pumpkin faces, and I love how versatile they are. You can do silly faces for a playful vibe or spooky ones for a dramatic effect.
Outlining the pumpkins in white or gold first makes the black face details pop and gives depth when illuminated at night.
DIY Steps:
- Clean the window with glass cleaner.
- Lightly sketch pumpkin shapes with chalk.
- Outline pumpkins in white or gold paint.
- Fill in the faces with black paint for eyes, nose, and mouth.
- Let dry completely.
- Optional: Add glitter or metallic highlights for extra sparkle.
2. Creepy Crawly Spider Halloween Window Painting
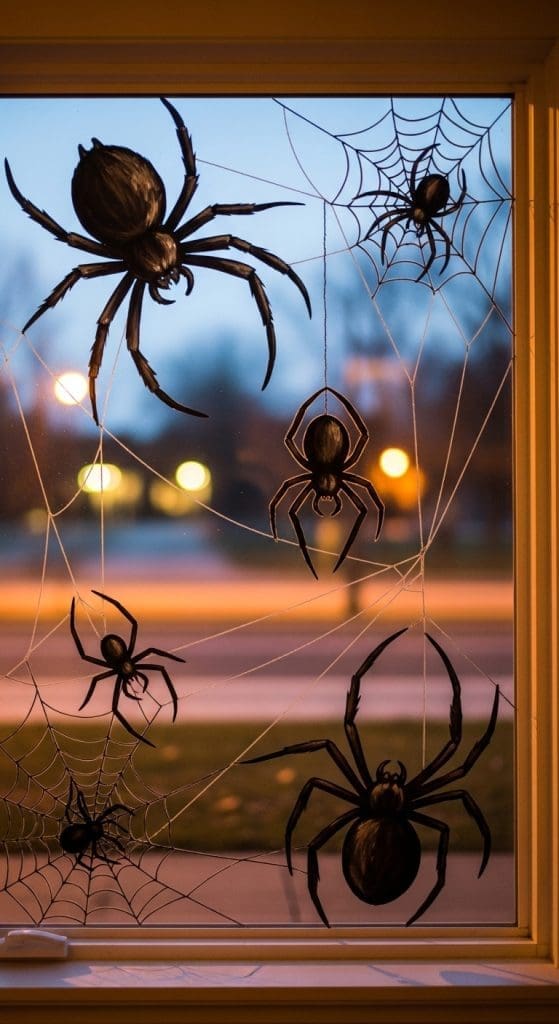
Giant spiders crawling across a window instantly add a spooky vibe and is a great Halloween Window Painting. Spiders are perfect for positioning in corners, dangling from webs, or “crawling” toward each other to make the scene feel alive. You can go as much or as little as you want!
Tip: Adding thin web strands connects everything visually and makes the design more cohesive.
DIY Steps:
- Wipe the window clean.
- Sketch the spider body and legs with chalk.
- Paint the body black, adding tiny white eyes.
- Extend jagged legs from corners or edges.
- Optional: Add thin web strands in white paint.
- Let dry fully before touching.
3. Haunted House Silhouettes
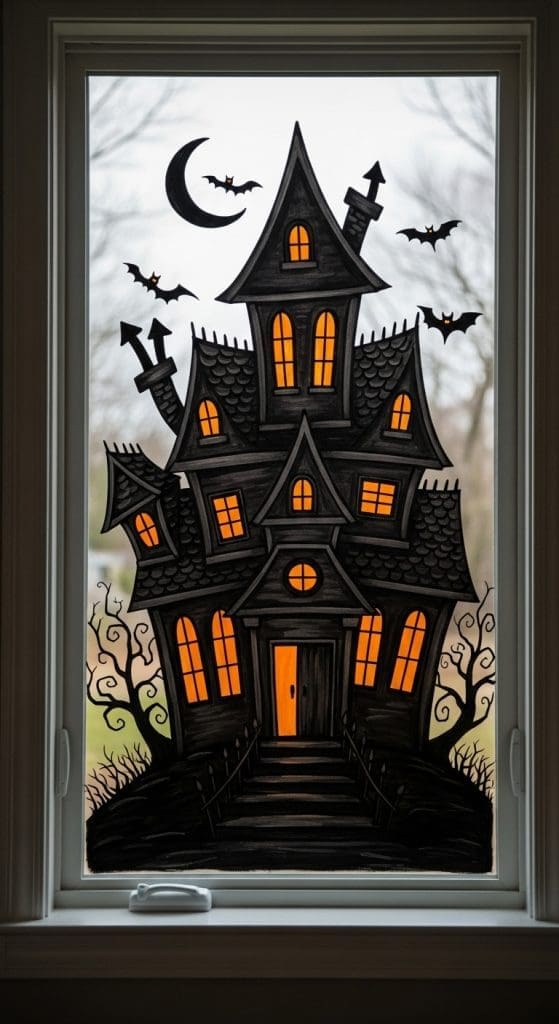
A haunted house is a classic and dramatic choice. The effect of crooked chimneys, tilted windows, and tiny glowing squares for lights, immediately creates a nighttime scene.
Layering the dark paint over the outline adds depth and makes it feel like a real haunted scene.
DIY Steps:
- Clean the window.
- Lightly sketch the haunted house outline with chalk.
- Fill in the structure with dark paint.
- Add chimneys, windows, and roof details.
- Paint small yellow or white squares for glowing windows.
- Let dry completely.
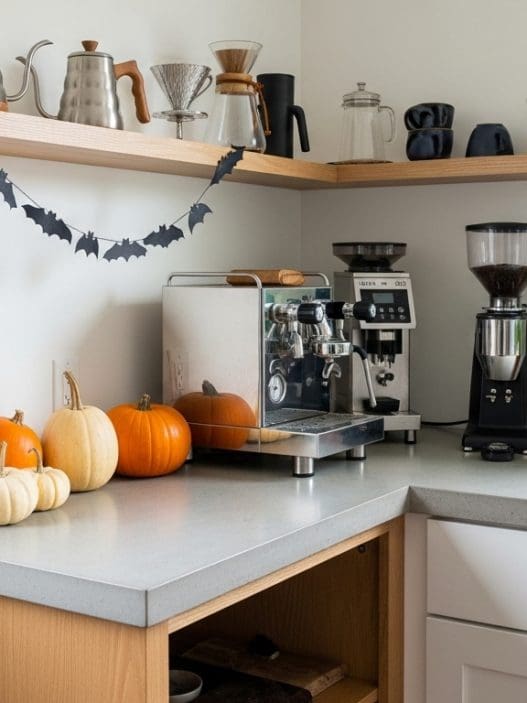
4. Flying Bats Halloween Window Painting
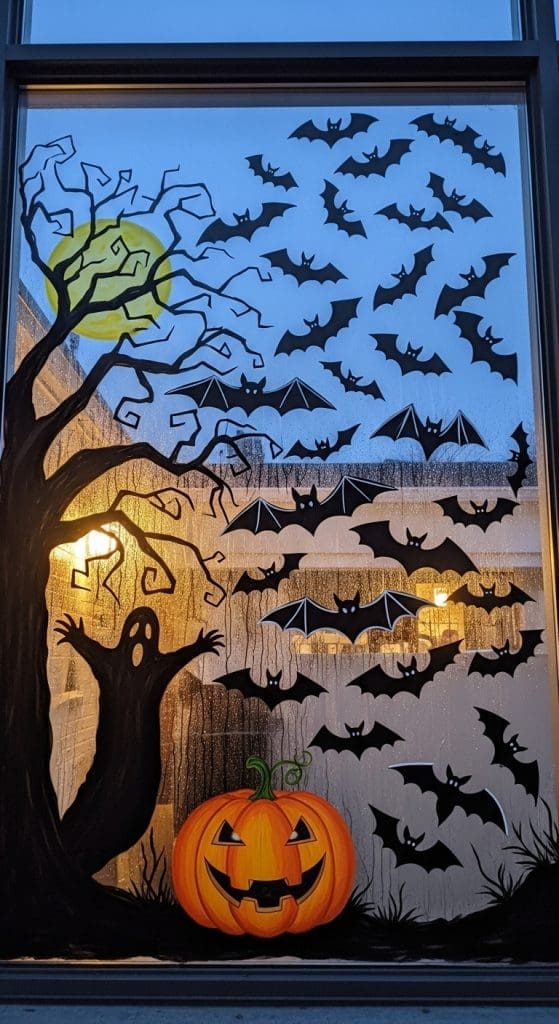
Bats are perfect for filling space without cluttering it.
I love how scattering them in different sizes creates the illusion of movement. It’s almost like they’re flying out of the window.
A thin white outline on a few bats makes them pop, especially in the evening.
DIY Steps:
- Wash the window thoroughly.
- Sketch bat shapes lightly with chalk.
- Paint bats black, varying the sizes for depth.
- Add optional white outlines for contrast.
- Check the arrangement for balance.
- Let dry fully before removing chalk lines.
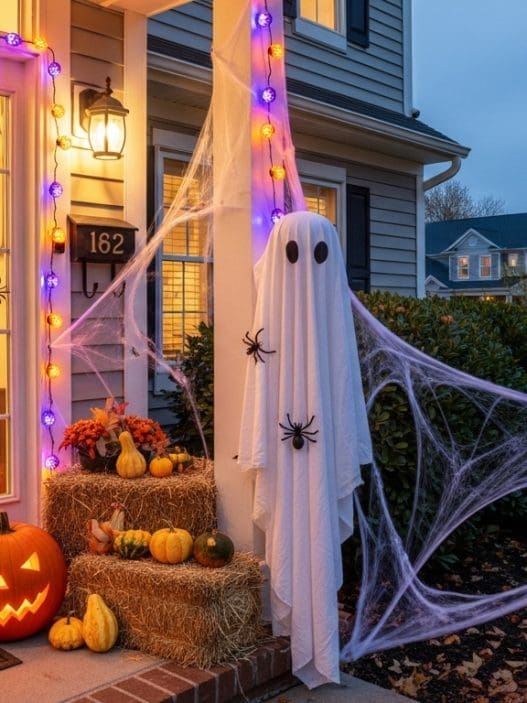
5. Ghost Parade Halloween Window Painting
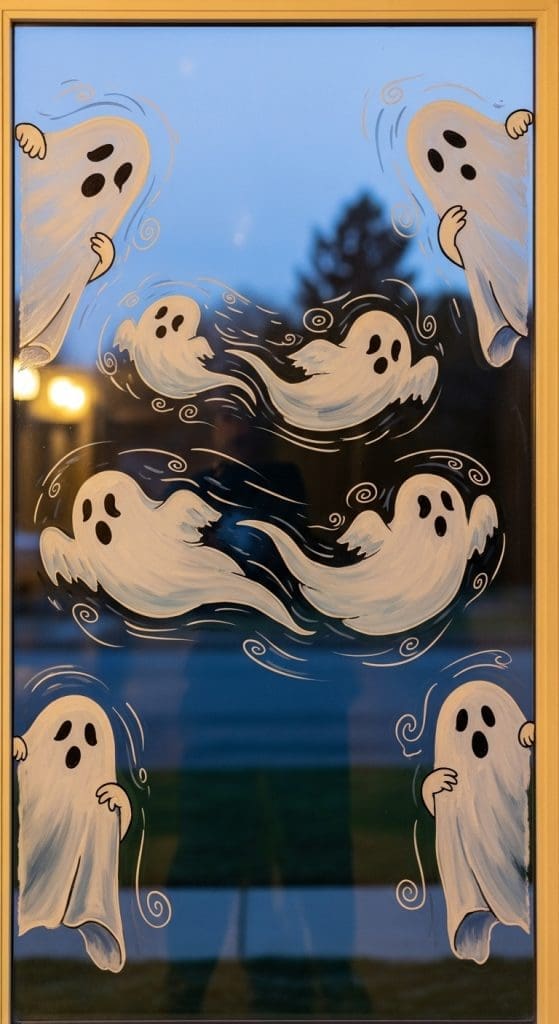
Ghosts are playful and spooky at the same time. I love the idea of having them “peek” from the edges or float across in a wavy line. They are a cute Halloween Window Painting!
Adding small swirls or wisps around them makes them look like they’re truly drifting in the air.
Plus they are perfect if you don’t want anything too big, you can paint one or you can paint five!
DIY Steps:
- Clean the window.
- Sketch ghost shapes with chalk.
- Fill in with white paint.
- Add expressive eyes and mouths with black paint.
- Optional: Add swirls or wisps around them.
- Let the paint dry completely.
6. Creepy Eyes in the Dark
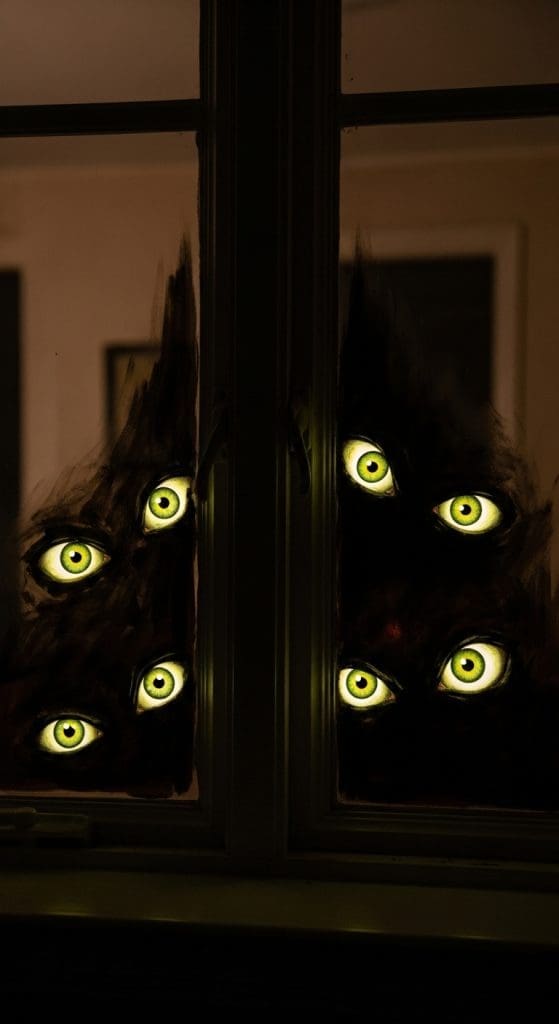
Peeking eyes are subtle but create a lot of suspense. I love the mysterious vibe this Halloween Window Painting gives, especially when just a few sets of eyes appear in a dark corner.
Using yellow, green, or white adds a glow that draws attention without showing the full creature.
DIY Steps:
- Clean the glass.
- Decide on eye placements.
- Sketch small ovals with chalk.
- Paint eyes in chosen colors.
- Add tiny black pupils for realism.
- Let dry fully.
7. Spider Web Corners
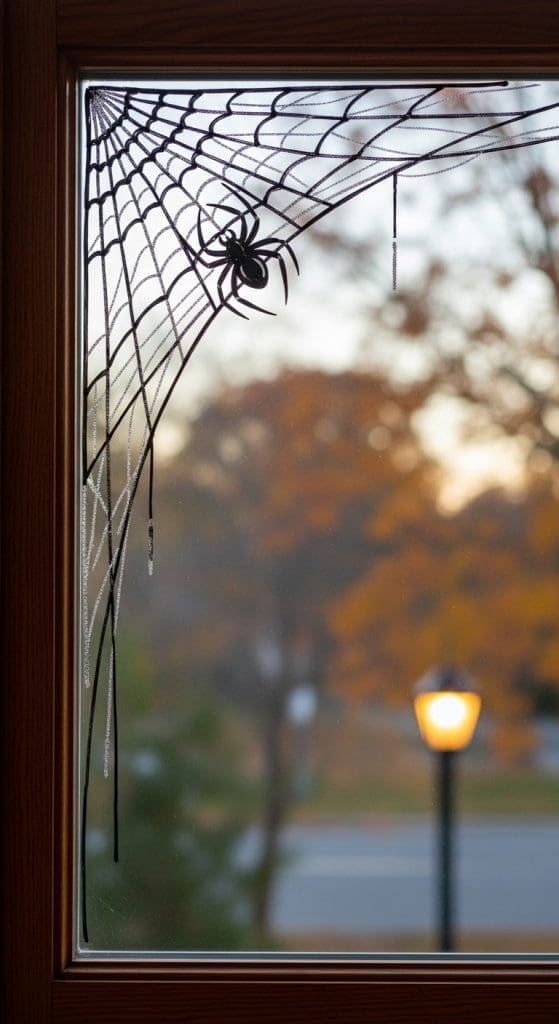
Spider webs are simple but visually striking Halloween Window Painting.
I love how a single corner web can make the whole window feel festive without covering the entire glass.
Adding a subtle shimmer or glitter makes it magical when light hits it.
DIY Steps:
- Clean your window.
- Draw a corner outline for the web with chalk.
- Paint thick web strands first.
- Connect strands with thinner lines.
- Optional: Lightly brush with glitter or metallic paint.
- Let dry completely.
8. Witch Silhouette
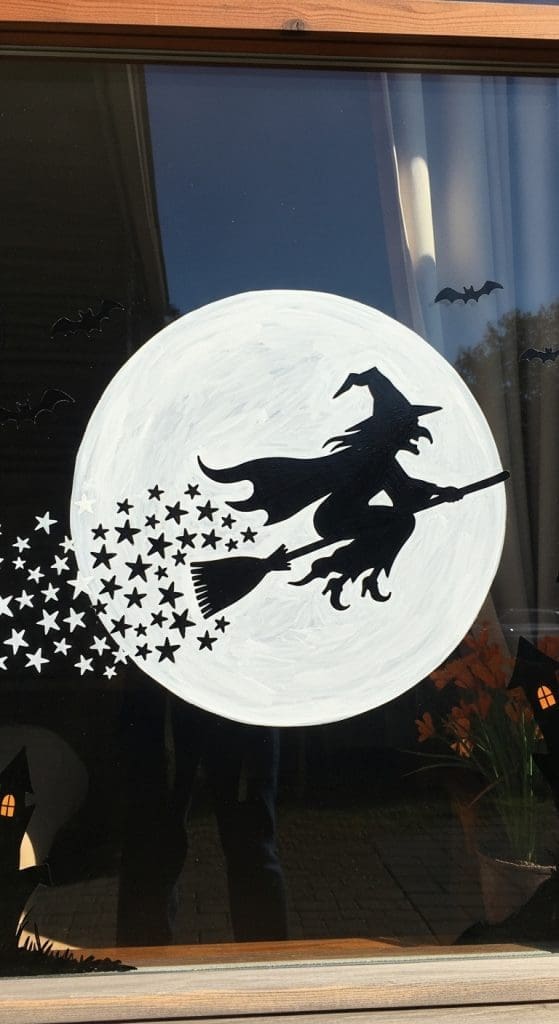
A witch flying across the moon is dramatic and iconic Halloween Window Painting.
Painting tiny stars around her broom will suggest motion and it really brings the scene to life.
This is a clever way to create a story without filling the entire window.
DIY Steps:
- Clean the window.
- Sketch a circular moon and flying witch.
- Paint the moon in soft yellow.
- Fill in the witch in black paint.
- Add optional stars or sparkles.
- Let dry fully before touching.
9. Falling Autumn Leaves
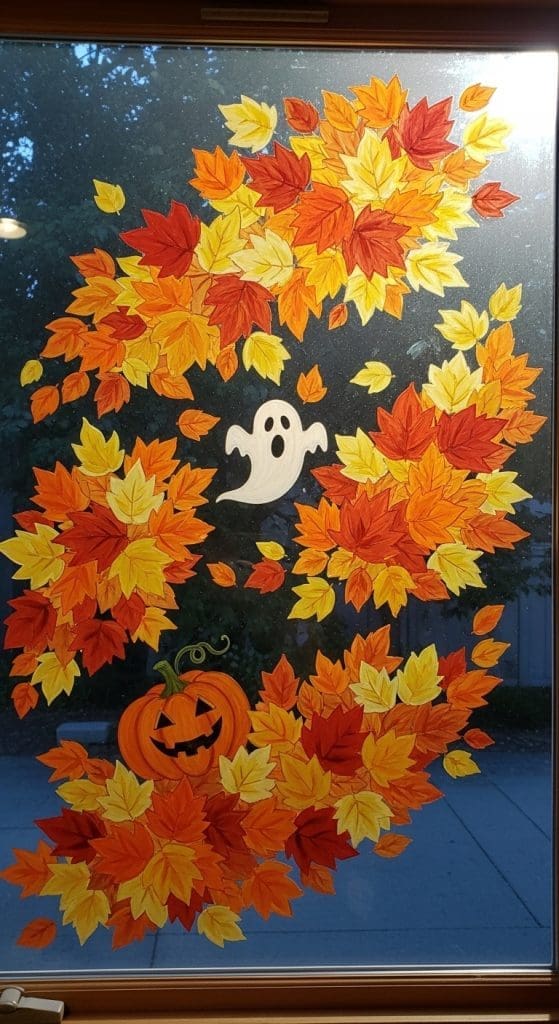
Adding leaves gives a seasonal twist, especially if you mix orange, red, and yellow.
I love the way layering different sizes and angles creates the illusion of movement, like a gentle fall breeze.
Pairing a leaf cluster with a small ghost or pumpkin adds depth.
DIY Steps:
- Clean window.
- Lightly sketch leaf shapes.
- Paint leaves in autumn colors.
- Layer smaller leaves over larger ones.
- Optional: Add faint veins with a thin brush.
- Let dry completely.
10. Graveyard Scene Halloween Window Painting
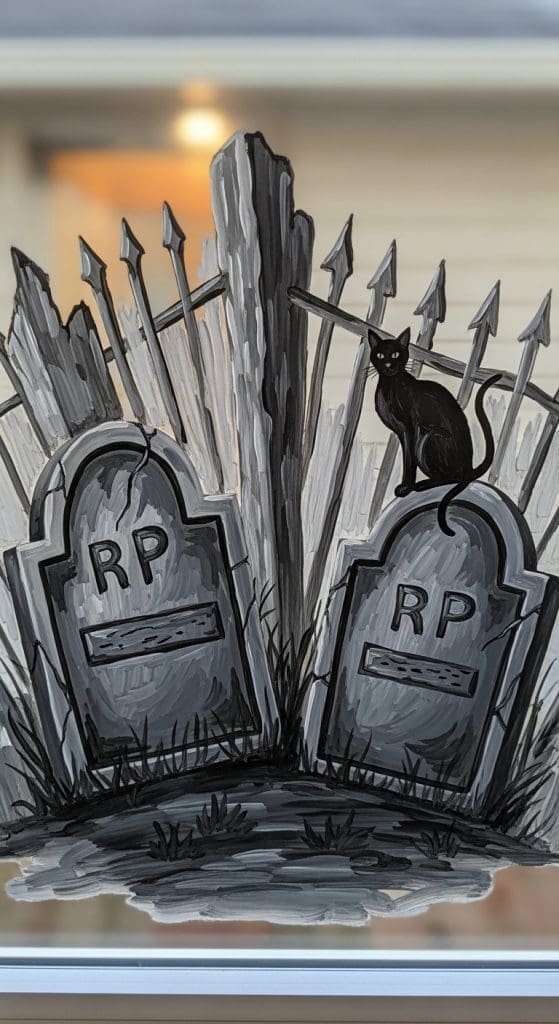
Tombstones, crooked fences, and a small black cat immediately evoke Halloween spookiness. Try mixing gray shades for dimension, it makes the graveyard feel real, not flat.
DIY Steps:
- Clean the window.
- Sketch tombstones and fence lines.
- Paint gray or black for structures.
- Add highlights for light reflection.
- Optional: Include a small black cat or ghost silhouette.
- Let dry fully.
11. Full Moon and Clouds
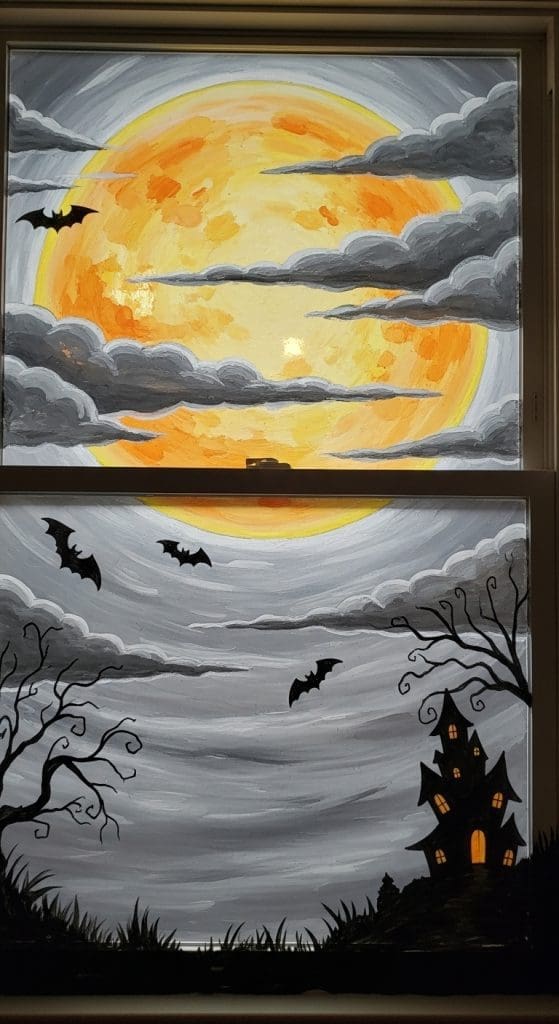
A full moon with drifting clouds is cinematic and subtle Halloween Window Painting.
Layering light grays over a yellow moon paint adds depth, giving a nighttime atmosphere. This works beautifully for large windows.
DIY Steps:
- Clean glass thoroughly.
- Sketch a circular moon lightly.
- Paint the moon in soft yellow.
- Add clouds with light gray strokes.
- Blend edges lightly for a soft effect.
- Let dry fully.
12. Candy Corn Pattern
Candy corn shapes add fun and festive color. Adding simple triangles with stripes can fill small spaces without feeling crowded. You can even scatter them randomly for a playful look.
DIY Steps:
- Clean window.
- Sketch triangles with chalk.
- Paint stripes: white tip, orange middle, yellow base.
- Fill in carefully.
- Optional: Outline in black for definition.
- Let dry completely.
13. Frankenstein Face Halloween Window Painting

Frankenstein is playful yet iconic Halloween Window Painting.
I love using blocky shapes and green paint, it’s beginner-friendly and instantly recognizable.
Adding stitches or scars gives extra personality.
DIY Steps:
- Clean window.
- Sketch square head and features lightly.
- Paint green base for the face.
- Add black hair, eyes, and stitched lines.
- Optional: Highlight with white for dimension.
- Let dry fully.
14. Mummy Wrappings

Mummies are clever and subtle Halloween Window Painting.
I love the effect of leaving small gaps for peeking eyes, it’s cute and creepy at the same time.
DIY Steps:
- Clean window.
- Sketch horizontal lines for wrappings.
- Paint stripes in white.
- Leave gaps for eyes.
- Paint small black and white eyes peeking through.
- Let dry completely.
15. Black Cat Silhouettes
Black cats are instantly spooky. Try varying the poses such as arched backs, sitting, stretching, for a dynamic effect.
Adding glowing eyes makes them pop even more.
DIY Steps:
- Clean window.
- Sketch cat shapes lightly.
- Fill in with black paint.
- Add yellow or green eyes for emphasis.
- Arrange for balance and spacing.
- Let dry fully.
16. Witch Hat Garland
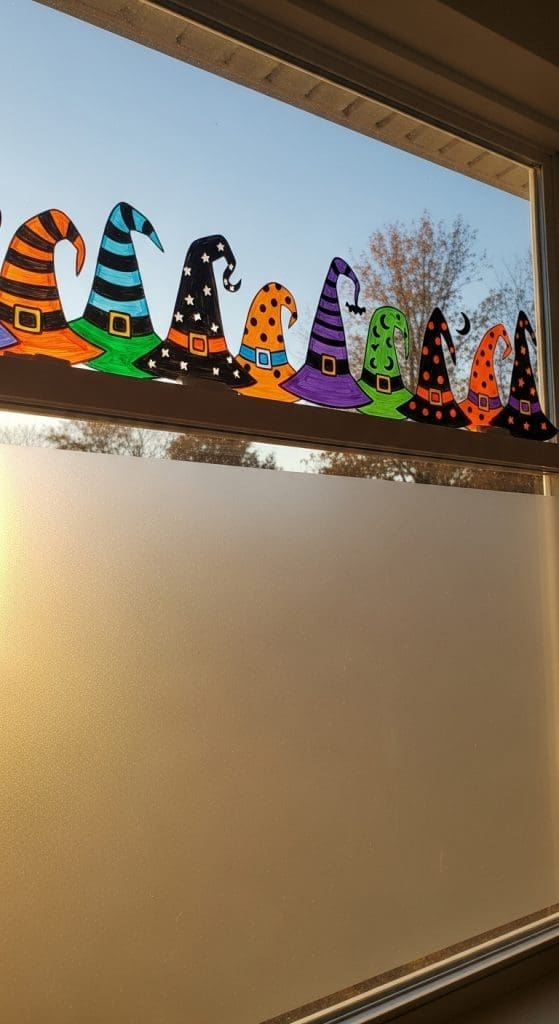
A series of witch hats along the top of the window is simple and whimsical.
It’s festive without covering the whole pane, and small details like stars or stripes make each hat unique.
DIY Steps:
- Clean window.
- Sketch small hat shapes along the top.
- Paint hats black.
- Add details like stripes or stars.
- Optional: Connect with thin painted line for garland.
- Let dry fully.
17. Spider Egg Sac
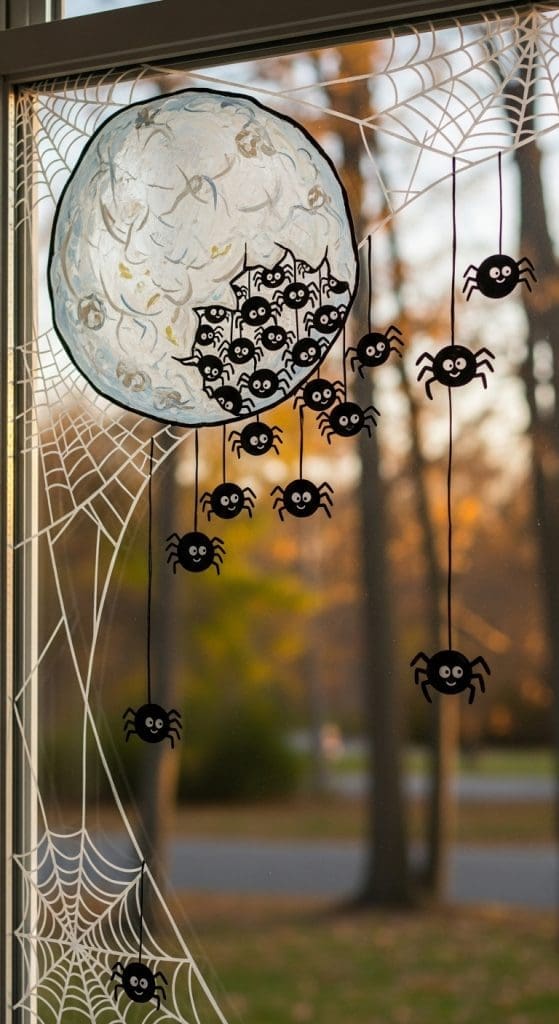
A spider egg sac with tiny baby spiders emerging is playful and creepy. It’s easy to do and you only need black and white window paint making it cost effective!
DIY Steps:
- Clean window.
- Sketch an oval for the sac.
- Paint sac in black or gray.
- Add small baby spiders peeking out.
- Optional: Add faint threads connecting to a larger spider.
- Let paint dry completely.
18. Skeleton Hands
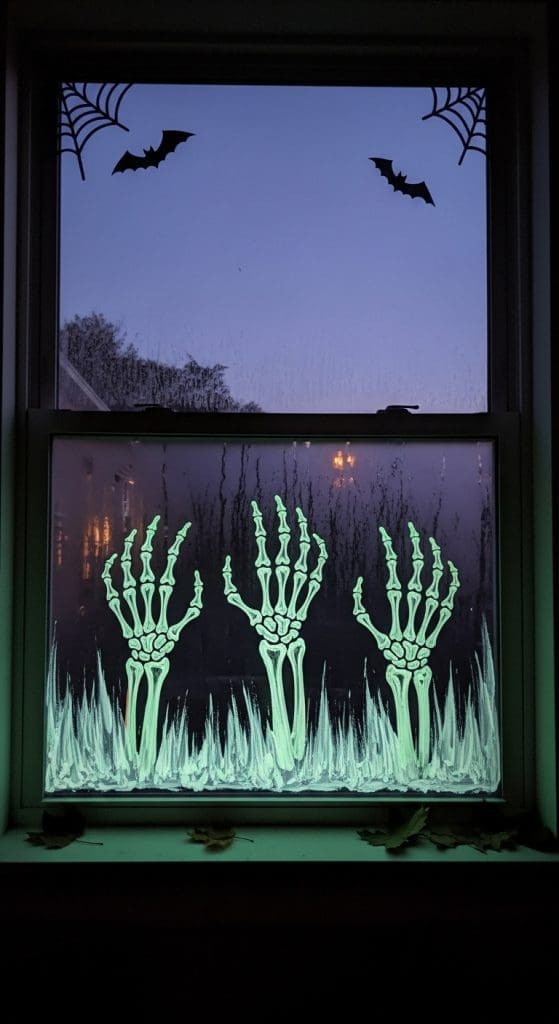
Skeleton hands reaching up are dramatic and fun. I love painting them from the bottom up for a “coming out” effect, which is perfect for larger windows.
Tip: Use glow-in-the-dark window paint for an extra eerie vibe at night!
DIY Steps:
- Clean window.
- Sketch hand shapes lightly.
- Paint bones in white.
- Add gray shading for depth.
- Optional: Paint cracks or details for realism.
- Let dry fully.
19. Eyeball Window Clusters
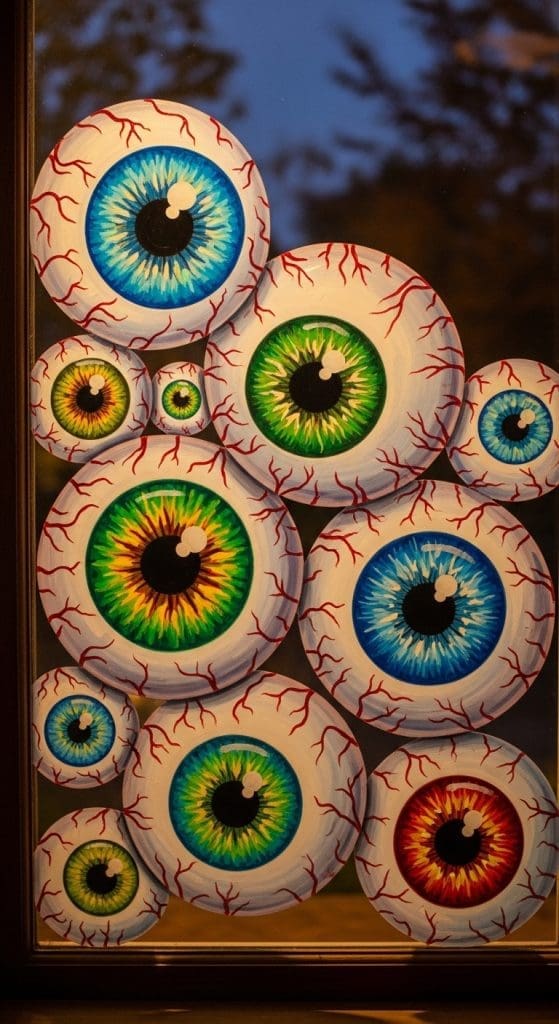
Clusters of giant eyeballs are fun and slightly creepy. This is a great DIY project and even one oversized eyeball painted on the window looks great for Halloween!
DIY Steps:
- Clean glass.
- Sketch round eye shapes lightly.
- Paint whites first, then iris and pupil.
- Add tiny white highlights for reflection.
- Optional: Scatter red veins lightly.
- Let dry fully.
20. Potion Bottles

Tiny potion bottles along the bottom of the window are whimsical. Try filling them with bright colors, it’s playful and adds a witchy vibe.
This is a perfect DIY project if you have kids as they can each decorate their own potion bottle!
DIY Steps:
- Clean window.
- Sketch bottle outlines lightly.
- Paint bottles in bright colors.
- Add stoppers or corks.
- Optional: Add labels or sparkles.
- Let dry completely.
21. Haunted Tree
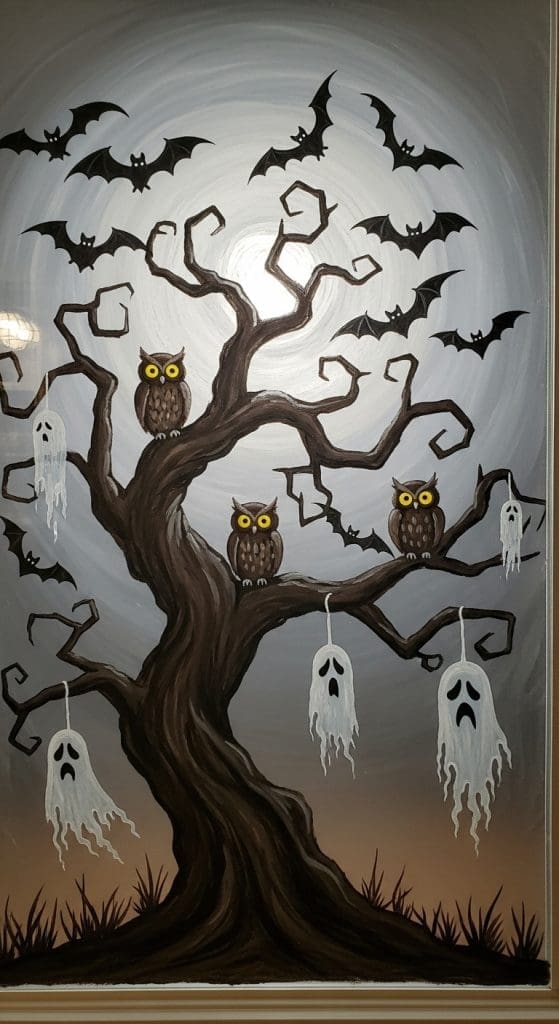
A twisted, haunted tree instantly sets a spooky tone. Adding owls, bats, or dangling ghosts will make the tree feel alive and add extra depth.
Tip: If you don’t feel confident painting a tree you can always use a window stencil and then finish the tree off with simple ghosts and bats!
DIY Steps:
- Clean window.
- Sketch twisted tree outline.
- Paint trunk and branches in black.
- Optional: Add owls or ghosts perched on branches.
- Blend edges lightly for depth.
- Let dry fully.
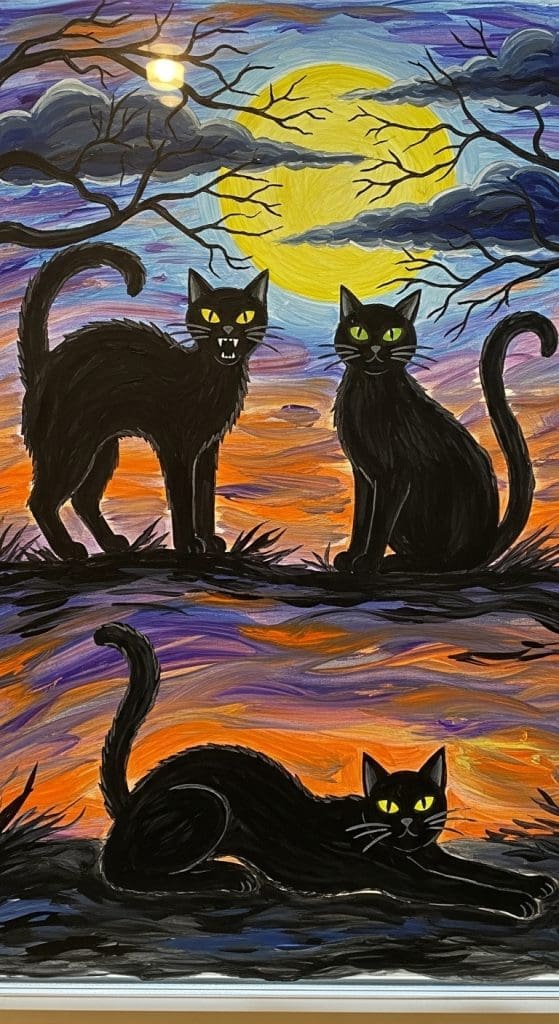
22. Moonlit Cat Silhouette
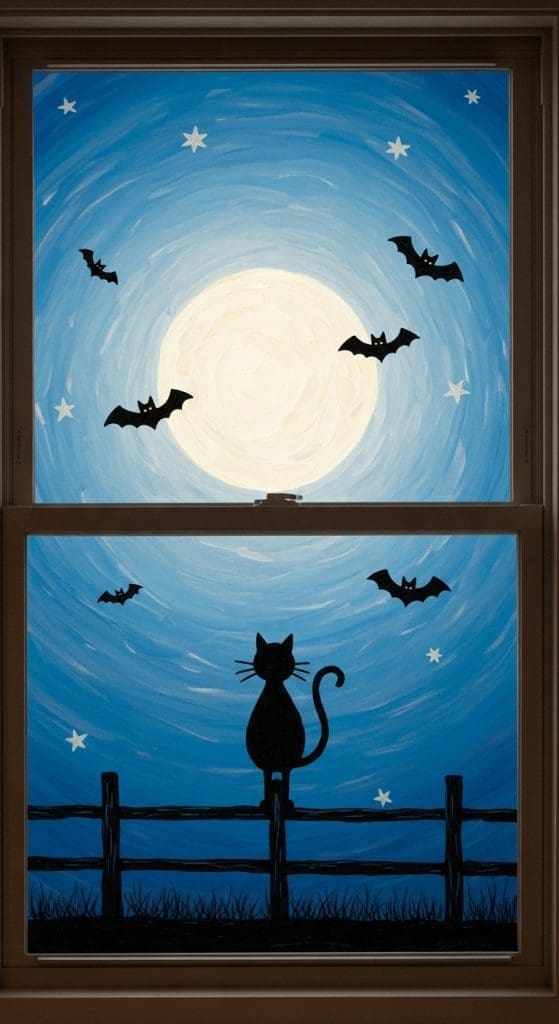
A black cat on a fence under a glowing moon is cozy yet eerie. I love adding stars or flying bats for extra storytelling.
The one above has added layers of blue paint, but this Halloween window art looks great just as a black silhouette.
DIY Steps:
- Clean window thoroughly.
- Sketch moon, cat, and fence lightly.
- Paint moon yellow.
- Paint cat and fence in black.
- Optional: Add stars or bats around moon.
- Let dry completely.
If you liked this post why not take a look at our other DIY Halloween posts 17 Scarecrow Ideas to Try This Fall