








DIY rainwater harvesting ideas can make it much easier to collect and reuse rain for gardens, raised beds, greenhouses, and outdoor plants without installing an expensive system. From simple barrels and gutter setups to slimline tanks, swales, and decorative catchment ideas, there are plenty of beginner-friendly ways to save water and make better use of rainy days.
These DIY rainwater harvesting ideas include everything from a basic Rainwater Collection System and practical Rainwater Harvesting System to simple Rain Catchment System projects, small Rain Water Harvesting Model ideas, and clever features inspired by Rainwater Harvesting Architecture. Whether the garden is in full sun, partial shade, beside a shed, around a greenhouse, or squeezed into a narrow side yard, these easy setups are practical, affordable, and realistic for beginners.
1. Start With a Simple Gutter-to-Barrel System
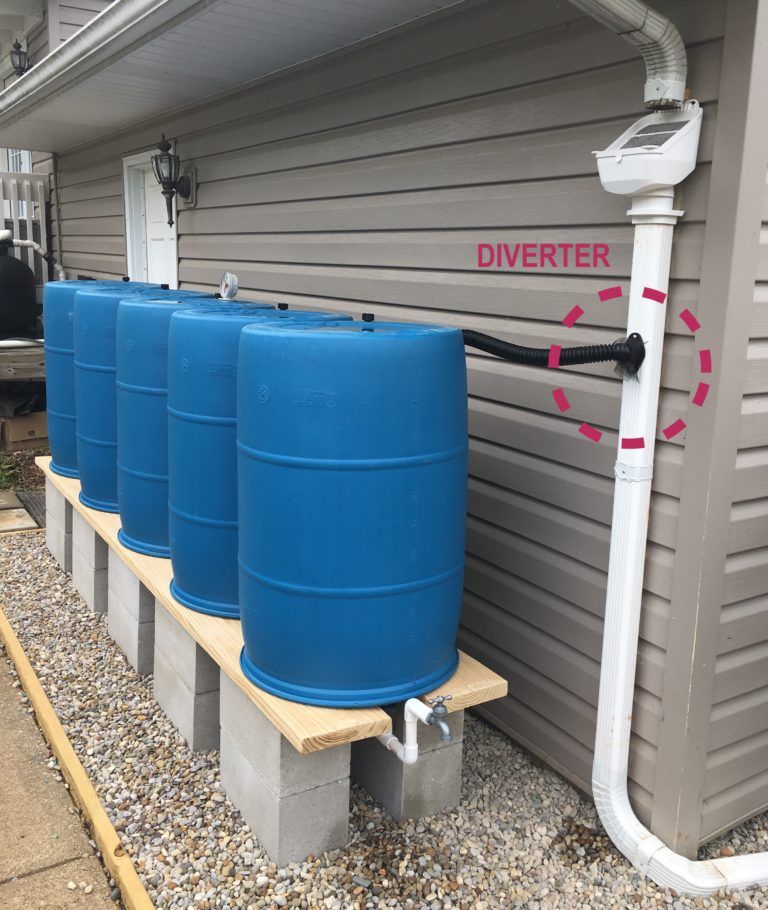
A single rain barrel under a downspout is one of the easiest ways to start collecting useful amounts of water.
Choose a sturdy, opaque barrel with a secure lid, then position it beside a garage, shed, greenhouse, or house downspout.
A downspout diverter can send rain directly into the barrel without requiring complicated alterations to the existing gutter. Adding mesh over the inlet keeps leaves, insects, and larger debris from dropping into the stored water.
A tap installed near the bottom makes filling watering cans much easier than dipping containers into the top.
This beginner-friendly Rainwater Collection System can supply water for flower beds, containers, and ornamental plants without taking over the garden.
Raise the barrel slightly on concrete blocks or a purpose-made stand so a watering can fits comfortably beneath the tap.
2. Turn a Garden Shed Into a Mini Water-Harvesting Station
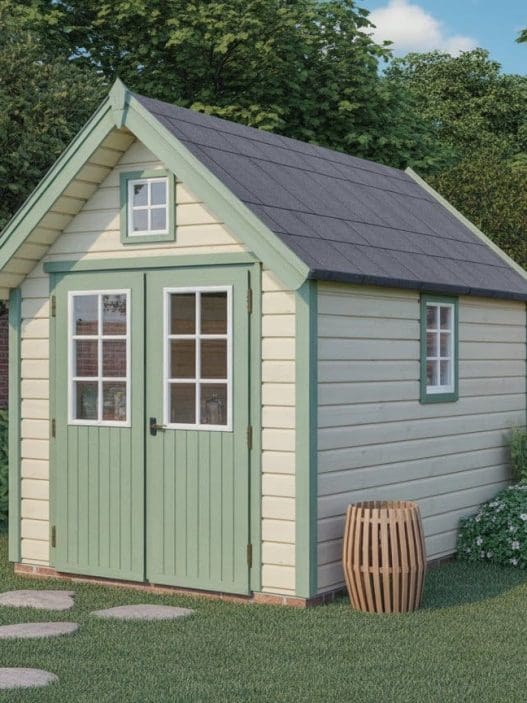
That little shed roof can collect far more rain than it might seem.
Install inexpensive guttering along the lowest edge of the shed roof and direct it toward a water butt positioned beside the building.
The small roof area keeps the project manageable for anyone trying DIY rainwater harvesting for the first time. A dark green, brown, or charcoal barrel can blend quietly into fencing and planting instead of looking like industrial equipment.
In a shaded corner, surround the barrel with ferns, hostas, or pots of leafy plants to soften the appearance further. The stored water can stay close to garden tools, seed trays, and potting supplies, which makes everyday watering more convenient.
3. Connect Two Rain Barrels for Extra Storage
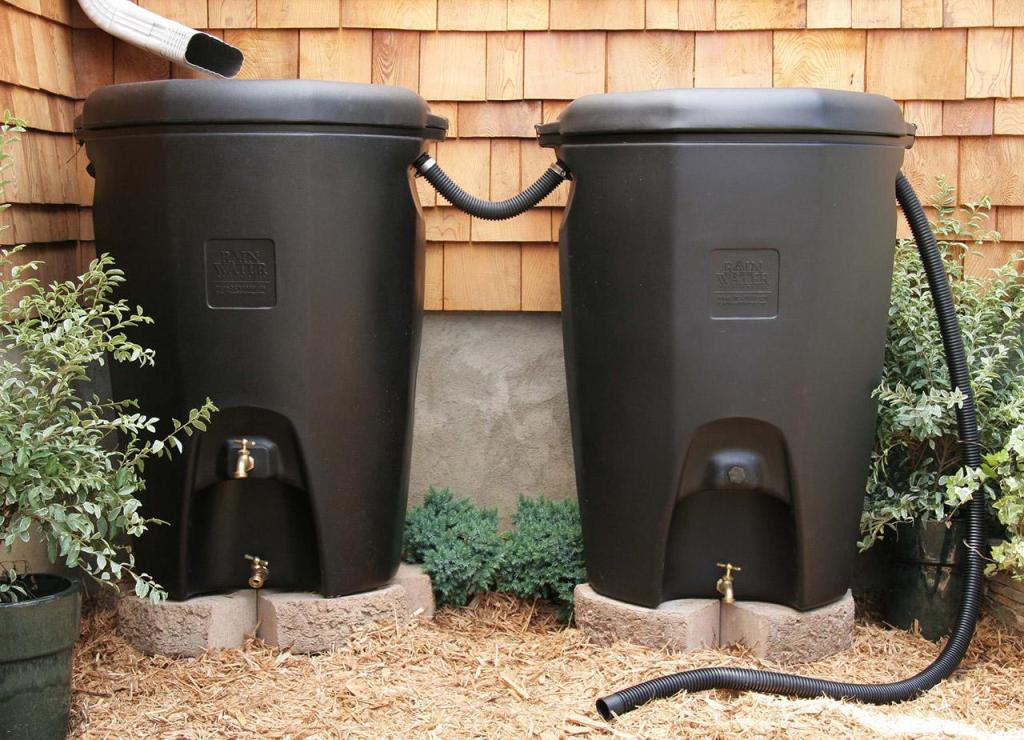
One overflowing rain barrel is usually a good sign that a second one could earn its place.
Position two matching barrels side by side and connect them with a barrel-linking kit or suitable overflow hose. As the first container fills, excess rain moves into the second instead of immediately draining away.
This gives a small Rainwater Harvesting System noticeably more capacity without changing the gutter or roof collection area.
Matching barrels also look tidier beside a patio, garage, or garden fence than a collection of mismatched containers.
For full-sun locations, choose covered, UV-resistant barrels to protect the containers and reduce light entering the stored water.
4. Add a First-Flush Diverter
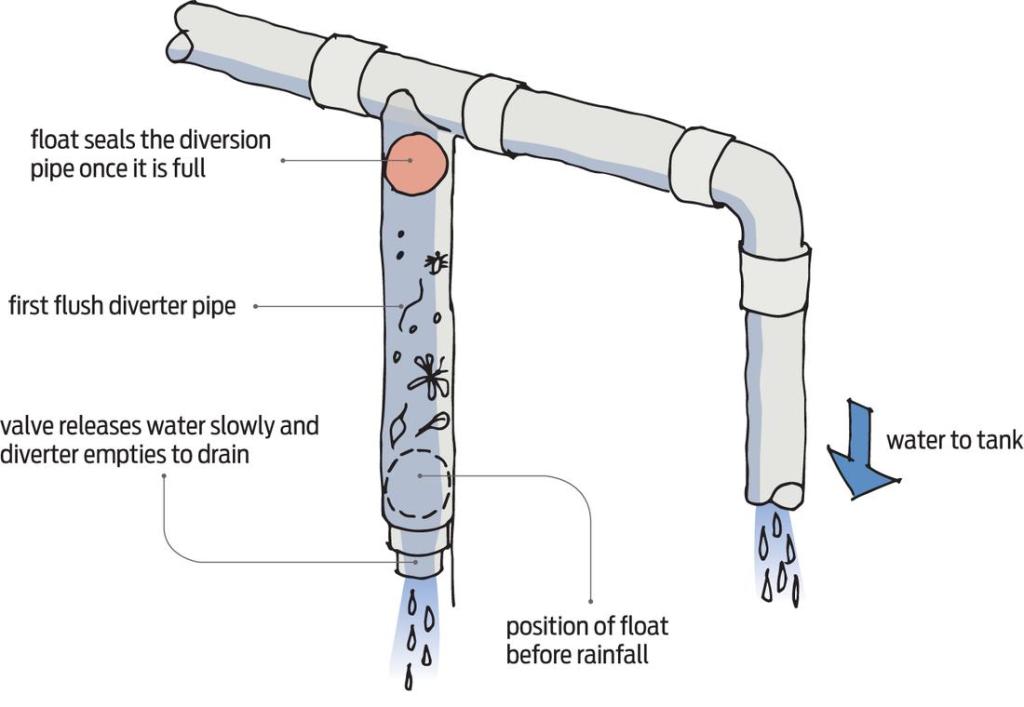
A first-flush diverter is a small upgrade that can make collected rainwater noticeably cleaner.
The first rainfall running across a roof can carry dust, pollen, bird droppings, and loose debris toward the gutter. So a first-flush device temporarily directs that initial runoff away before cleaner rain begins entering the storage barrel.
It is a useful addition when creating a more considered Rain Catchment System, particularly beneath larger house or garage roofs.
Many compact versions can be installed vertically beside a downpipe, so they do not require much extra garden space. Combine the diverter with gutter guards and an inlet screen for several simple layers of debris control.
5. Build a Raised Rain Barrel Stand
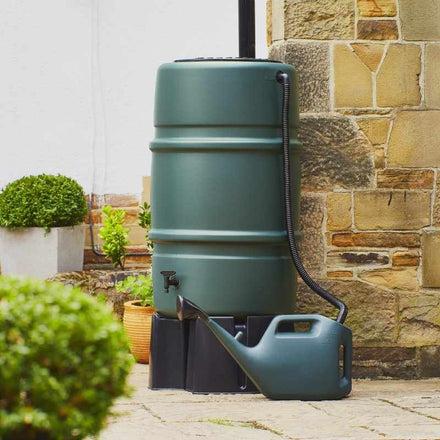
Build a low platform from exterior-grade timber, concrete blocks, or sturdy paving materials capable of supporting the weight of a full tank.
The extra height creates room beneath the tap for buckets and large watering cans.It can also provide a little more gravity pressure when connecting a short hose or simple drip-watering line.
A neat timber surround can make basic DIY rainwater harvesting feel like an intentional part of the garden rather than an added utility container.
Remember that water is heavy, so keep the platform low, level, solid, and wider than the base of the barrel.
6. Hide an IBC Tank Behind a Simple Timber Screen
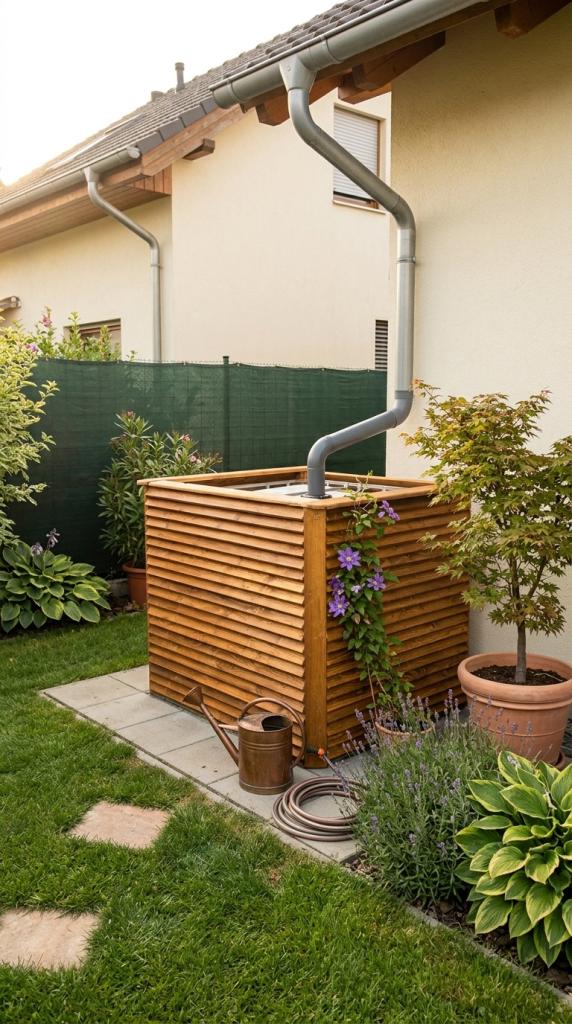
A standard IBC container can hold considerably more rainwater than a typical domestic rain barrel, making it useful beside large roofs and productive gardens.
The practical plastic-and-metal appearance can be softened with a freestanding slatted screen positioned around the visible sides.
Leave the top, fittings, and inspection points accessible so cleaning and maintenance do not become frustrating later.
This is a straightforward way to borrow the integrated look often seen in Rainwater Harvesting Architecture without constructing a permanent tank enclosure.
If you want the timber to blend more into its surroundings paint the timber screen to match a fence, shed, or raised beds so the entire setup feels connected to the landscape.
7. Feed a Drip-Irrigation Line From the Rain Barrel
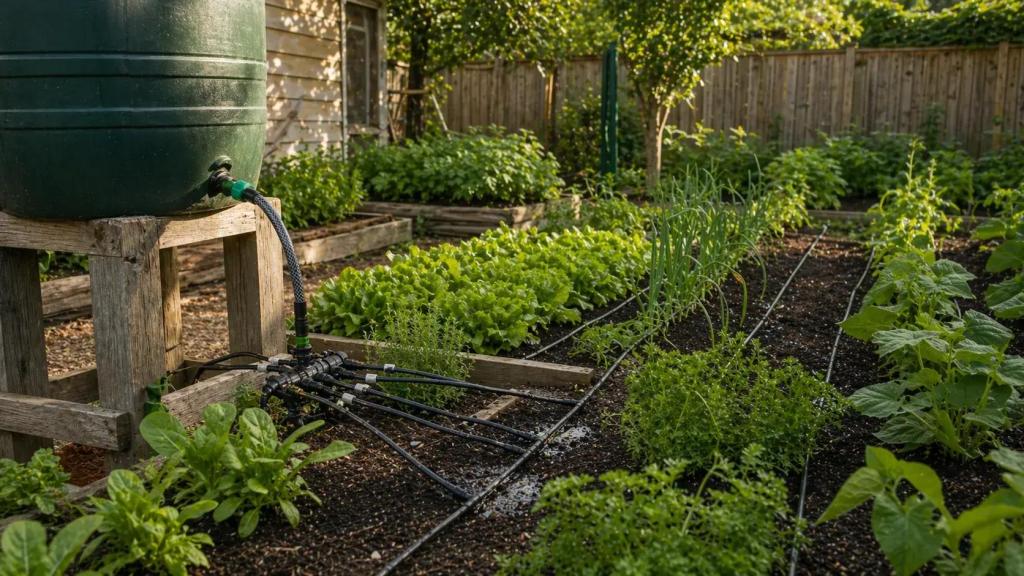
Collected rainwater becomes even more useful when it can reach plants slowly and directly.
Raise the barrel on a secure stand and connect a simple gravity-compatible drip line to the lower outlet. Run the tubing through a raised bed, greenhouse border, or row of container plants rather than repeatedly carrying watering cans across the garden.
Slow delivery places moisture around the root zone instead of splashing large amounts across paths and leaves.
This turns a basic barrel into a more functional Rainwater Harvesting System without adding an electric pump. A filter between the tank and drip tubing can help prevent small particles from clogging narrow emitters.
8. Create a Greenhouse Rainwater Collection Setup
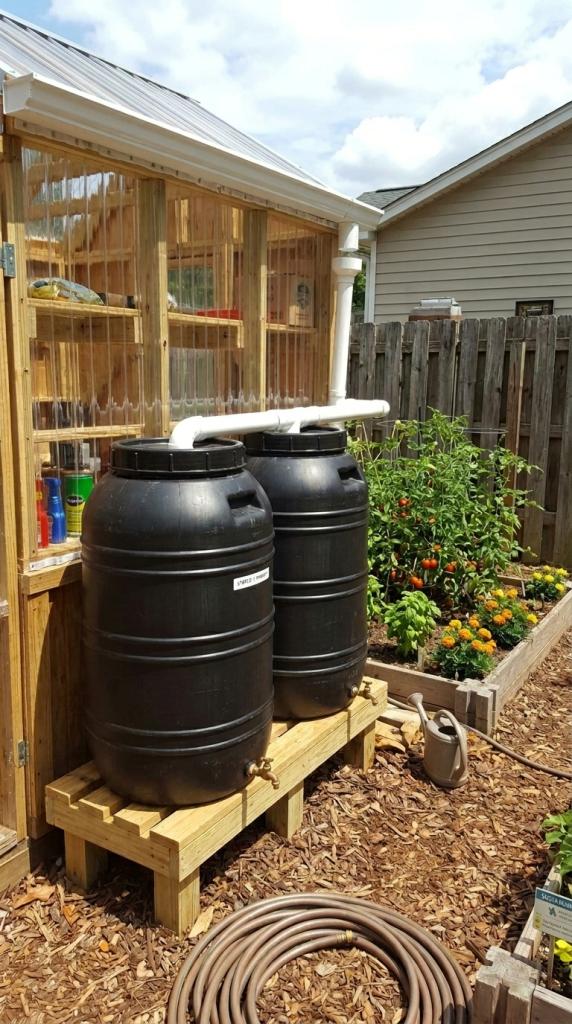
A greenhouse can collect water for the exact plants growing just a few steps away.
Fit guttering to the greenhouse eaves and direct each side toward one or two slimline water butts. Even a modest greenhouse roof can provide a useful supply during regular rainfall.
Keeping the storage beside the greenhouse means seed trays, tomatoes, peppers, and potting mixes can be watered without carrying containers across the whole garden.
For an extra practical touch, place a small watering can permanently beside the tank so water is always ready for quick greenhouse checks.
9. Use a Decorative Rain Chain With a Collection Barrel
Replace a suitable section of downspout with a rain chain that guides water from the gutter toward a covered collection container below.
During a shower, water slipping down metal cups or linked chains creates a pretty moving feature rather than disappearing inside a pipe.
Copper-style chains look lovely beside brick, timber, and cottage gardens, while black metal suits more contemporary spaces.
The barrel still handles the practical storage side of the Rain Catchment System, so the decorative feature is not purely ornamental.
Position smooth stones around the inlet area to help disguise plumbing and visually connect the barrel to surrounding planting.
10. Build a Compact Rainwater Setup for a Narrow Side Yard
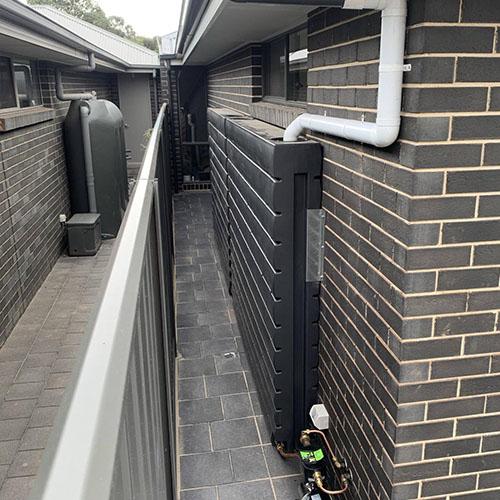
A slim space between the house and fence can become one of the most useful watering areas in the garden.
Choose a narrow water butt designed to sit close to a wall rather than a traditional wide barrel. Connect it to a nearby downpipe with a diverter so rain is captured without blocking the walkway.
Vertical tanks use height rather than floor space, which makes them practical for small suburban gardens and tight side passages.
11. Send Overflow Into a Rain Garden
Instead of wasting barrel overflow, guide it toward plants that can make use of occasional extra water.
Attach an overflow hose near the top of the barrel and run it toward a shallow planted depression located safely away from building foundations. The area can temporarily receive excess rain when the storage tank is already full.
Moisture-tolerant planting turns the overflow zone into part of the landscape rather than creating a muddy puddle beside the tank.
Choose plants appropriate for local soil, light, drainage, and climate rather than assuming every moisture-loving plant suits every rain garden. A mix of grasses and flowering perennials can make the area attractive even during periods when no overflow is reaching it.
12. Collect Rainwater Beside Raised Vegetable Beds
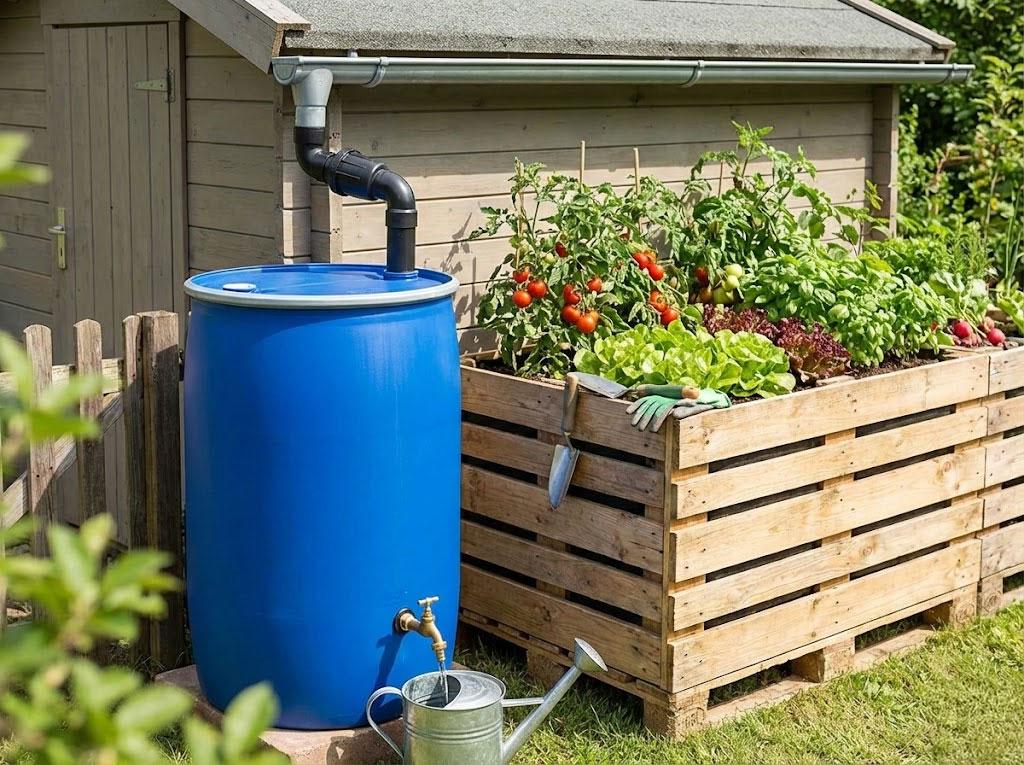
Keeping stored rain close to vegetables can make regular watering much easier.
Place a barrel beside raised beds and connect it to the nearest suitable shed, greenhouse, or garage gutter. The short distance between tank and crops makes grabbing one watering can feel much less like a chore.
It is particularly helpful for thirsty summer crops growing in full sun, including tomatoes, cucumbers, beans, courgettes, and leafy greens. Mulching the beds after watering can help the soil retain that valuable moisture for longer.
This simple arrangement is an approachable Rainwater Harvesting System for anyone interested in growing food without installing pumps or underground plumbing.
13. Make a Mini Rain Water Harvesting Model Before Building
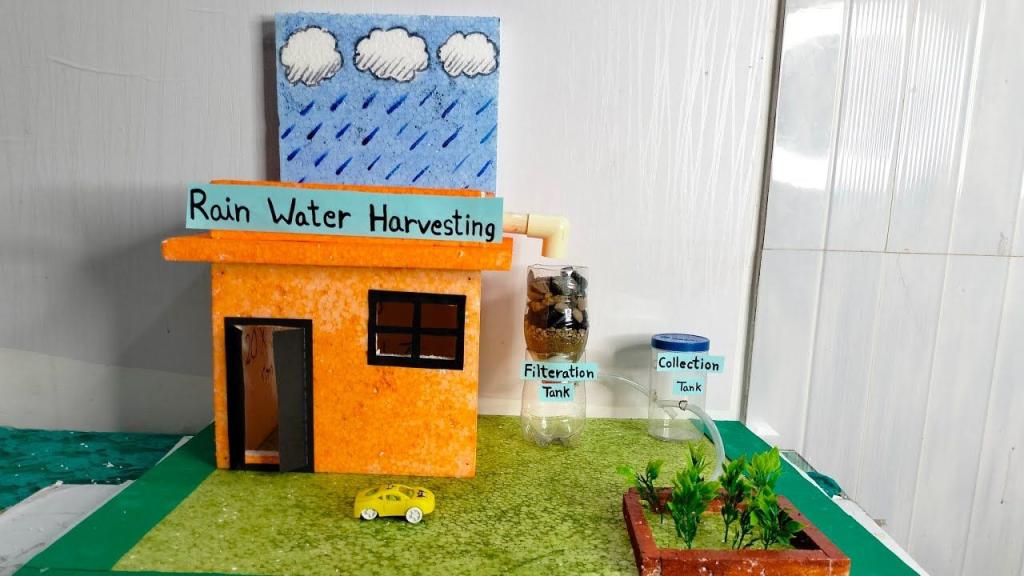
A small model can make the flow of water much easier to understand before any holes are drilled.
Create a simple Rain Water Harvesting Model using a cardboard roof, drinking straws or tubing for gutters, a mesh filter, and a small bottle representing the storage tank. Pour a little clean water over the roof and watch how gravity moves it through each part of the system.
This makes it easy to spot why gutters need a slight fall and why the storage inlet needs to sit below the collection point.
The model is also useful for deciding where an overflow pipe, filter, and tap should go.
Beginners who feel unsure about plumbing often find the system much less intimidating once the entire route is visible in miniature.
14. Add a Simple Leaf Screen to the Gutter
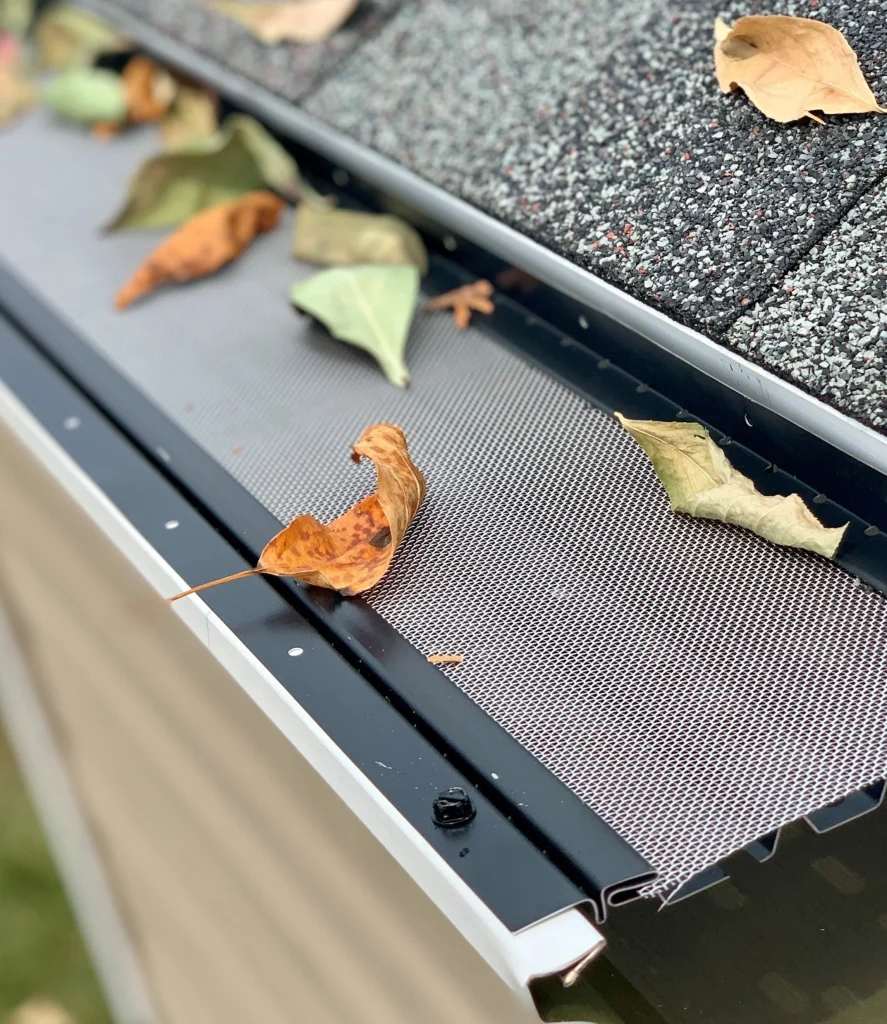
Keeping larger debris out at the beginning makes the rest of the system easier to maintain.
Fit an appropriate leaf guard or gutter screen where leaves frequently collect above the rain barrel connection. Stopping twigs and large leaves before they travel down the pipe reduces the amount of debris reaching filters and storage containers.
It is a particularly sensible upgrade beneath mature trees or beside shaded gardens where falling leaves can quickly fill gutters in autumn.
The screen still needs occasional checking, so choose a design that can be reached safely rather than creating an inaccessible maintenance job.
15. Turn a Pergola or Covered Patio Roof Into a Catchment Area
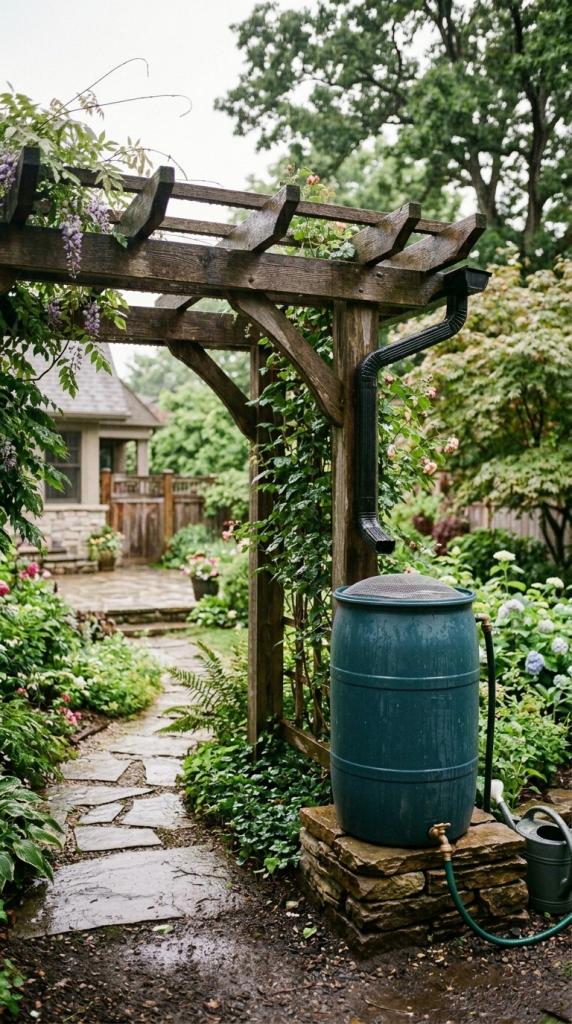
A garden structure can become a useful source of water instead of simply providing shade.
If the pergola or covered patio has a suitable solid roof, fit guttering along its lower edge and direct rainfall into a nearby barrel. The collected water can then be used for the pots, climbers, and planters already surrounding the seating area.
Timber screening or large containers of shade-tolerant plants can help the tank blend into the relaxing atmosphere of the patio.
16. Create a Decorative Garden Dipping Tank
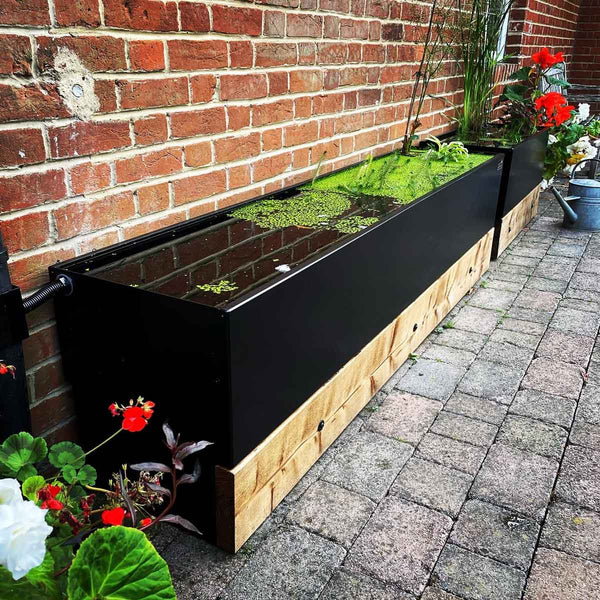
Turn rainwater storage into a garden feature with a wide, open dipping tank that looks more like a water feature than a utility barrel.
A shallow galvanized trough, corten-style tank, stone basin, or large weatherproof container can collect rain from a nearby roof or downspout.
Instead of hiding the water away inside a traditional barrel, the surface remains visible, reflecting surrounding plants and changing with the weather.
A screened inlet can direct roof runoff into the tank while helping keep larger debris out of the stored water. This style of DIY rainwater harvesting suits courtyards, cottage gardens, and patios where a standard plastic water butt would feel visually heavy.
A galvanized livestock trough beneath a shed gutter would be an easy beginner version, while a corten-style container creates a more modern Rainwater Harvesting Architecture look.
17. Build a No-Gutter Rain Catchment Barrel
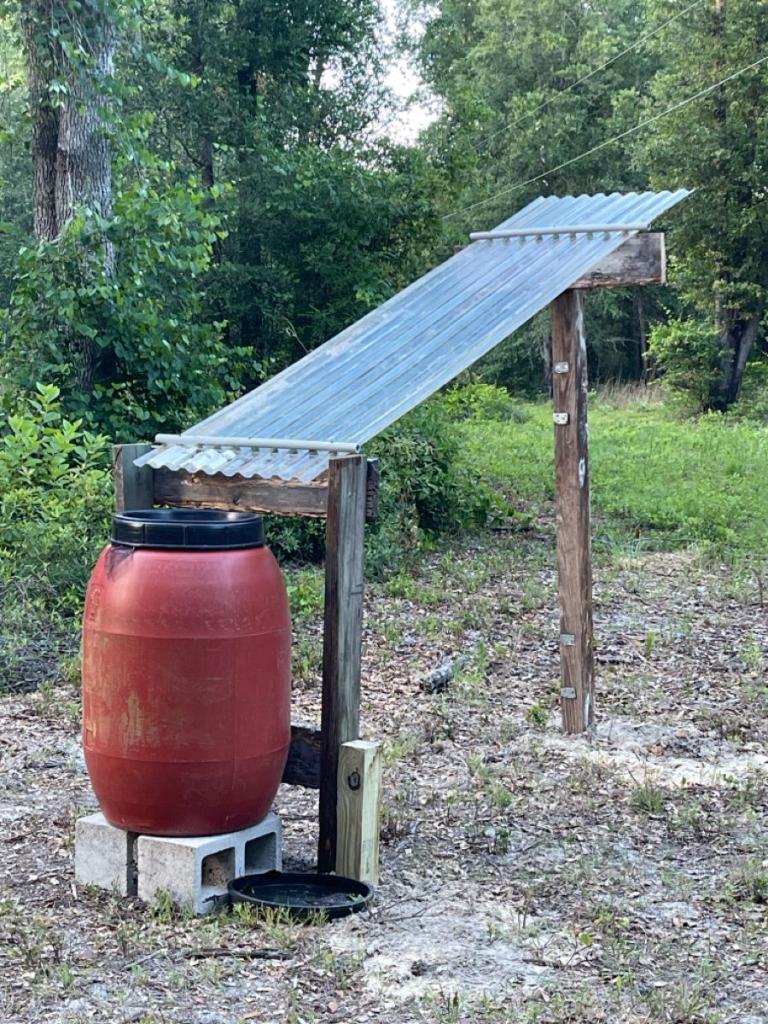
No gutter? A strategically positioned barrel can still catch rain falling directly from the edge of a small roof.
Place a wide, covered container beneath the drip line of a shed, lean-to, chicken coop, or other small garden structure where rain naturally pours from one edge. A broad funnel or screened collection tray on top increases the catchment area and directs more of that falling water into the container.
It is particularly useful for renters, beginner DIY projects, or small structures where fitting permanent guttering feels unnecessary.
Keep the inlet screened and add an overflow hose so heavy rainfall has somewhere safe to go once the container fills.
18. Create a Rainwater Swale Through the Garden
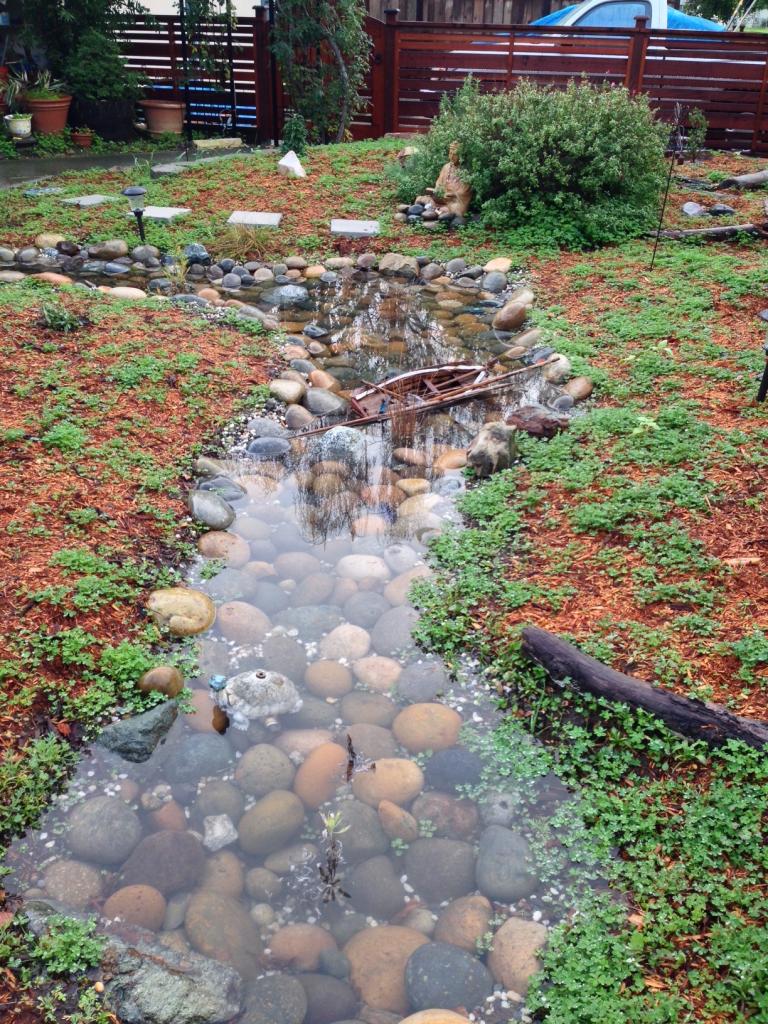
Instead of collecting every drop inside a tank, shape the garden itself so rainfall is captured where plants can use it.
A swale is a shallow channel or depression that intercepts runoff and allows water to spread slowly through the soil rather than racing toward a drain.
It can collect rain moving from a lawn, path, shed area, or gently sloping section of the garden.
For beginner-friendly DIY rainwater harvesting, the swale does not need to be huge, even a shallow curved trench can redirect useful amounts of runoff toward planting.
Line the lower side with soil, stones, grasses, shrubs, or moisture-tolerant plants so the feature looks deliberately landscaped rather than like a drainage ditch.