








Creating spooky yet stylish DIY Halloween Outdoor Decorations decorations is one of the best ways to celebrate Halloween. Whether you want to impress trick-or-treaters, entertain neighbors or simply enjoy the festive atmosphere, having a plan for your front yard decorations is key. In this article, we will share 20 DIY Halloween outdoor decorations ideas for front yards and porches that are beginner-friendly, cost-effective, and easy to set up without professional help.
Each idea is designed for homeowners and renters who want to get creative without relying on complicated tools or materials. From DIY props to budget lighting tricks, these suggestions focus on simple Halloween front yard decor that still has maximum impact. Let’s explore what works and why.
This post uses affiliate links which help support our blog. We earn a small commission from each link. You will not be charged anything extra for using the link.
1. Glowing Ghost Lanterns Halloween Outdoor Decorations

We recommend creating ghost lanterns using empty milk jugs or large white plastic containers filled with battery-powered lights.
White plastic diffuses light well and gives off a soft, eerie glow. Drawing spooky faces on the outside with a black permanent marker adds character, making them perfect for lining walkways.
The combination of ambient lighting and ghostly shapes makes a strong visual impact with minimal effort, which is ideal for beginner-friendly Halloween decor.
DIY Steps
- Rinse and dry empty milk jugs or white plastic containers.
- Draw ghost faces using a black permanent marker.
- Cut a small hole in the back or bottom.
- Insert battery-powered LED string lights or candles.
- Set them along walkways or garden beds.
- Turn the lights on at dusk for glowing effect.
2. DIY Floating Witch Hats Simple Outdoor Halloween Decor
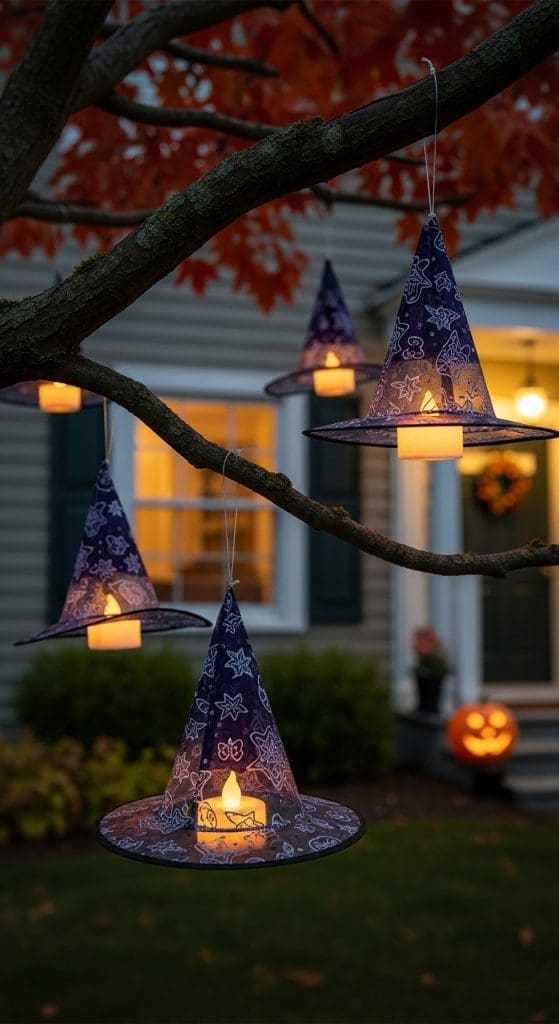
We suggest hanging lightweight witch hats from tree branches or porch ceilings using transparent fishing line.
Inside each hat, you can place a small battery-powered LED tealight to create a floating, glowing illusion.
This idea works great in outdoor spaces because the hats are light enough to sway slightly in the wind, adding an eerie movement.
DIY Steps
- Buy or repurpose lightweight fabric witch hats.
- Poke a small hole in the top of each hat.
- Thread fishing line through and tie securely.
- Attach a battery-powered LED tealight inside.
- Hang from tree branches or porch beams.
- Adjust height and spacing for floating effect.
3. Cornstalk and Pumpkin Clusters
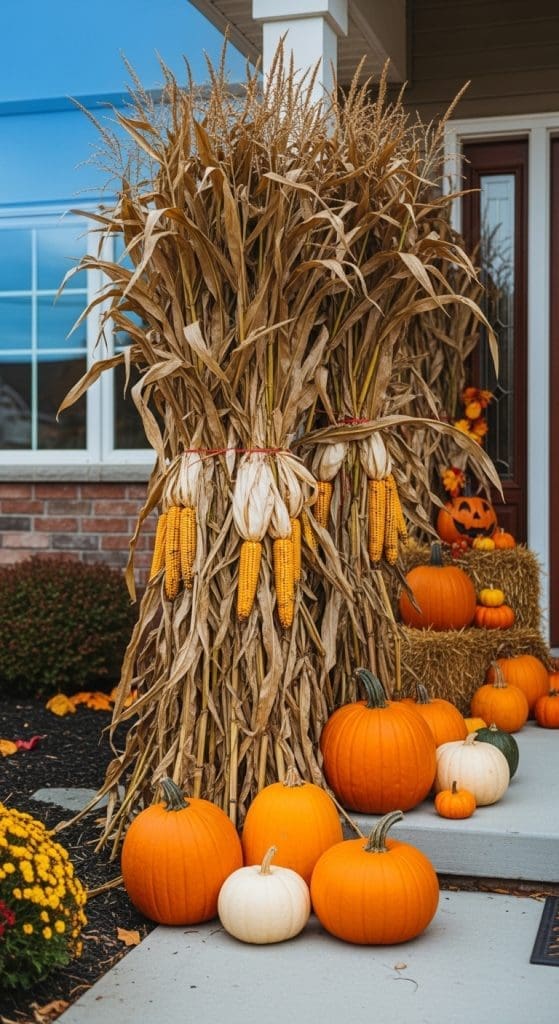
We use dried cornstalks bundled together and placed near entryways, paired with pumpkins of varying sizes.
This combination works because it visually balances fall harvest decor with Halloween elements.
It’s a low-maintenance way to decorate and looks festive during both daytime and evening hours.
Adding a few faux spiders or small skeletons transforms this display into a Halloween-ready arrangement without being overly scary.
DIY Steps
- Buy dried cornstalk bundles from a farm or garden store.
- Arrange upright against a porch post or entryway.
- Tie with twine or raffia to keep in place.
- Set pumpkins of different sizes around the base.
- Add faux spiders, cobwebs, or skeleton hands.
- Use a spotlight for nighttime effect.
4. PVC Pipe Graveyard Fence
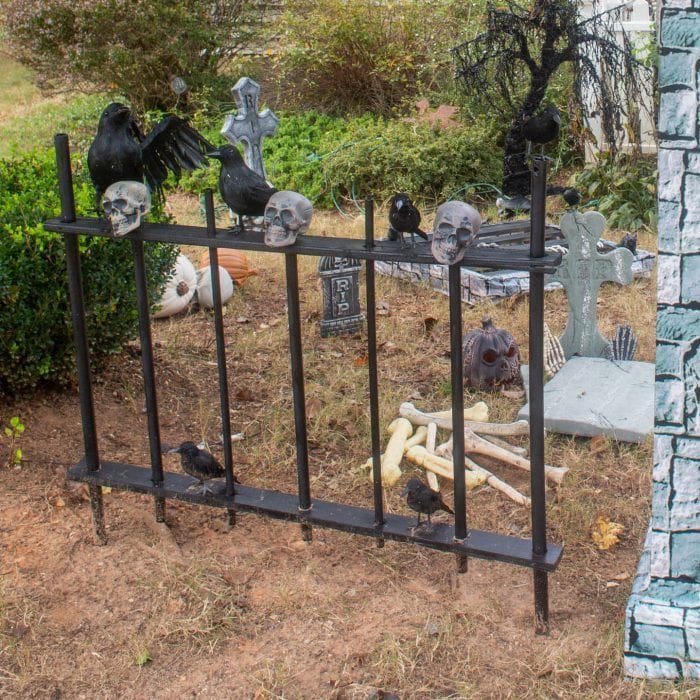
We recommend constructing a lightweight faux cemetery fence using PVC pipes and spray paint.
Painting the pipes black and connecting them with elbow joints creates a classic wrought iron appearance.
Using PVC instead of metal keeps it budget-friendly and easy to move or store between seasons.
DIY Steps
- Cut PVC pipes into vertical and horizontal sections.
- Spray paint all pieces black or dark gray.
- Connect vertical posts with elbow or T-joints.
- Hammer wooden stakes into the ground.
- Slide PVC fence posts over the stakes.
- Optional: Attach plastic skulls, faux crows or signs.
5. Trash Bag Spider Webs
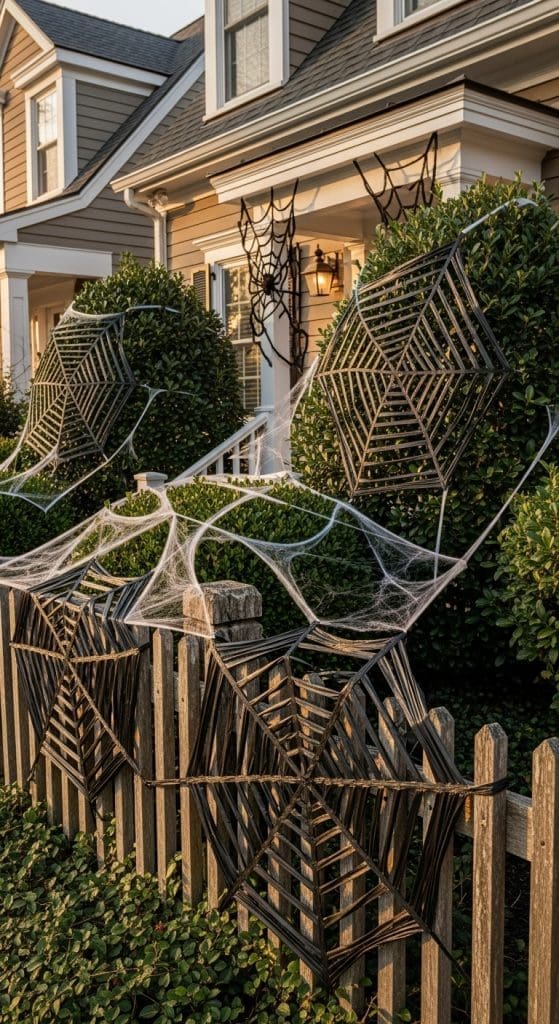
We suggest making large spiderwebs using black trash bags, cut into web patterns and stretched across bushes or fences.
This looks great in neighbourhoods because the dark material stands out against greenery and brick, and the plastic holds up well outdoors.
We often pair these webs with oversized fake spiders for added impact. It’s a fast and affordable way to fill vertical space and make the yard feel transformed.
DIY Steps
- Lay out a clean black trash bag flat.
- Fold it in half twice to create a triangle.
- Cut out shapes like you would for a snowflake.
- Unfold to reveal a spiderweb pattern.
- Use tape, thumbtacks, or string to attach to surfaces.
- Add plastic spiders & faux web for dimension.
6. Skeletons in Lawn Chairs
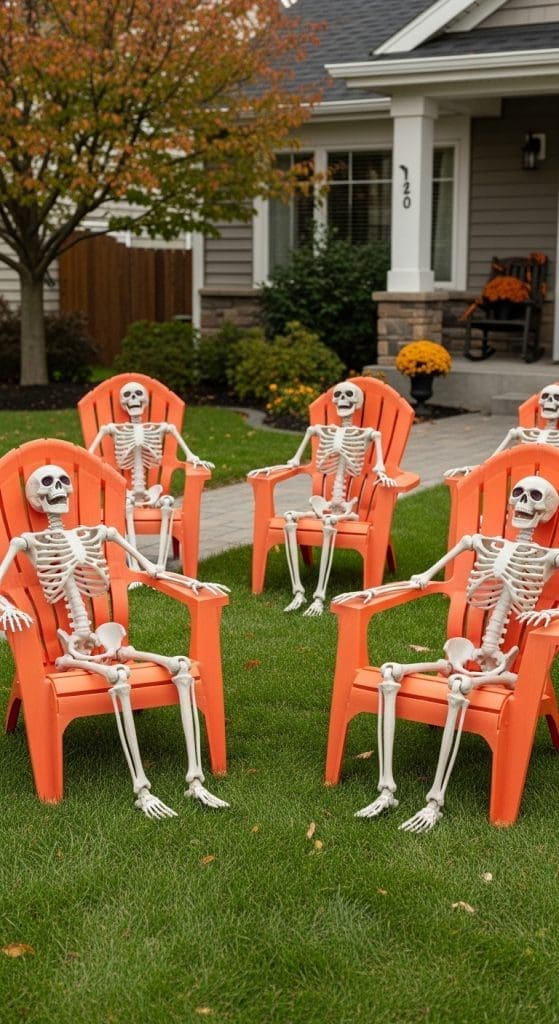
We use poseable skeletons sitting in outdoor lawn chairs to create humorous or eerie scenes.
Adding props like cups, newspapers, or sunglasses adds personality.
It’s also easy to update the display throughout the season, which helps keep your outdoor Halloween decor engaging.
DIY Steps
- Place foldable chairs in visible areas of your yard.
- Sit full-size plastic skeletons in each one.
- Position arms and legs naturally.
- Add props like mugs, books, or wigs.
- Use zip ties to secure skeletons if windy.
- Create scenes or add signs for fun context.
7. Motion-Activated Sound Props
We suggest placing motion-sensor props, such as howling ghosts or screaming pumpkins, near walkways or front steps.
These are effective because they startle visitors and add an interactive element. We position them where foot traffic will trigger them naturally.
For simple outdoor Halloween decorations, these props require no complicated installation but create a memorable experience.
DIY Steps
- Purchase battery-powered motion-sensor Halloween props.
- Test them indoors to ensure function.
- Place them near high-traffic entry paths.
- Hide battery compartments with foliage or fabric.
- Adjust angle to face where people walk.
- Replace batteries weekly for consistent performance.
8. Tomato Cage Ghosts
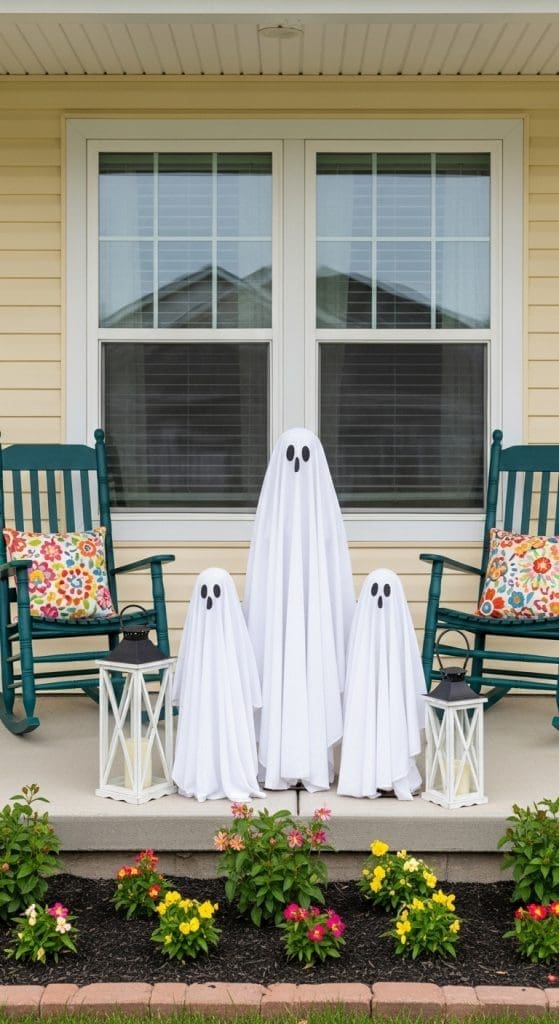
We recommend using upside-down tomato cages wrapped in white fabric to create ghostly figures. Placing a light or glow stick inside the cage helps illuminate the ghost from within.
This works because the cage provides a ready-made framework that stands up easily in garden beds or on lawns. It’s one of the most accessible Halloween yard DIY projects for beginners.
Check out our full post on how to make tomato cage ghosts
DIY Steps
- Flip a tomato cage upside down with pointed ends upward.
- Tie the top ends together with string or duct tape.
- Drape with a white sheet or cheesecloth.
- Draw eyes and a mouth using black fabric paint or felt.
- Place a glow stick or LED light inside.
- Set in the yard or secure into the ground.
9. Hay Bale Seating with Skeleton Guests
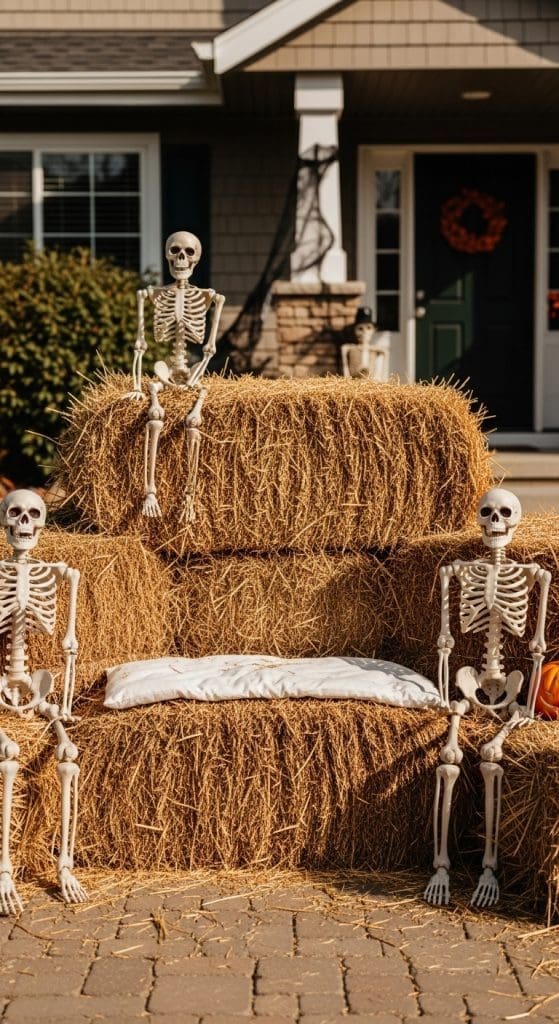
We suggest stacking hay bales to form rustic seating areas and staging them with plastic skeletons.
The combination of autumn-themed seating and Halloween props creates a cozy but spooky ambiance.
This idea works well for homes that want a farmhouse look but still want to stay on theme. Hay bales are readily available during fall and double as decor and functional seating.
DIY Steps
- Purchase two to three hay bales from a farm or store.
- Arrange them in a bench shape near your porch or lawn.
- Sit one or more skeletons on the bales.
- Add props like faux mugs or candy buckets.
- Decorate the area with mini pumpkins or corn.
- Optional: Drape a plaid blanket for comfort and style.
10. DIY Giant Spiders
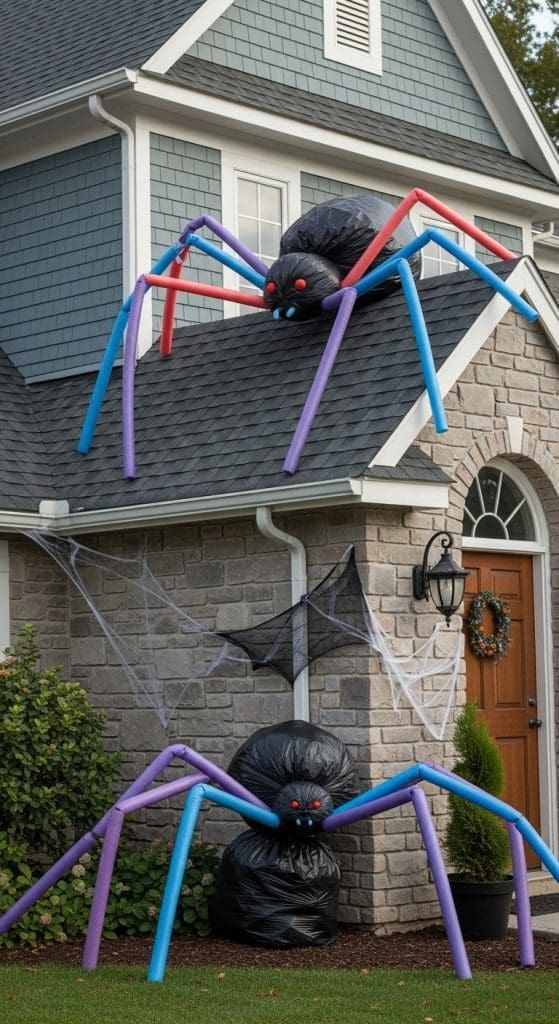
We recommend making oversized spiders using black trash bags for bodies and pool noodles for legs.
Positioning them crawling over rooftops or walls works well because of the exaggerated scale.
DIY Steps
- Fill two black trash bags, one large and one small, with stuffing.
- Tie them together to form a spider body and head.
- Cut four pool noodles in half to make eight legs.
- Bend each noodle into a curve and tape to the body.
- Use hot glue to attach eyes made from paper or ping pong balls.
- Place on the ground, rooftop, or wall using fishing line or adhesive hooks.
11. Pumpkin Tower Display
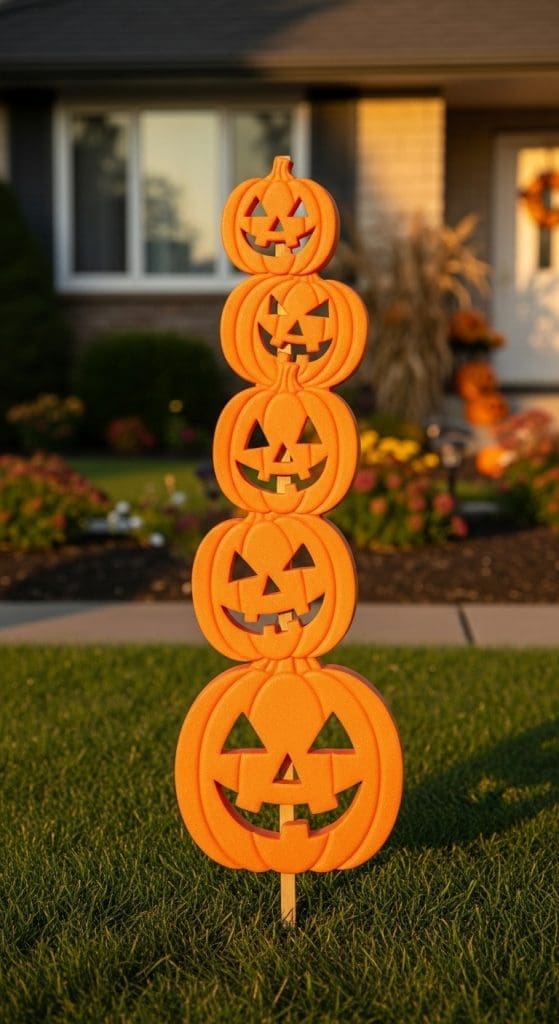
We use a vertical rod or wooden dowel pushed into the ground to stack several hollow foam pumpkins.
Drilling a hole in the bottom and top of each pumpkin lets them slide securely onto the pole.
This works great in small yards because the vertical displays save space while still showing off multiple decorations. It’s a simple way to add height and color to smaller front yards.
DIY Steps
- Drive a wooden dowel or rebar stake into the ground.
- Drill holes in the tops and bottoms of foam pumpkins.
- Slide pumpkins down the stake, largest at the bottom.
- Rotate each one slightly for a staggered look.
- Paint or carve faces into each pumpkin.
- Add a light to the top pumpkin if desired.
12. Window Silhouette Cutouts
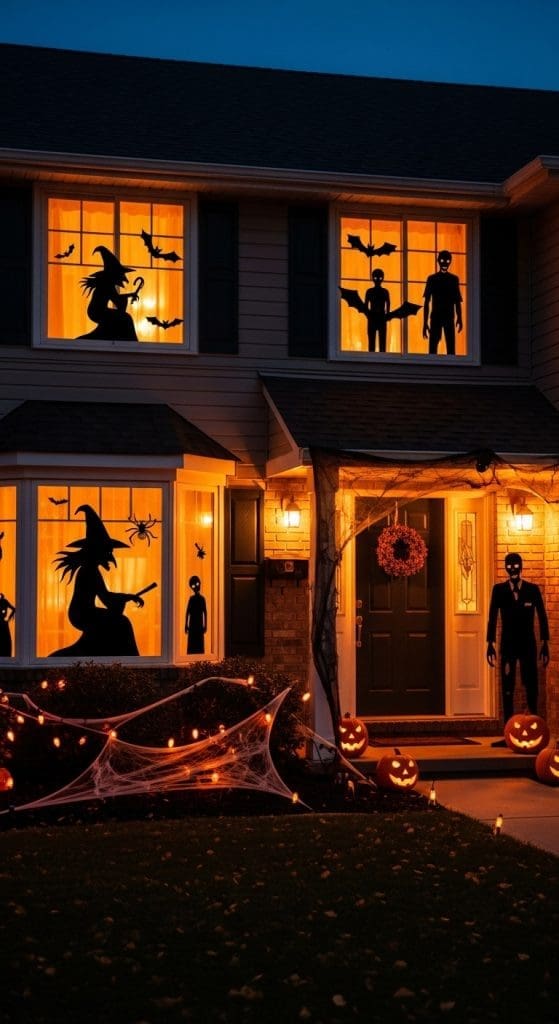
We suggest placing black cardboard cutouts of witches, bats, or zombies inside your front windows and shining lights behind them.
This looks great because silhouettes are easily recognizable even from a distance and they create a mysterious indoor-outdoor effect.
The light behind the shapes brings them to life after dark, enhancing nighttime curb appeal.
DIY Steps
- Print or draw a spooky silhouette design.
- Trace it onto black poster board or cardboard.
- Cut out the shapes with scissors or a craft knife.
- Tape the silhouettes to the inside of your window.
- Place a lamp or LED light behind the window.
- Turn on lights at night to reveal the shadow effect.
13. Broomstick Parking Zone
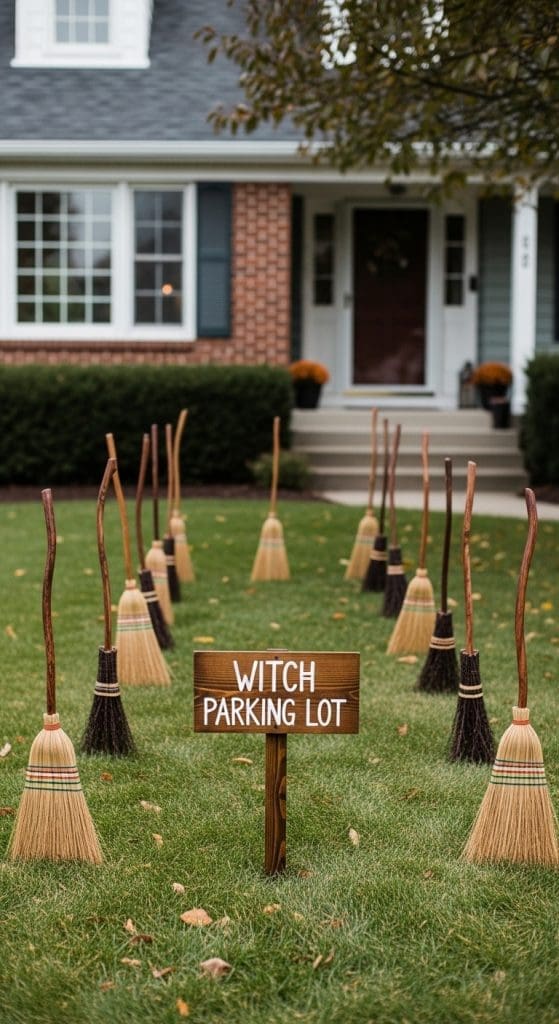
Create a “witch parking lot” by sticking old broomsticks into the lawn with a simple wooden sign.
This idea is funny and kids love it! It doesn’t require electrical work or heavy materials, so it’s ideal for DIY beginners.
DIY Steps
- Collect three or more old or dollar-store brooms.
- Push each broom handle into the lawn at an angle.
- Create a simple wooden or cardboard sign reading “Witch Parking Only.”
- Paint the sign with Halloween colors and text.
- Secure sign into the ground with a stake.
- Add witches’ hats or shoes nearby for effect.
14. Haunted Mailbox DIY Outdoor Halloween Decorations
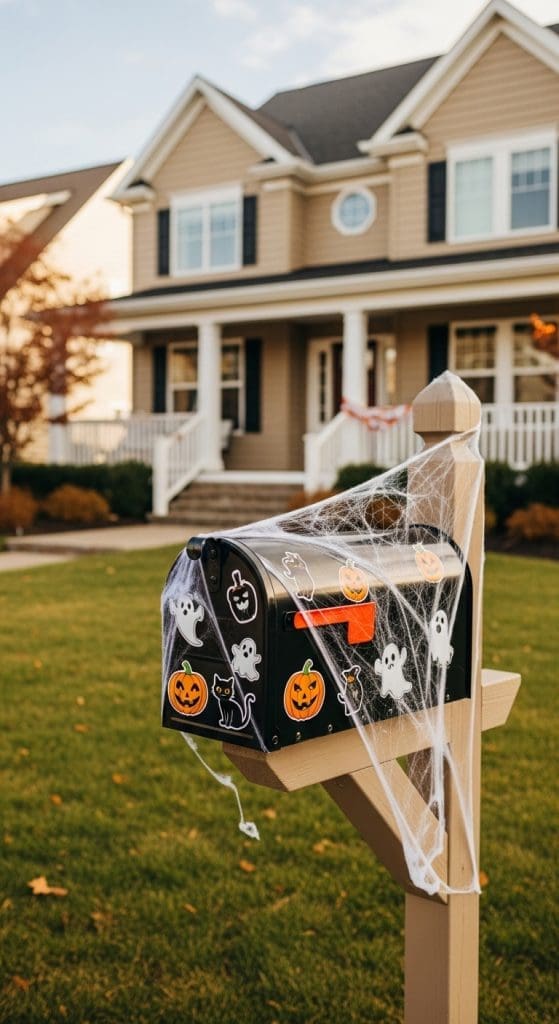
We use magnetic bats, cobwebs, or spooky decals to give mailboxes a Halloween twist.
This is a great idea because it’s a high-visibility area that is often overlooked. By decorating the mailbox, you extend the Halloween decor to the street and create continuity throughout the yard.
It’s also an easy way to participate in the holiday with minimal effort or expense.
DIY Steps
- Clean the mailbox surface for good adhesion.
- Attach magnetic or adhesive bats, skulls, or eyeballs.
- Drape cobweb material over the top and sides.
- Add a small skeleton or plastic rat on top.
- Place a miniature pumpkin at the base.
- Optional: Add a flag reading “Boo Mail!”
15. Lighted Pathway with Pumpkins
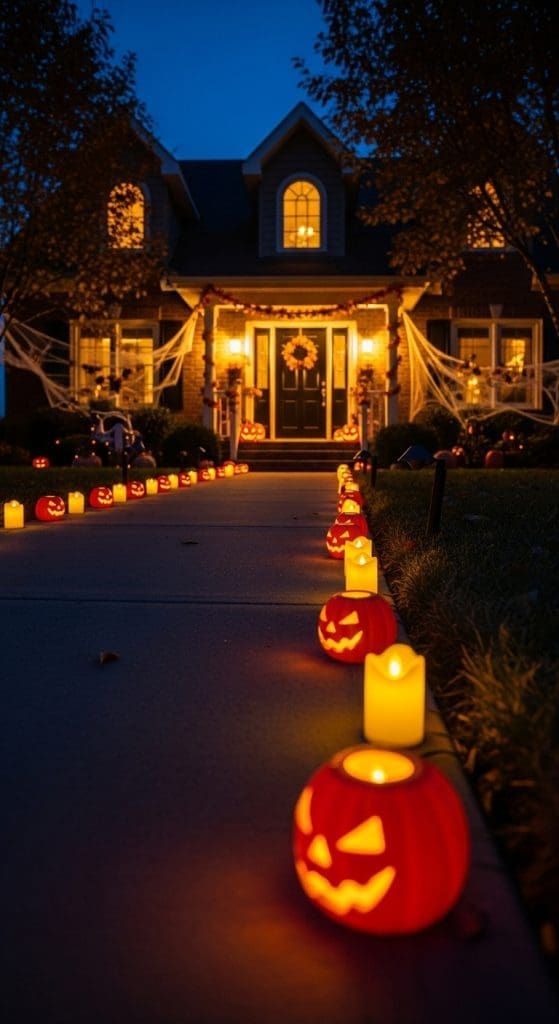
We suggest lining your front path with small carved or faux pumpkins lit with LED candles.
Using lights in pumpkins adds safety while contributing to the theme. It’s one of the most classic and effective Halloween decorations for front yards.
DIY Steps
- Choose real or foam pumpkins small enough for walkway edges.
- Carve simple faces or leave uncarved for a classic look.
- Insert battery-operated tea lights or LED candles.
- Space them evenly along your pathway.
- Turn on lights each evening.
- Optional: Use solar lights for energy efficiency.
16. DIY Bat Swarm on the House
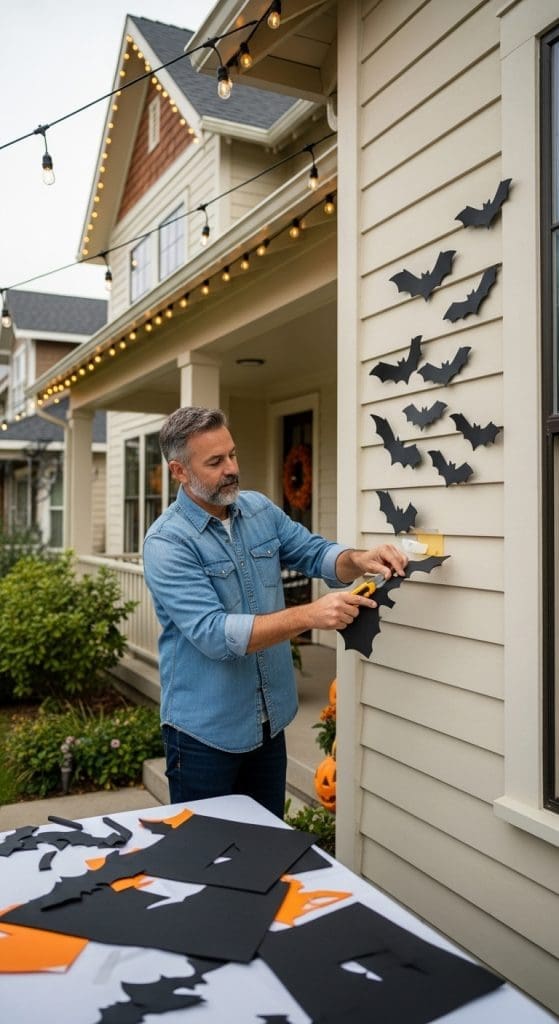
A Simple Outdoor Halloween Decor idea is cutting bat shapes from black foam sheets and attaching them to exterior walls using removable adhesive.
Placing them in a rising or swirling pattern gives the illusion of movement.
This works well because bats are simple shapes that look great from a distance and are easy to make. Plus the minimal materials make it a beginner-friendly project.
DIY Steps
- Print a bat template and trace it onto black foam or cardstock.
- Cut out 10 to 20 bats of various sizes.
- Fold wings slightly for 3D effect.
- Use double-sided tape or removable mounting putty.
- Arrange bats in a flying pattern on siding or windows.
- Optional: Add a spotlight for dramatic shadows.
17. Pumpkin Scarecrow Guard
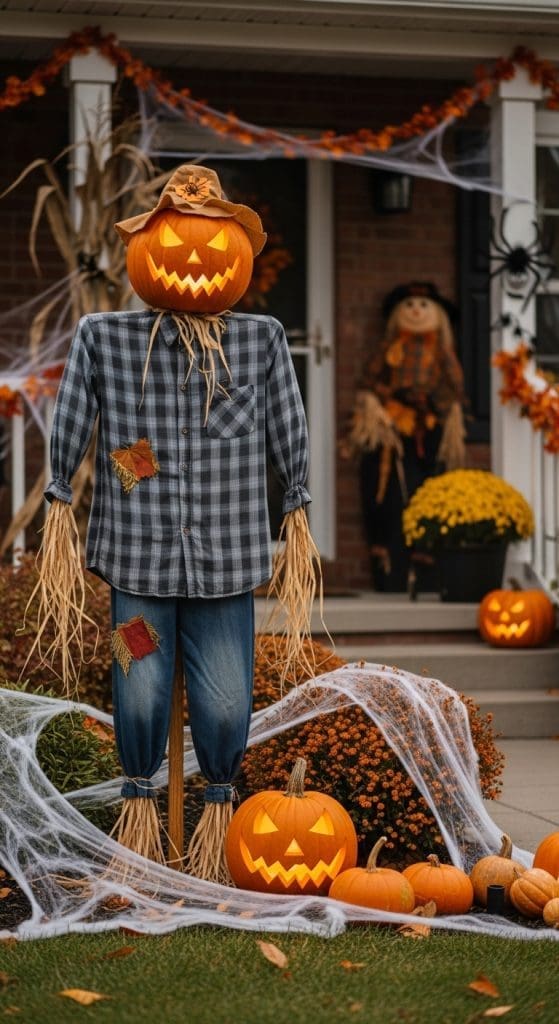
We suggest building a scarecrow using old clothes stuffed with straw and topping it with a carved pumpkin head.
This looks great even before Halloween and can be built for fall! It gives strong autumn harvest vibes!
Placing it near the entryway or a garden bed adds personality and charm. It’s also a great use of recycled clothing and fall leftovers.
DIY Steps
- Stuff old jeans and a long-sleeve shirt with straw or newspaper.
- Use a stake or broomstick to support the scarecrow upright.
- Carve a pumpkin with a friendly or spooky face.
- Place pumpkin securely on top as the head.
- Dress with a scarf, hat, or gloves.
- Anchor scarecrow in the yard or flower bed.
18. Upside-Down Witch Legs
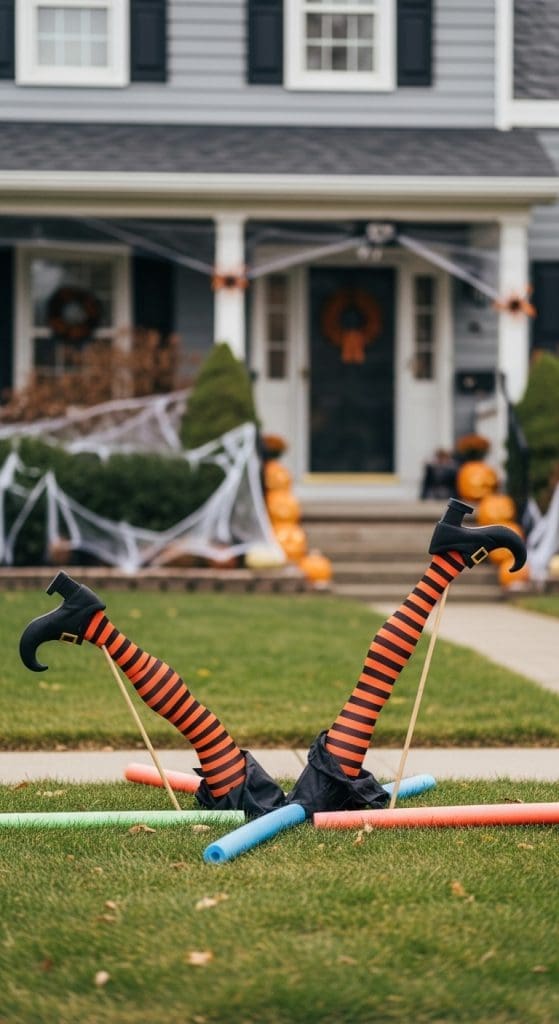
Sticking pool noodles or wooden dowels into the ground with striped tights and pointed shoes to mimic a witch crash-landing.
This humorous setup works because it’s unexpected and easy to assemble.
It adds depth to your yard display without relying on electricity or large props. The whimsical nature keeps things light and fun.
DIY Steps
- Insert pool noodles or dowels into the ground.
- Slide striped tights or socks over each noodle.
- Attach old or fake witch shoes at the base.
- Push the legs in at an angle to simulate impact.
- Add faux leaves or dirt around for realism.
- Optional: Add a broom nearby for context.
19. Creepy Curtain Entrance Simple Outdoor Halloween Decor
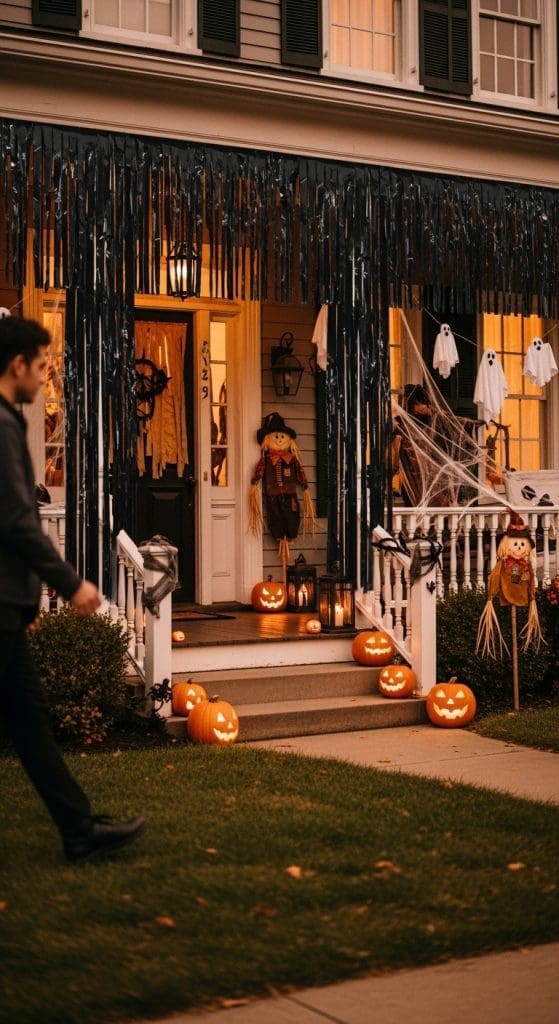
We use strips of black plastic or old sheets to create tattered curtains around the front door or porch.
This looks great in autumn because the movement of the fabric in the wind adds a haunted feel.
It also sets the tone for anyone approaching the house. The curtains are simple to install and add dramatic impact without needing special tools or experience.
DIY Steps
- Cut old black sheets or trash bags into long strips.
- Staple or tape them above your door frame or porch beam.
- Tear or fringe the bottoms for a ragged look.
- Drape loosely for a flowing effect.
- Add fake cobwebs or spiders if desired.
- Let them sway naturally in the breeze.
20. Jack-o’-Lantern Family Display Simple Outdoor Halloween Decor
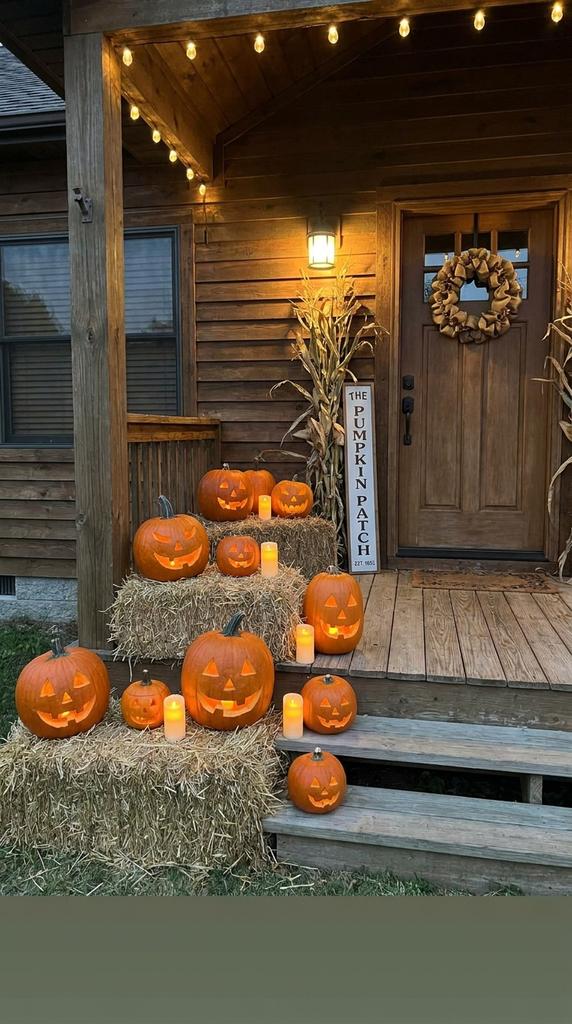
A Simple Outdoor Halloween Decor idea is carving several pumpkins to resemble different expressions and arrange them as a “family” near the front door.
Using varying sizes and face styles adds variety and charm. This idea is especially effective for homes with kids and makes your yard decor feel more personal.
DIY Steps
- Pick small, medium, and large pumpkins.
- Carve each with a unique face or emotion.
- Group them on hay bales, crates, or steps.
- Add accessories like scarves, hats, or glasses.
- Insert LED candles for night-time glow.
- Arrange them to look like a happy or spooky family.
21. Glowing Eyes Hidden in Bushes
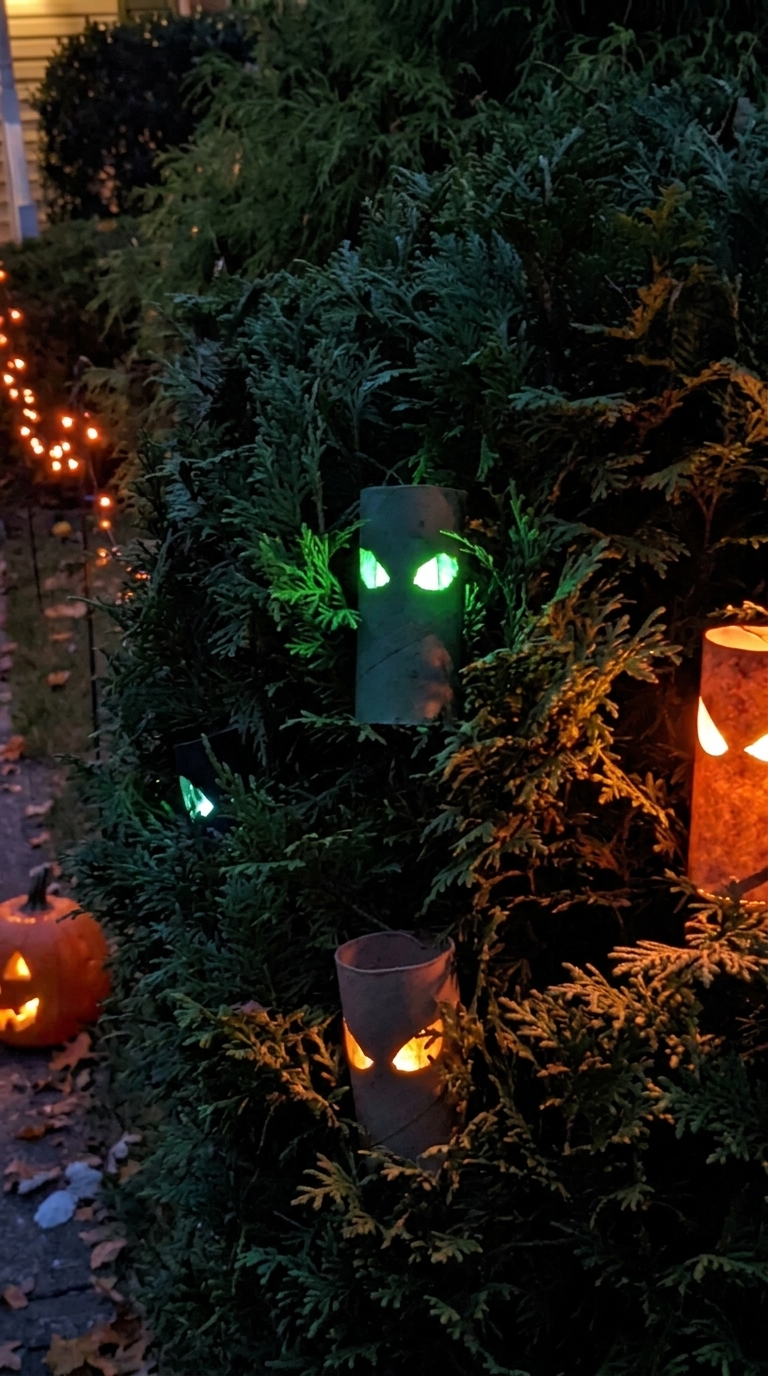
Create a pair of glowing eyes and hiding them inside shrubs, hedges, or dark corners of the garden.
This idea works especially well after sunset because visitors can see the glowing eyes without immediately seeing what they belong to. Using cardboard tubes keeps the project inexpensive, and you can make several pairs in less than an hour.
It’s a simple way to make existing landscaping part of your Halloween display without adding large props to the yard.
DIY Steps
- Save several empty toilet paper or paper towel tubes.
- Draw different eye shapes onto the sides of each tube.
- Carefully cut the eye shapes out with scissors or a craft knife.
- Place a glow stick or small battery-powered light inside each tube.
- Hide the tubes between branches, shrubs, or garden plants.
- Angle the eyes toward the walkway so they are visible after dark.
22. Mummy-Wrapped Porch Columns
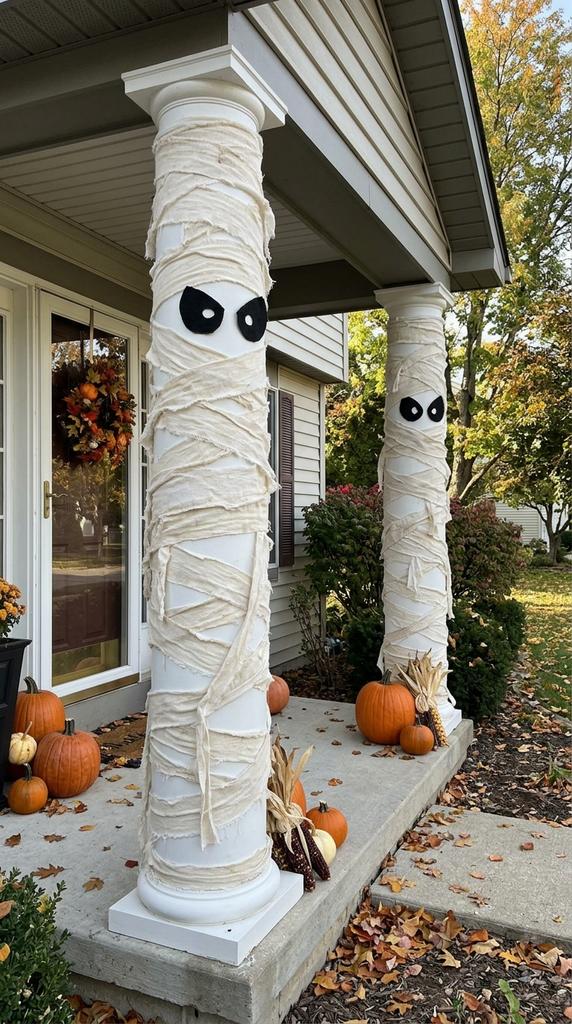
Turning your porch posts or columns into giant mummies using strips of inexpensive white fabric.
Wrapping the material loosely creates plenty of texture, while oversized black eyes make the mummy recognizable from the street. The project does not require permanent changes to your porch, making it suitable for a temporary Halloween display.
It also works during the daytime, so you do not need lighting or electrical decorations to make an impact.
DIY Steps
- Cut an old white sheet or inexpensive white fabric into long strips.
- Starting near the bottom, wrap the strips loosely around each porch column.
- Overlap the fabric in different directions to create a messy mummy effect.
- Cut two large oval eyes from black felt or foam.
- Attach the eyes between layers of fabric using removable tape or safety pins.
- Secure loose ends so the fabric stays in place on windy days.
23. Creepy Doll Garden
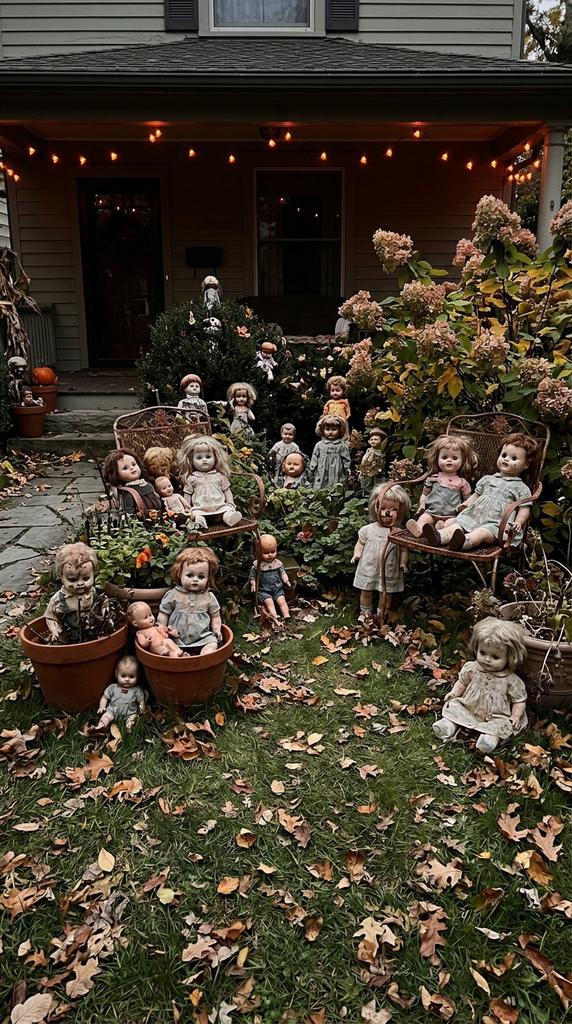
Turning unwanted dolls into a creepy garden display by arranging them between plants, flowerpots, or garden furniture.
Older dolls work particularly well because faded clothing and slightly worn features naturally give them an unsettling appearance. You can also use dolls from thrift stores instead of purchasing expensive Halloween props.
This is one of the easiest Halloween yard DIY projects because most of the effect comes from where and how the dolls are positioned.
DIY Steps
- Collect several inexpensive or unwanted dolls in different sizes.
- Dress them in old, faded, or slightly torn clothing.
- Add washable gray or brown paint to clothing if you want a weathered look.
- Sit or stand the dolls between flowerpots, shrubs, or garden beds.
- Position some facing the house and others facing the walkway.
- Move them into unexpected positions occasionally throughout October for extra creepiness.
24. Giant Candy Corn Lawn Stakes
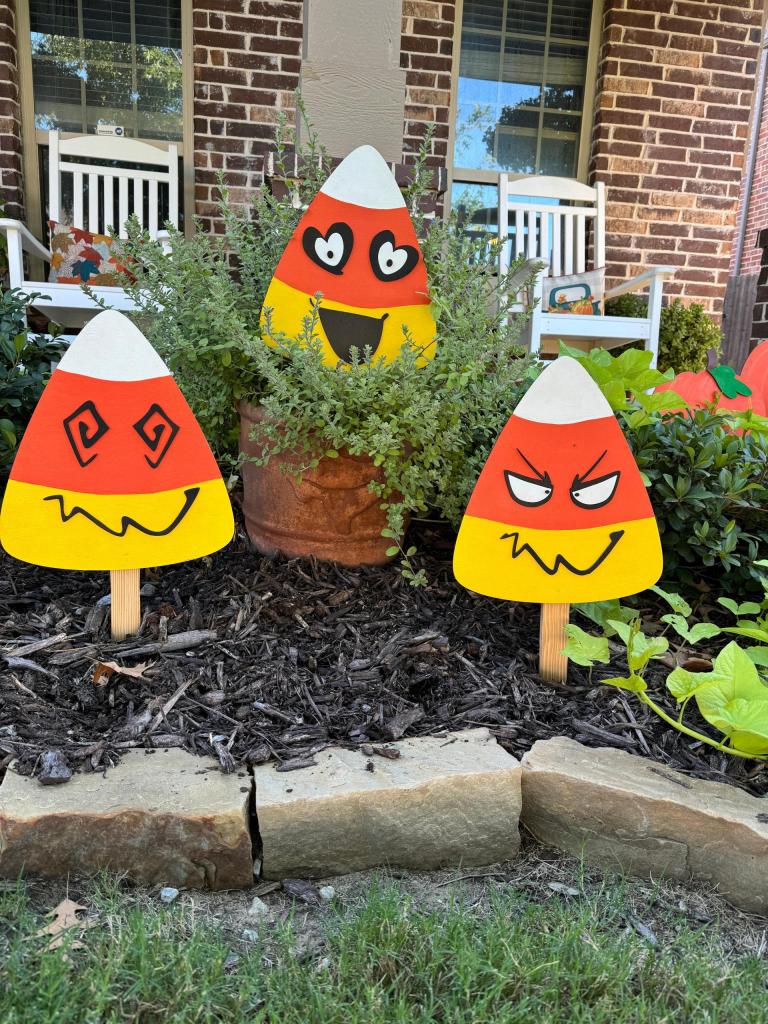
For a more playful Halloween Outdoor Decorations idea, try making oversized candy corn shapes from scrap wood or thick foam board.
The bright yellow, orange, and white sections are easy to recognize and add color to a yard without relying on pumpkins or traditional spooky props.
These decorations are especially useful for family-friendly displays and can be made in several different sizes to fill empty areas of the lawn.
DIY Steps
- Draw large rounded triangle shapes onto scrap plywood or thick foam board.
- Cut out each candy corn shape carefully.
- Paint the bottom section yellow.
- Paint the middle section orange and the pointed top white.
- Attach a wooden garden stake to the back using screws, glue, or strong tape.
- Push several finished candy corn stakes into the lawn at different heights.
25. Rubber Snake Planter Takeover
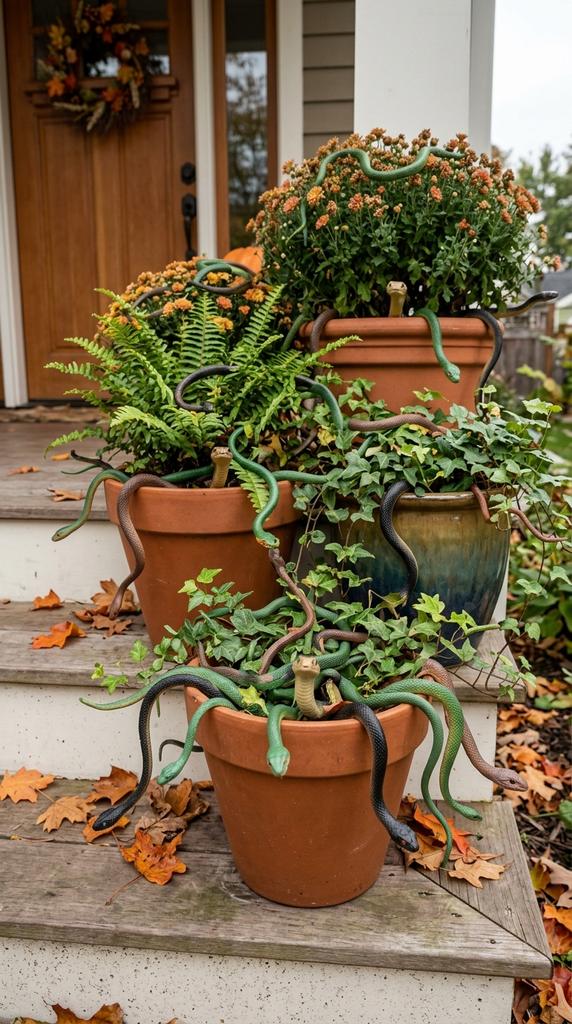
Use inexpensive rubber snakes to transform ordinary porch planters and flowerpots into creepy Halloween decorations.
The snakes can be twisted through plants, wrapped around pots, or positioned so they appear to be crawling over the edges. Greenery helps partially hide them, which makes the display more convincing when someone approaches the house.
This idea requires almost no building or crafting, making it an easy option if you want to decorate several outdoor areas quickly.
DIY Steps
- Gather several inexpensive rubber or plastic snakes.
- Bend them into different curved positions.
- Place some between the leaves of existing porch plants.
- Wrap others around the rims or handles of flowerpots.
- Allow a few snake heads to hang over the edges where visitors will notice them.
- Secure lightweight snakes with garden wire if your porch or yard is exposed to wind.
26. DIY Coffin Yard Prop
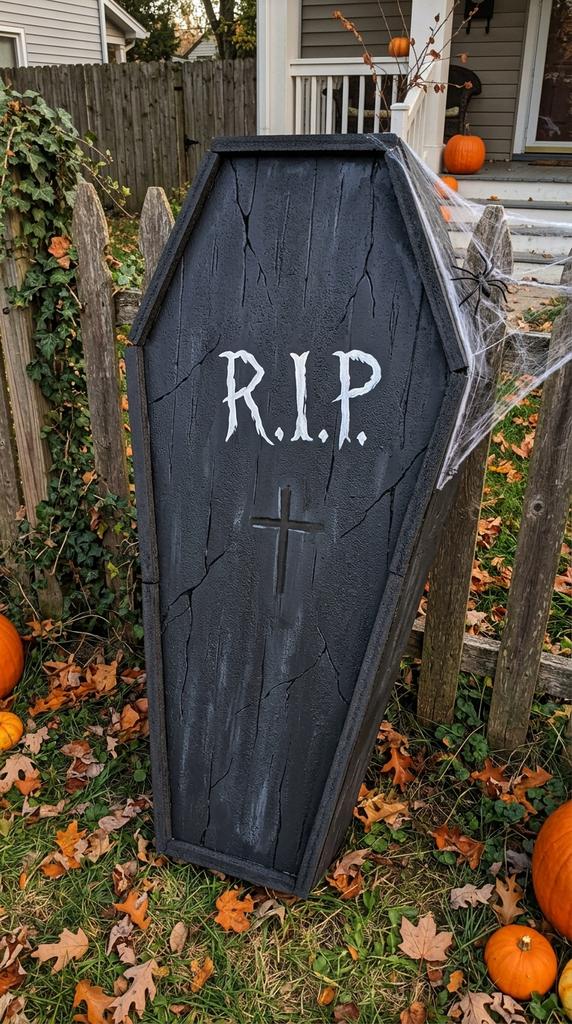
Try making a lightweight coffin decoration from rigid foam board for a large Halloween prop that does not require advanced woodworking.
Painting the surface black, charcoal, or weathered brown gives the coffin a convincing appearance without making it heavy or difficult to move.
The finished prop can be leaned against a porch wall, fence, shed, or tree, making it useful for filling a large empty space in your outdoor Halloween display.
DIY Steps
- Draw a simple coffin shape onto a large sheet of rigid foam board.
- Cut the shape out carefully with a craft knife.
- Cut narrow foam strips and glue them around the edges to create depth.
- Paint the entire coffin black, dark gray, or brown.
- Add painted cracks, scratches, or lettering such as “RIP” once dry.
- Lean the finished coffin securely against a wall or attach it to a garden stake.
27. Monster Footprint Trail Simple Outdoor Halloween Decor
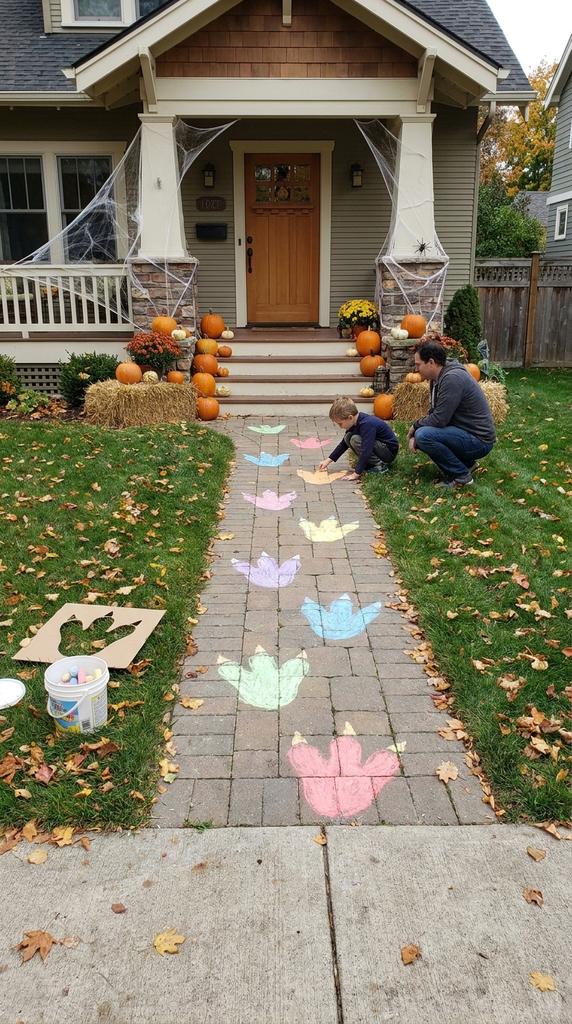
A trail of oversized monster footprints leading from the sidewalk toward your front door is the perfect welcome for trick or treaters!
This idea works because it immediately makes visitors wonder what walked through the yard before they arrived. The footprints also guide trick-or-treaters toward the entrance while adding Halloween detail to an area that might otherwise be left undecorated.
Using a reusable cardboard stencil and washable sidewalk chalk makes this project inexpensive and easy to remove after Halloween.
DIY Steps
- Draw an oversized three-toed monster footprint onto thick cardboard.
- Cut out the footprint to create a reusable stencil.
- Place the stencil on your driveway, path, or paving stones.
- Fill the opening with washable sidewalk chalk.
- Repeat the footprints every few feet, changing the angle slightly as you go.
- Continue the trail toward the front door, porch, or another Halloween decoration.
28. Pose a Skeleton Around the Mailbox
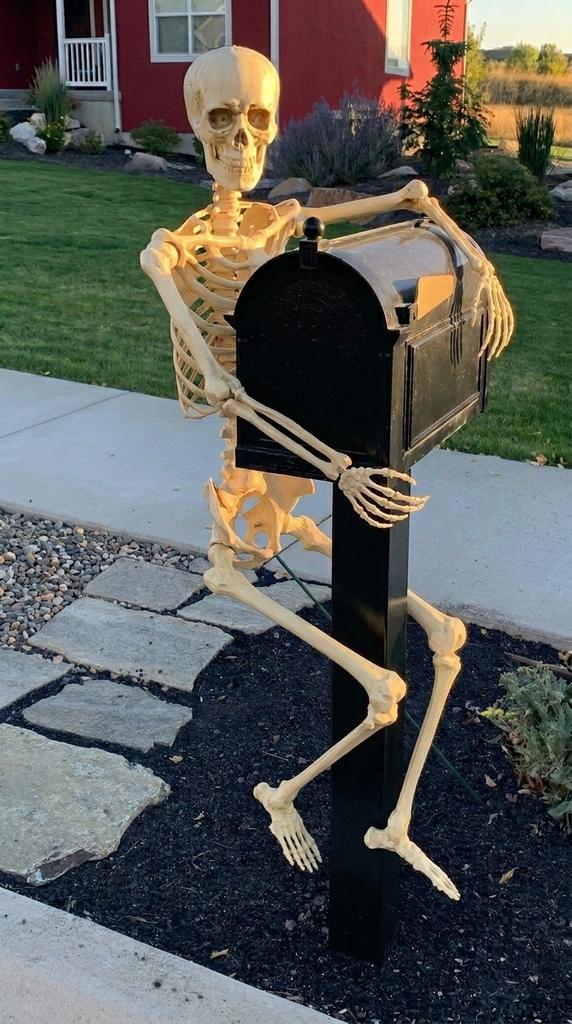
Skeleton displays are one of the easiest Halloween mailbox decorations to make your front yard look impressive without needing much decorating experience.
Use a lightweight posable plastic skeleton and bend the arms around the post or mailbox support as though it is hanging on for dear life.
29. Turn the Mailbox Into a Witch
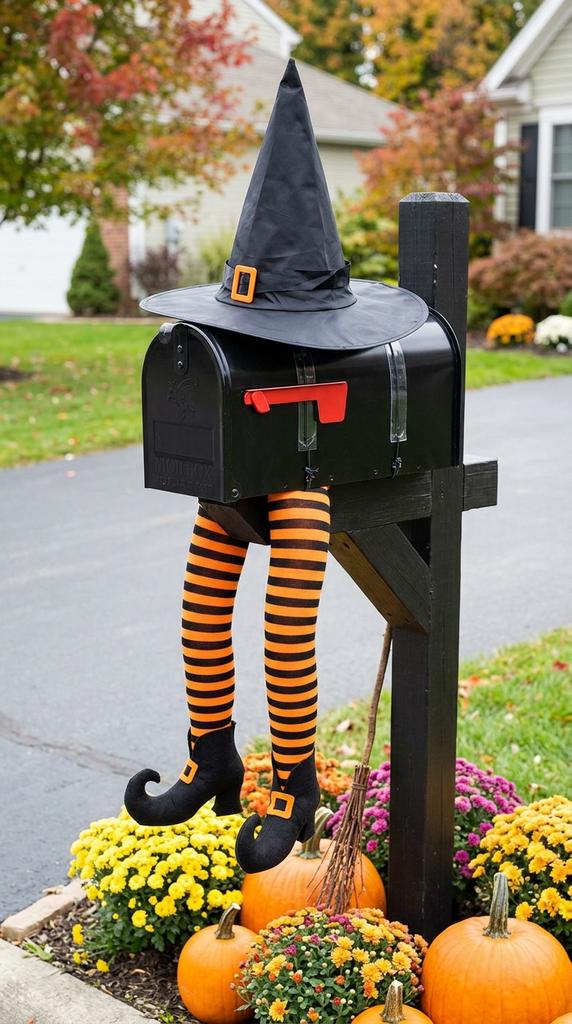
Start with a lightweight black witch hat that is wide enough to sit on top of the mailbox.
Attach it with removable outdoor mounting strips, floral wire, or fishing line so the mailbox can still be opened normally.
Then make two legs from orange and black striped tights stuffed lightly with plastic grocery bags or polyester filling.
30. Turn a Witch Hat Into a Halloween Wreath
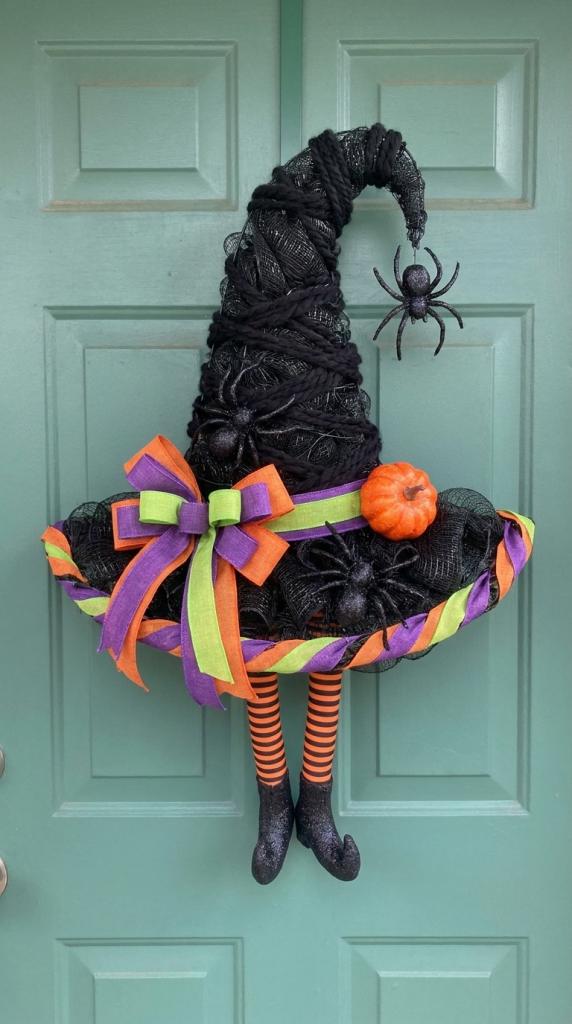
A pointed witch hat instantly gives the front door a playful shape that stands out from traditional round wreaths.
Start with a wire witch hat form and weave black deco mesh, chunky yarn, or strips of fabric through the frame.
The unusual silhouette does most of the decorating work, which makes a halloween witch hat wreath surprisingly manageable for a beginner. This is a great way to decorate your front porch or front door for instant spooky curb appeal!