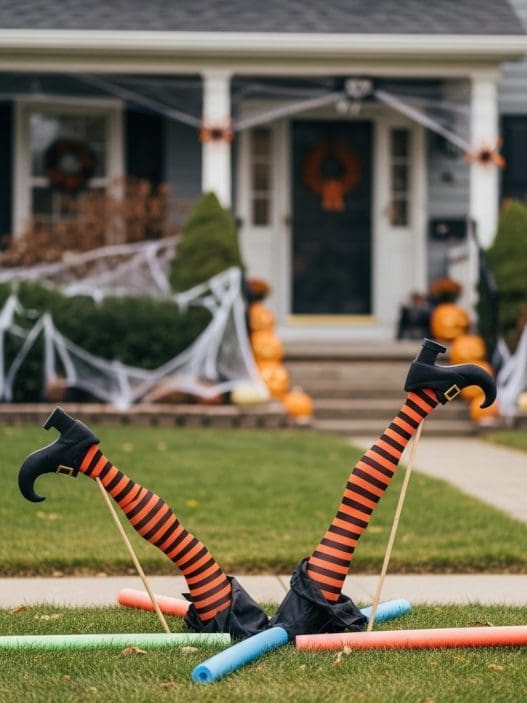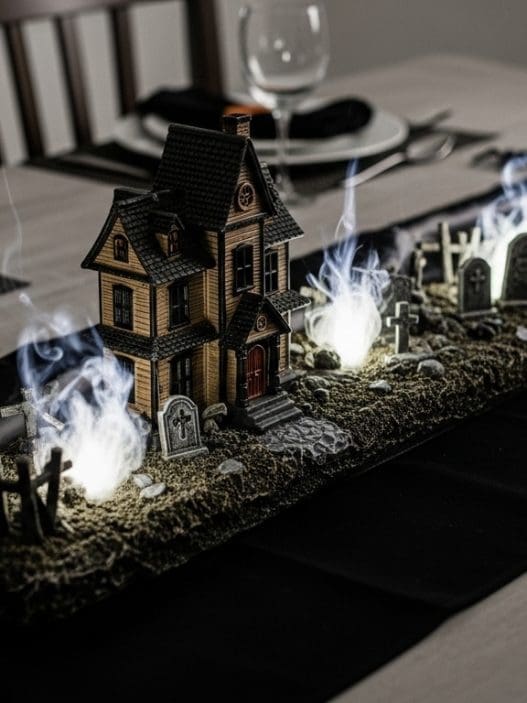









This DIY black cat Halloween archway is such a fun way to transform an ordinary front walkway into a magical Halloween entrance. The oversized black cat silhouettes make the biggest impact, while purple tulle and warm twinkle lights soften the look and give the whole display an almost enchanted feel once the sun goes down.
Even better, you do not need to build a complicated wooden structure to recreate it.
A simple metal garden arch can become the base of the entire project, making this a Halloween decoration you can take apart, store and use again next year.
If you loved our other Halloween archway DIY ideas, this black cat version is perfect when you want something spooky without going all-out scary.
What You’ll Need
You can adapt the materials depending on the size of your walkway and the Halloween decorations you already own.
For a similar look, gather:
- A metal garden arch or garden arbor
- Purple tulle, organza or sheer fabric
- Warm white fairy lights
- Black foam board, corrugated plastic or lightweight craft board
- Black paint, if your board is not already black
- A black cat silhouette template
- Scissors or a craft knife
- Pencil or chalk
- Zip ties
- Black floral wire
- Clear fishing line
- Outdoor-rated extension cord, if needed
- Garden stakes or weights for securing the arch
- Pumpkins
- A lantern
- Potted fall mums
- Battery-operated candles
You can also add fake cobwebs, bats, spiders or small skeleton decorations if you want to make the finished arch a little creepier.
Step 1: Set Up Your Garden Arch
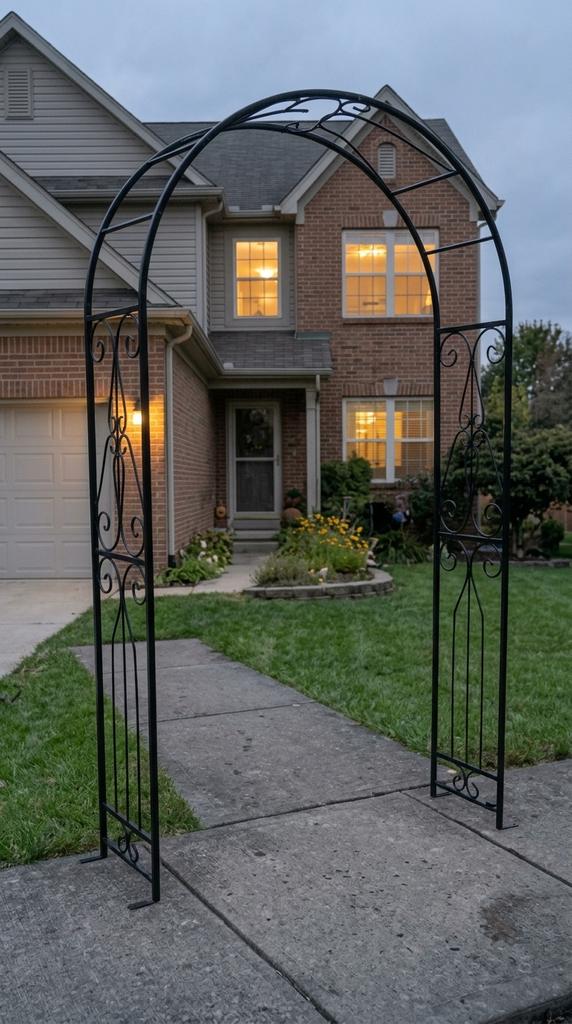
Start by placing your garden arch over the walkway or pathway where you want your Halloween entrance.
A black metal garden arbor works particularly well because the frame almost disappears behind the decorations once everything is attached.
Make sure there is plenty of room for people to comfortably walk underneath it.
If the arch is going into soil or grass, push its stakes firmly into the ground.
For an arch sitting on concrete or a driveway, use sturdy weighted bases, sandbags or another suitable anchoring method.
This part is important, especially if your front yard gets windy.
You want the arch to feel completely stable before adding decorations.
Step 2: Wrap the Arch With Fairy Lights
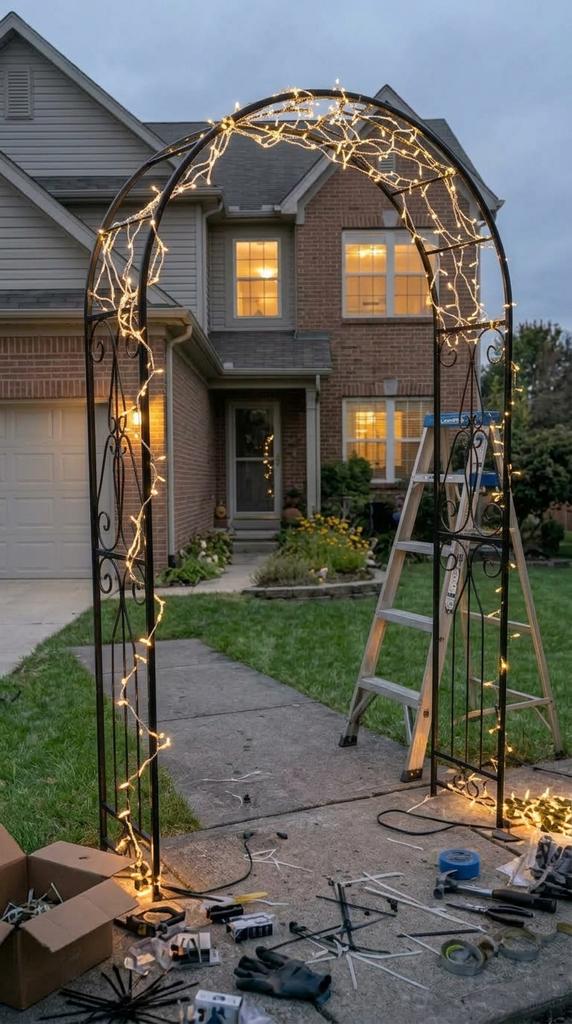
Before adding the fabric, wrap your fairy lights around the frame.
Start at one bottom corner and work your way upward, across the curved top and back down the opposite side.
You do not need the lights to look perfectly symmetrical.
In fact, slightly irregular lights give this Halloween archway a more whimsical, magical appearance.
Use small black zip ties or floral wire to secure the light strand every few feet.
If you are decorating outdoors, always choose lights and electrical connections that are rated for outdoor use.
A Little Lighting Tip
Warm white lights create the soft golden glow shown in this style of arch.
Purple lights would make the display feel moodier, while green lights could turn it into more of a witch-themed Halloween entrance.
Step 3: Add the Purple Tulle
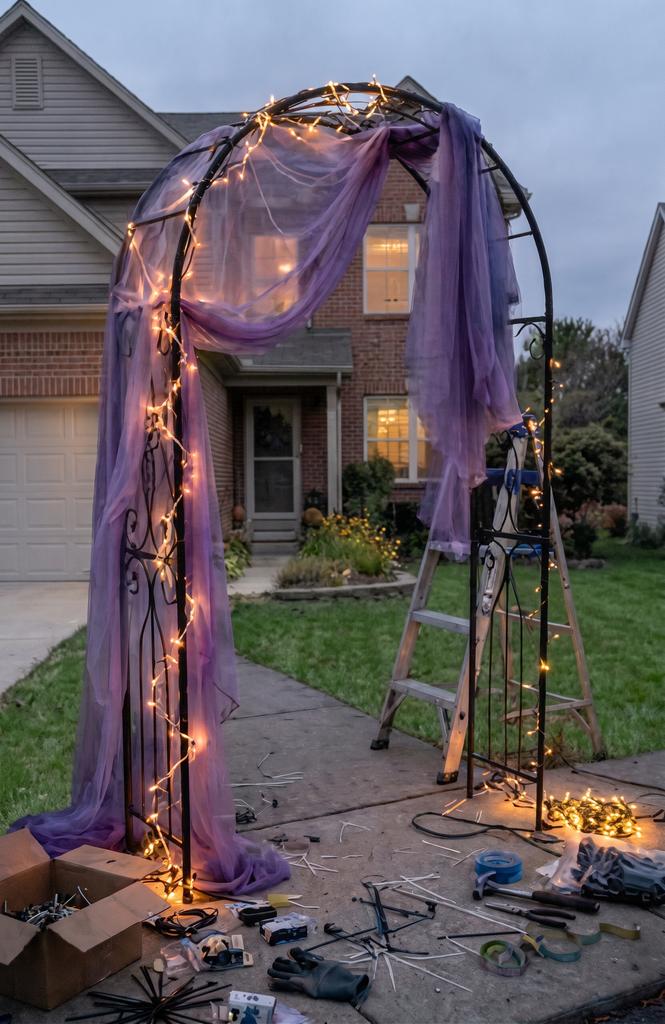
Now comes the part that gives this Halloween arch its dramatic color.
Take a long piece of purple tulle and loosely drape it over the top of the arch.
Allow the fabric to fall down both sides rather than wrapping it tightly around the frame.
The goal is to create soft folds and swags.
Gather sections of fabric near the top and sides and attach them with:
- Floral wire
- Fishing line
- Small zip ties
Try leaving some sections slightly longer than others.
The uneven fabric creates a flowing, haunted effect and looks particularly pretty when the fairy lights glow through it at night.
If your tulle feels too transparent, layer two pieces together.
You can also mix dark purple and lighter lavender fabric for even more dimension.
Step 4: Make Your Black Cat Silhouettes
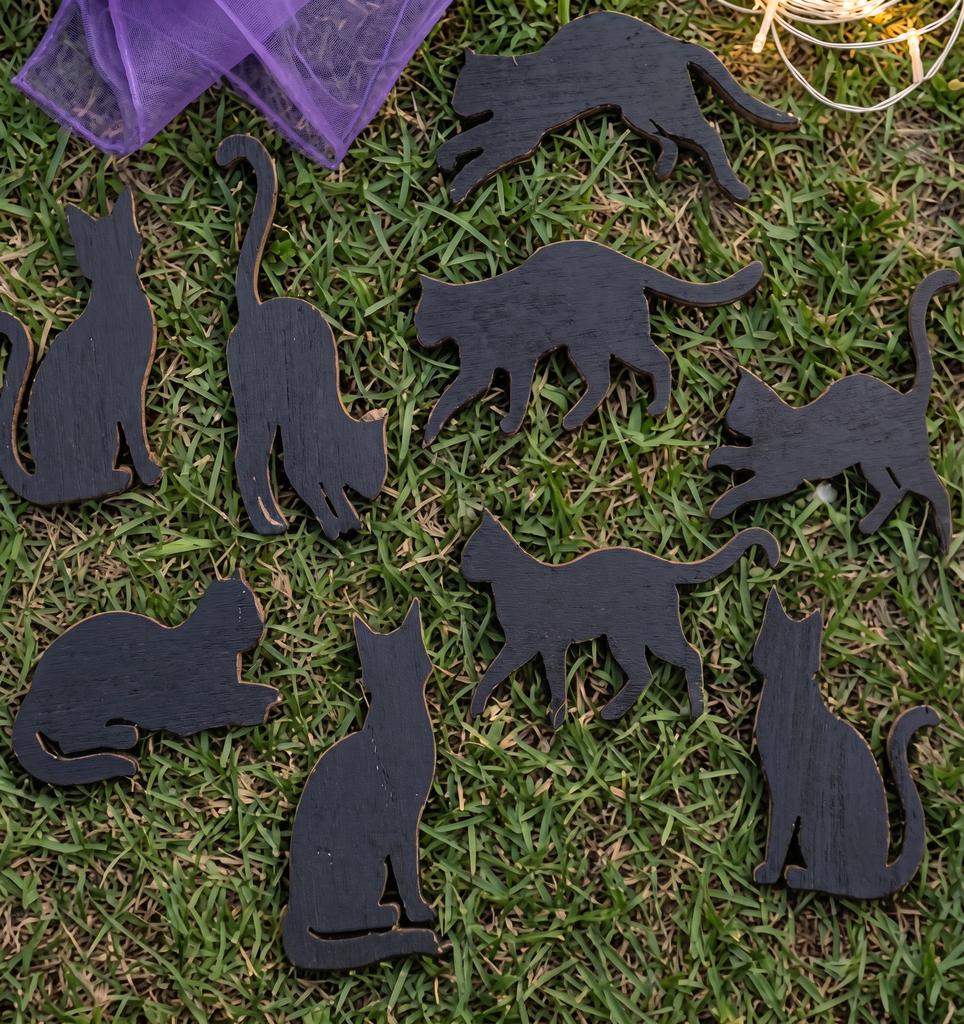
The cats are what turn this from a pretty Halloween arch into a real statement piece.
You can purchase ready-made black cat decorations, but making your own allows you to create several different poses and sizes.
Print or draw a few simple black cat silhouettes.
Try using cats that are:
- Sitting
- Walking
- Stretching
- Arching their backs
- Looking sideways
- Standing with their tails curled upward
Having different poses makes the finished display much more interesting.
Trace each cat onto black foam board or corrugated plastic.
Carefully cut around the outline using sharp scissors or a craft knife.
For outdoor decorating, corrugated plastic is usually a better choice than ordinary cardboard because it holds up much better if the weather turns damp.
Step 5: Create Glowing Cat Eyes
This little detail makes a huge difference once it gets dark.
Cut two small eye shapes into each cat or add eyes using yellow reflective material.
Another option is to place tiny battery-operated LED lights behind the eye openings.
You do not need every cat to have illuminated eyes.
Adding glowing eyes to just a few silhouettes creates the effect of mysterious cats watching people as they approach the house.
For an easier version, simply cut small pieces of yellow craft vinyl or reflective tape and stick them onto the faces.
Step 6: Position the Largest Cats First
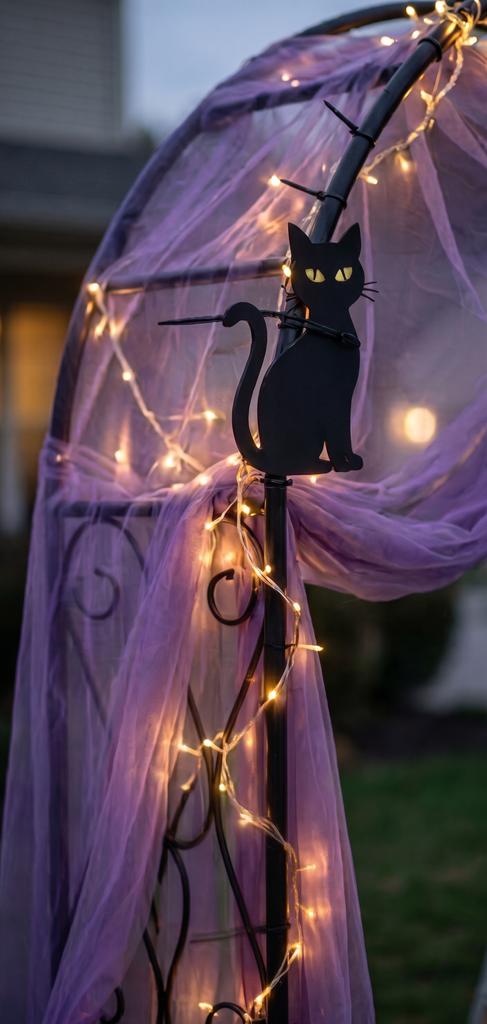
Before attaching everything permanently, decide where your biggest cats will go.
Place the largest silhouettes around the top of the arch.
These create the focal point of the whole display.
Try positioning one cat across the center with another cat sitting or standing on either side.
Let their tails extend beyond the edges of the arch where possible.
That exaggerated silhouette makes the decoration much more noticeable from the street.
Secure lightweight cats using several black zip ties or floral wire.
Make sure every decoration is firmly attached and cannot fall onto the walkway.
Step 7: Add Smaller Cats Down the Sides
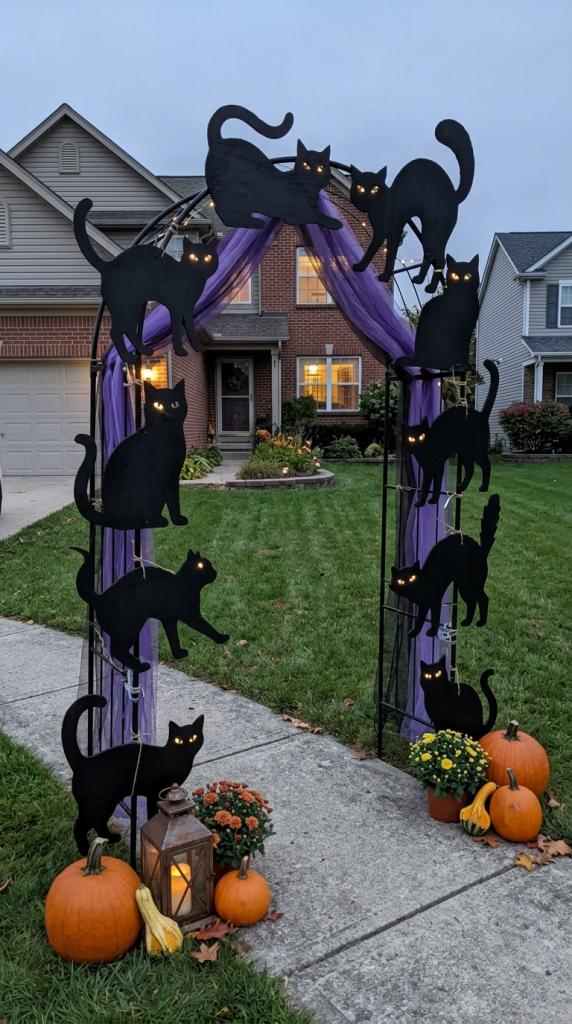
Once the top cats are in position, start filling the sides of the arch.
Alternate sitting cats with walking cats so that it almost looks as though they are climbing all over the structure.
Instead of placing them in perfectly straight rows, stagger their positions.
You could have:
- One cat sitting near shoulder height
- Another stretching farther up
- A walking cat near the bottom
- A smaller cat peeking through the purple fabric
This gives the arch much more personality.
You can even angle a few cats slightly toward the pathway so they appear to be watching your guests walk underneath.
Step 8: Weave the Fabric Around the Cats
Once the silhouettes are secure, rearrange your purple fabric around them.
Pull small sections of tulle between and behind the cats.
Allow some of the black silhouettes to sit completely in front of the purple fabric while others appear partially surrounded by it.
This layering creates much more depth than simply placing all the decorations on top of the fabric.
Make sure you can still see plenty of the fairy lights underneath.
Step 9: Decorate the Bottom of the Arch
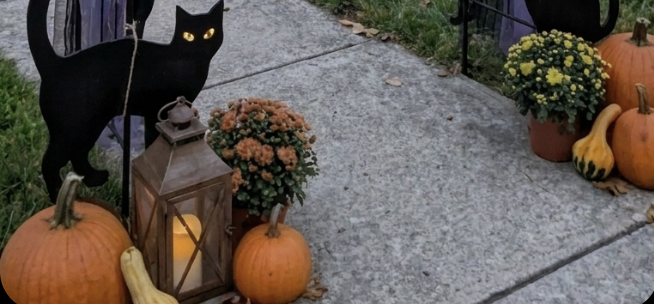
Do not forget about the base.
A few simple decorations around the bottom make the arch feel like a complete Halloween display rather than a freestanding structure.
Try grouping together:
Pumpkins
Use a mixture of large orange pumpkins and smaller gourds.
Fall mums
Purple, yellow or orange mums look beautiful alongside the purple tulle.
Lanterns
Place an old-fashioned lantern on one side with a battery-powered candle inside.
More black cats
A smaller cat silhouette placed beside the pumpkins makes it look as though one mischievous cat has escaped from the arch.
Keep all decorations clear of the actual walking path so trick-or-treaters can safely pass through.
Step 10: Turn On the Lights and Make Adjustments
Wait until dusk before making your final adjustments.
Halloween decorations can look completely different once the lights come on.
Stand several feet away and look at the arch from the direction trick-or-treaters will approach it.
Check whether the cats are clearly visible.
You may want to:
- Move a section of purple fabric
- Spread the fairy lights farther apart
- Angle a cat differently
- Add another pumpkin to the base
- Illuminate a few more cat eyes
Small changes can make the whole display look much more balanced.
How Much Purple Tulle Do You Need?
For a standard garden arch, I would start with approximately 8 to 12 yards of tulle.
If you want the fabric to look very full and dramatic, buy a little extra.
Tulle is usually inexpensive, and having more fabric allows you to create deeper folds rather than stretching it tightly across the structure.
You can always reuse leftover purple tulle elsewhere on your porch.
Try draping it:
- Around porch railings
- Over bushes
- Around lanterns
- Across your front door
- Behind Halloween signs
Repeating the purple fabric elsewhere will help tie your whole Halloween porch together.
How to Make the Arch More Weather Resistant
If you are keeping your Halloween arch outside for several weeks, choose your materials carefully.
Use plastic or corrugated plastic for your cat silhouettes rather than ordinary paper or thin cardboard.
Secure everything with outdoor zip ties instead of relying entirely on tape.
You should also avoid leaving lightweight decorations loose enough to catch the wind.
For the lights, use outdoor-rated products and keep plugs and connections protected according to the manufacturer’s directions.
If severe weather is expected, it is worth temporarily removing the tulle and lightweight silhouettes.
Easy Ways to Customize This Halloween Arch
One of my favorite things about this project is how easy it is to change the theme.
Make It More Witchy
Add miniature witch hats, broomsticks and potion bottles among the black cats.
Purple and green lights would look especially fun with this version.
Make It Creepier
Stretch fake spiderwebs between the cats and add oversized black spiders.
A few hanging bats around the top would make the arch even more dramatic.
Make It Cute for Kids
Give the cats colorful eyes, add smiling pumpkins and use orange and purple fairy lights.
This keeps the display festive rather than frightening.
Create a Gothic Version
Replace the purple tulle with black lace or deep burgundy fabric.
Add black roses, faux candles and antique-style lanterns around the bottom.
Budget-Friendly Black Cat Halloween Arch Ideas
You certainly do not need expensive Halloween decorations to make this project work.
The silhouettes are especially easy to DIY from inexpensive materials.
Look for garden arches secondhand or reuse one you normally grow climbing plants on during the summer.
You can also check your existing Halloween decorations before buying anything new.
Old fairy lights, pumpkins, lanterns and leftover fabric can all be incorporated into the display.
Even if you simplify the project to just a metal arch, purple tulle, fairy lights and a handful of black cat cutouts, you will still get a dramatic result.
Why This Halloween Archway Works So Well
This project has all the ingredients of a memorable Halloween entrance without requiring complicated construction.
The black cats create a strong silhouette during the daytime.
The purple fabric adds movement and color.
Then, as soon as evening arrives, the warm fairy lights completely transform the arch.
It is spooky, whimsical and just a little mysterious.
And because most of the decorations are attached to a reusable garden arch, you can easily take everything apart once Halloween is over and create a completely different design next year.
Create a Magical Entrance This Halloween
Sometimes one statement decoration is all you need to transform your front yard for Halloween.
This DIY black cat Halloween archway turns a simple pathway into an entrance that feels like it belongs in a wonderfully witchy Halloween story.
Pile pumpkins and lanterns around the bottom, switch on those twinkling lights and let all those mysterious black cats keep watch over everyone who comes to your door.
And if you want even more inspiration before deciding on your design, take a look at our Halloween Archway DIY Ideas for more spooky, whimsical and creative ways to decorate your entrance this Halloween.