


A flying scarecrow is a scarecrow that gives the impression of jumping or flying. It is connected to a spring suspension or spring and bounces from one direction to another giving the impression that it is flying.
A flying or jumping scarecrow is a great decor idea for Halloween! It is fun and unpredictable! If you’re crafty then a flying scarecrow can be DIY’d at home using an old pogo stick!
How a Jumping Scarecrow Works
If you are still unsure how a jumping scarecrow works, take a look at this video:

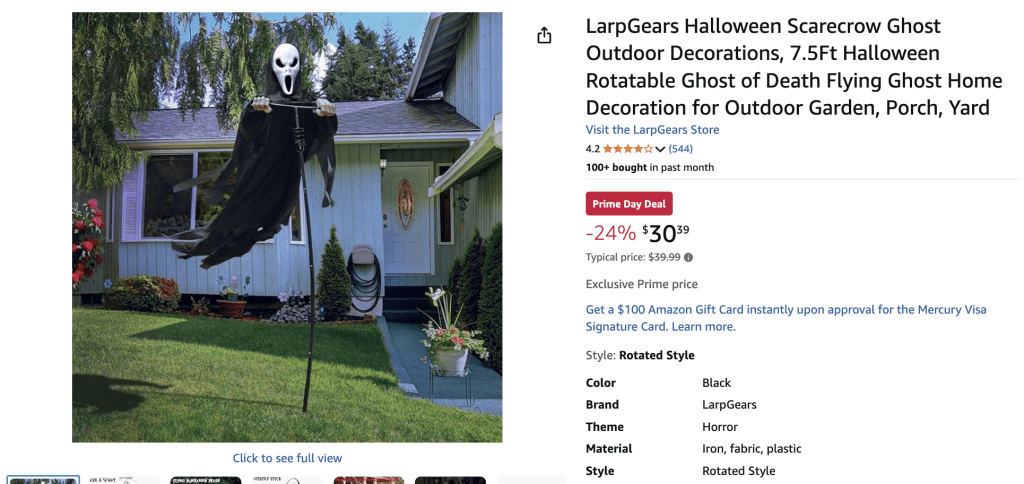
Easy Option
If you prefer an easy option then you can buy a flying scarecrow on Amazon
Materials You’ll Need
- 1 long wooden or PVC pole (approx. 5 to 6 feet) for the body
- 1 short crossbar (2 to 3 feet) for arms
- Old long-sleeved shirt and trousers
- Straw, newspaper, or old cloth for stuffing
- Gloves and boots (optional)
- String, zip ties, or duct tape
- An old pillowcase or fabric for the head
- Hat or hood (optional)
- Lightweight plastic sheeting, cape, or old fabric for spooky motion
- 1 strong extension spring with loops on both ends (rated for 5–10 kg / 10–20 lbs)
- 1 swivel hook (so it can spin)
- Rope or paracord for hanging
- Drill or screws (optional)
Step-by-Step Instructions
1: Build the Frame
- Lay your long pole flat. This will form the scarecrow’s body.
- Attach the crossbar horizontally about 6 to 8 inches from the top using screws, zip ties, or duct tape. This will be the arm span.
- Optional: You can add a short third piece sticking out at the bottom for legs if more structure is needed.
2: Dress the Scarecrow
- Slide the long-sleeved shirt over the frame, placing each arm over the horizontal crossbar.
- Put the trousers on from the bottom. Tie them tightly around the bottom of the pole so they stay up.
3: Stuff the Body
- Fill the shirt and pants with stuffing so they hold shape. Focus on chest, shoulders, thighs, and arms.
- Tie off the sleeve and pant leg openings to keep stuffing inside.
- You can stuff the gloves and boots too, then attach them securely.
4: Create and Attach the Head
- Fill a pillowcase or cloth sack with stuffing and shape it into a round head.
- Tie off the bottom of the head with string.
- Place a hat or hood over the top for realism.
- Attach the head to the top of the vertical pole using tape, screws, or glue.
5: Add Cape or Fabric for Floating Effect (Optional)
- Attach lightweight fabric to the back of the shoulders and arms like a cape or tattered robe.
- This helps catch the wind and makes the scarecrow look like it’s flying or gliding.
6: Install the Spring Suspension System
This is the critical part that gives the scarecrow its floating, bouncing movement.
- Choose a strong branch, beam, or overhead hook where your scarecrow will hang.
- Cut a piece of rope or paracord about 2 to 3 feet long and tie it to the branch securely.
- Attach one end of your extension spring to the bottom of this hanging rope using a carabiner or tied loop.
- Attach the swivel hook to the bottom loop of the spring.
- Tie a strong rope from the swivel hook to the top of the scarecrow’s spine pole (through a drilled hole or tightly knotted around the wood).
7: Hang and Test the Motion
- Lift the scarecrow by the hanging line and let it suspend from the spring and swivel.
- Check balance and adjust by sliding the hanging point slightly forward or back on the spine pole.
- The spring should allow slight bouncing up and down, and the swivel should let it spin gently in the wind.
For Best Results
- Use a lightweight frame so the spring doesn’t overstretch.
- Choose a spring with enough resistance to hold the weight but allow movement.
- Add reflective tape or creepy lighting nearby to highlight it at night.
- If used outdoors, choose weather-resistant clothing and stuffing like plastic bags or foam.