


Herb drying at home is one of those cozy kitchen habits that just makes sense. I love the smell of fresh rosemary hanging near the stove, and there is something deeply satisfying about turning garden clippings or store-bought herbs into something you will use all winter.
If you have ever stood in your kitchen holding a bunch of herbs and thought, “Now what?”, you are in the right place.
Herb drying in kitchen spaces works so well because you are already in the heart of the home. The airflow, warmth, and daily routines naturally support the process, even if you are a complete beginner.
You do not need fancy equipment or a dedicated pantry. A little intention and a few smart setups go a long way.
Below are 15 different, beginner-friendly ways to dry herbs right in your kitchen. Each idea explains why it works, how it looks, and exactly how to do it step by step, so you can pick what fits your space and lifestyle best.
1. Hang Herbs From a Simple Twine Line Near a Window
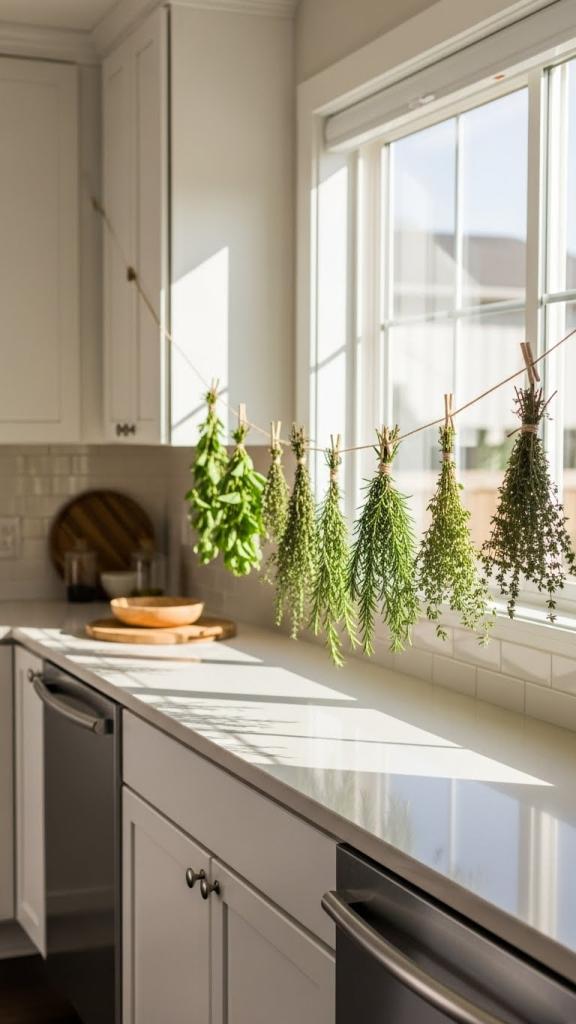
Imagine a row of herbs gently drying in the sunlight, adding charm and purpose to your kitchen at the same time.
This is one of my favorite ways to start herb drying in kitchen spaces because it feels rustic but is incredibly effective.
Natural airflow combined with indirect light helps herbs dry evenly without losing too much color or aroma.
Windows often provide gentle warmth during the day, which speeds things up naturally. It also keeps herbs off the counter, which is a win in small kitchens.
DIY Steps
- Cut herbs into small bundles, about 5 to 7 stems each.
- Tie each bundle with kitchen twine or cotton string.
- Stretch twine between two hooks near a bright window.
- Hang bundles upside down with space between them.
- Let dry for 7 to 14 days, checking occasionally.
- Crumble and store once fully dry.
2. Use a Wooden Drying Rack on an Open Shelf
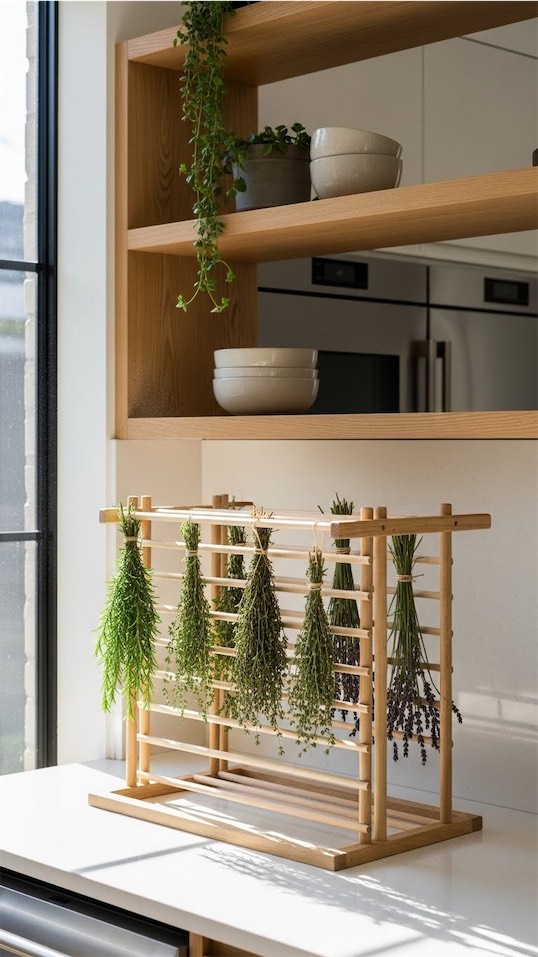
A wooden rack feels intentional and decorative, almost like part of your kitchen styling.
Herb drying in kitchen shelves works well because warm air naturally rises, helping moisture escape from the leaves.
Open shelves allow airflow from all sides, which reduces the risk of mold.
I love this option if you already have floating shelves and want something that looks curated instead of cluttered.
It also makes checking progress easy during everyday cooking.
DIY Steps
- Place a small wooden rack on an open shelf.
- Lay herbs flat in a single layer.
- Turn herbs every two days.
- Keep away from direct steam or splashes.
- Allow 5 to 10 days for drying.
- Store in labeled jars.
3. Hang Herbs Inside a Cabinet With the Door Slightly Open
This is perfect if you want herbs out of sight but still effective.
Herb drying in kitchen cabinets works because enclosed spaces protect herbs from light while still allowing airflow if the door is cracked.
Darkness helps preserve flavor and color, especially for delicate herbs like basil or mint.
DIY Steps
- Install small hooks inside the cabinet.
- Tie herbs into bundles.
- Hang upside down from hooks.
- Leave cabinet door open slightly.
- Check after one week.
- Remove and store when crisp.
4. Lay Herbs on a Mesh Cooling Rack on the Counter
Cooling racks are underrated for herb drying in kitchen setups.
The mesh design allows air to circulate above and below the herbs, which speeds up drying and keeps leaves from getting soggy.
This works especially well in kitchens that stay warm during the day.
It is also great if you are drying small-leaf herbs like oregano or thyme.
DIY Steps
- Wash and pat herbs dry.
- Remove thick stems if needed.
- Spread herbs on a mesh rack.
- Place in a warm, dry spot.
- Flip every two days.
- Dry for about one week.
5. Use Brown Paper Bags Hung on Hooks

Paper bags are surprisingly effective and perfect if you worry about dust.
Herb drying in kitchen paper bags works because the paper absorbs excess moisture while allowing airflow.
It also blocks direct light, which helps preserve essential oils.
This is my go-to method when drying multiple herb types at once.
You can even label the bags so nothing gets mixed up.
DIY Steps
- Punch small holes in a paper bag.
- Place herb bundles inside.
- Tie the bag closed loosely.
- Hang from a hook or knob.
- Leave for 10 to 14 days.
- Remove and crumble herbs.
6. Dry Herbs on a Tray Above the Fridge
The top of the fridge is warm, dry, and often forgotten, which makes it ideal for herb drying in kitchen environments.
Heat from the fridge helps speed up moisture evaporation without overheating the herbs.
This works best for hardy herbs like rosemary, sage, or bay leaves.
I love how this uses dead space you probably never think about. (Have you ever checked the top of your fridge lately?)
DIY Steps
- Place a baking tray on top of the fridge.
- Line with parchment paper.
- Spread herbs evenly.
- Turn every few days.
- Dry for about one week.
- Store in airtight jars.
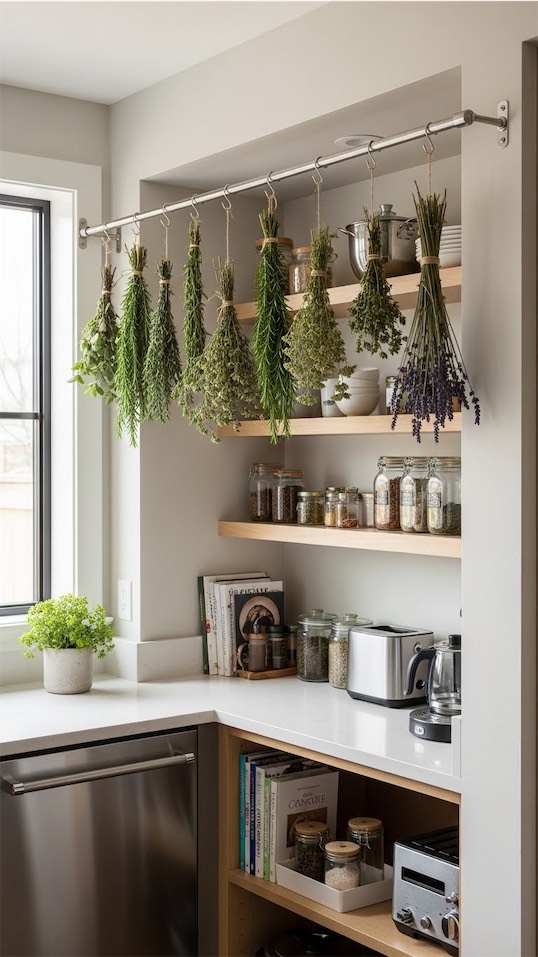
7. Hang Herbs From a Peg Rail
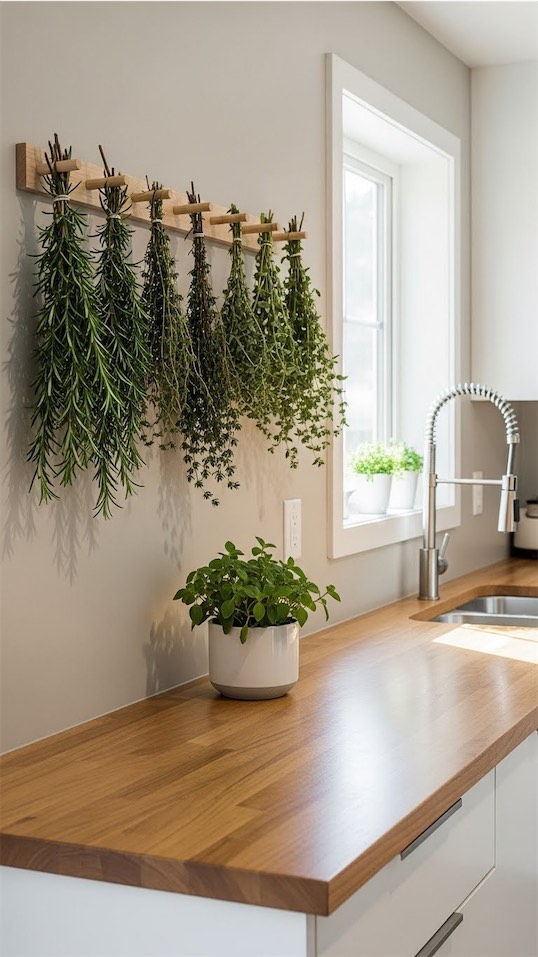
Peg rails are functional and charming, and they make herb drying in kitchen spaces feel intentional.
Pegs allow you to space herbs evenly, which improves airflow and prevents mold.
This setup works well in farmhouse or cottage-style kitchens, but honestly fits anywhere.
DIY Steps
- Install a peg rail on the wall.
- Tie herbs with twine.
- Hang bundles from pegs.
- Keep away from steam.
- Dry for 7 to 14 days.
- Store once brittle.
8. Use a Collapsible Hanging Mesh Dryer
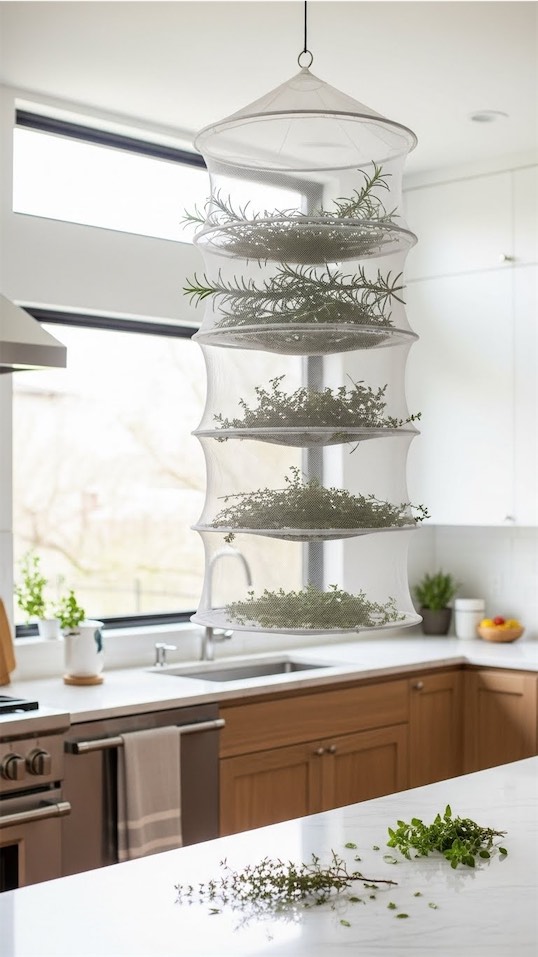
Mesh dryers are lightweight, affordable, and surprisingly effective.
Herb drying in kitchen mesh dryers works because air flows freely from all directions.
These are great for apartments or rentals because they store flat when not in use.
I like hanging mine near a doorway where air naturally moves.
DIY Steps
- Hang mesh dryer from a hook.
- Spread herbs in single layers.
- Zip closed if applicable.
- Rotate shelves every few days.
- Dry for 5 to 10 days.
- Remove and store.
9. Dry Herbs on a Windowsill Tray
Windowsills provide gentle warmth and light, perfect for certain herbs.
Herb drying in kitchen windowsills works best for woody herbs that are less sensitive to light.
The key is indirect sunlight, not harsh midday rays.
I love glancing at the windowsill and seeing progress day by day. It feels very seasonal and grounding.
DIY Steps
- Place a tray on the windowsill.
- Line with paper towel.
- Lay herbs flat.
- Turn every other day.
- Dry for about one week.
- Store when fully dry.
10. Use a Dish Rack for Small Herb Bunches
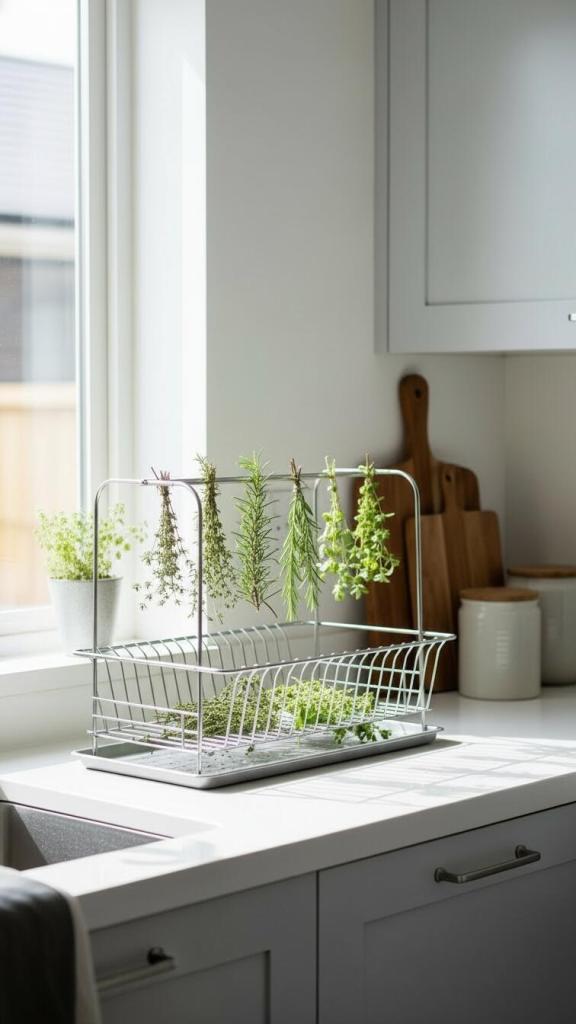
This is such a practical hack if you are short on tools.
Herb drying in kitchen dish racks works because racks already promote airflow.
It is ideal for small amounts of herbs you plan to use soon.
I usually do this after grocery shopping when I have extra parsley or cilantro. It is fast, easy, and uses what you already own.
DIY Steps
- Wash and dry herbs thoroughly.
- Clip small bunches together.
- Hang from dish rack pegs.
- Place in a dry area.
- Dry for 5 to 7 days.
- Store or use immediately.
11. Hang Herbs From a Tension Rod in a Pantry Nook
A tension rod creates instant hanging space without tools.
Herb drying in kitchen pantry nooks works well because pantries are often cool, dry, and dark.
This helps preserve flavor while still allowing airflow.
This is great for renters who cannot drill holes.
DIY Steps
- Install a tension rod.
- Tie herbs into bundles.
- Hang upside down.
- Leave space between bundles.
- Dry for 10 to 14 days.
- Store in jars.
12. Dry Herbs on Parchment Paper Inside a Drawer
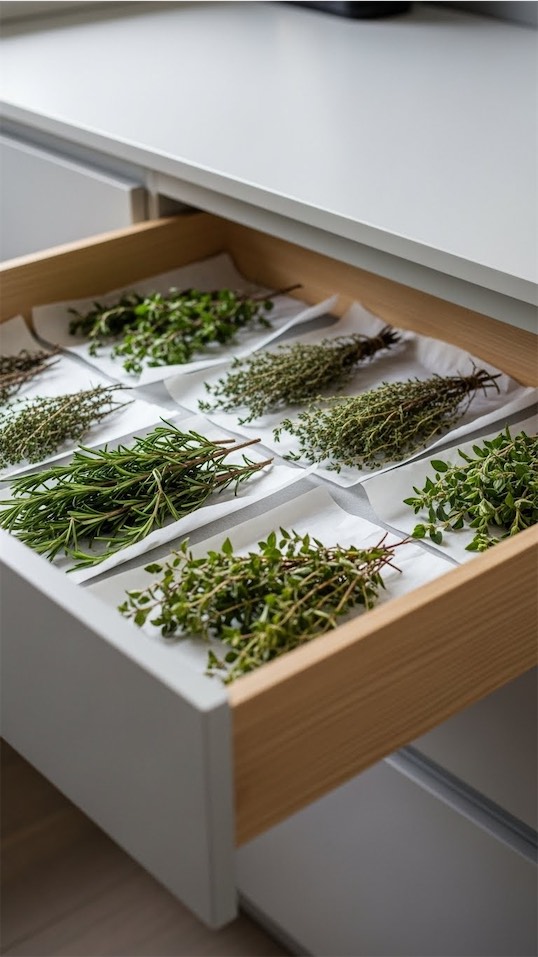
Drawer drying is subtle and surprisingly effective.
Herb drying in kitchen drawers works because it limits light exposure and keeps herbs protected.
Choose a drawer that stays warm and dry, not one near the sink.
I like this method for delicate herbs I want to keep vibrant.
DIY Steps
- Line drawer with parchment paper.
- Spread herbs in one layer.
- Leave drawer slightly open.
- Check every few days.
- Dry for about one week.
- Store when crisp.
13. Use a Baking Sheet in a Warm, Off Oven
Residual heat is perfect for gentle drying.
Herb drying in kitchen ovens works when the oven is off but still warm from recent use.
This speeds drying without cooking the herbs.
DIY Steps
- Wash and dry herbs.
- Spread on baking sheet.
- Place in warm, turned-off oven.
- Leave door slightly open.
- Check after 24 to 48 hours.
- Remove and store.
14. Hang Herbs From a Magnetic Clip Strip on the Fridge

Magnetic clips are fun, flexible, and renter-friendly.
Herb drying in kitchen fridge areas works because the air is usually dry and slightly warm on the sides.
This method is perfect for small spaces!
DIY Steps
- Attach magnetic clips to fridge side.
- Clip herb bundles upside down.
- Space evenly.
- Keep away from steam.
- Dry for 7 to 10 days.
- Store when ready.
15. Dry Herbs in Small Bundles Tied to Chair Backs
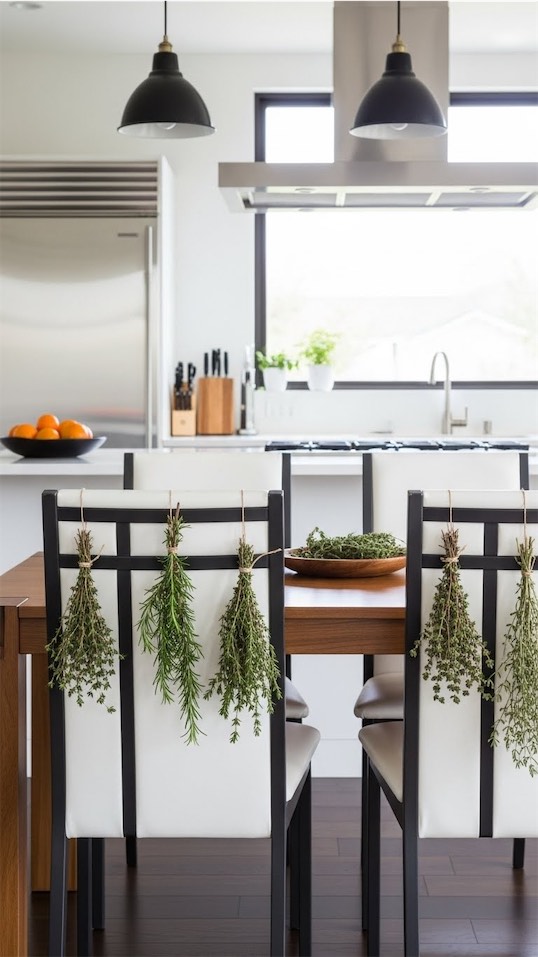
This one feels very old-school and surprisingly effective.
Herb drying in kitchen chair backs works because chairs are often near airflow paths.
It is perfect for quick drying projects after harvesting.
I love this method when I have a lot of herbs and not enough hooks.
DIY Steps
- Tie herbs into small bundles.
- Loop twine over chair backs.
- Space bundles apart.
- Place chairs in a dry area.
- Dry for 7 to 14 days.
- Remove and store.